Welcome to Internal penetration testing on FTP server where you will learn FTP installation and configuration, enumeration and attack, system security and precaution. As you know that File Transfer Protocol (FTP) used for the transfer of computer files between a client and server in a network via port 21.
Let’s start!!!
Requirement
FTP Server: ubuntu
Attacker system: Kali Linux
Client system: window
FTP Installation
Vsftpd stand for Very secure FTP daemon is an FTP server for Unix-like systems, including Linux.
Let’s start by typing following command to install vsftpd for FTP service.
apt-get install vsftpd
This will start FTP service on port 21
FTP Scanning
Scanning plays an important role in penetration testing because through scanning attacker make sure which services and open ports are available for enumeration and attack.
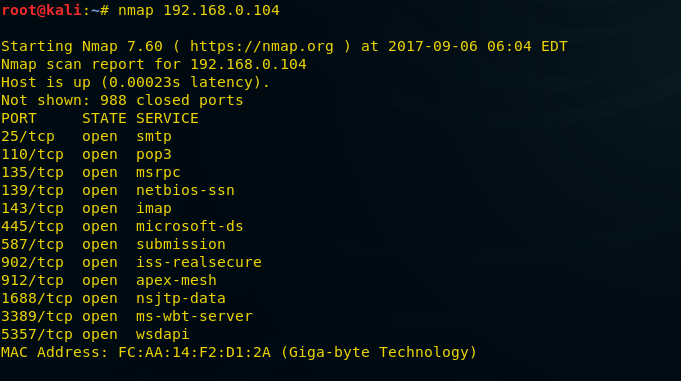
Here we are using nmap for scanning port 21.
Nmap -p 21 192.168.0.106
If service is activated in targeted server then nmap show open STATE for port 21.
Anonymous Login
FTP users may authenticate themselves with a clear-text sign-in protocol, normally in the form of a username and password, but can connect anonymously if the server is configured to allow it.
If anonymous login is allowed by admin to connect with FTP then anyone can login into server. An attacker can easily search for anonymous login permission using following metasploit exploit.
use auxiliary/scanner/ftp/anonymous
msf auxiliary(anonymous) >set rhosts 192.168.0.106
msf auxiliary(anonymous) >exploit
From given image you can observe that it is showing permission READ from FTP server.
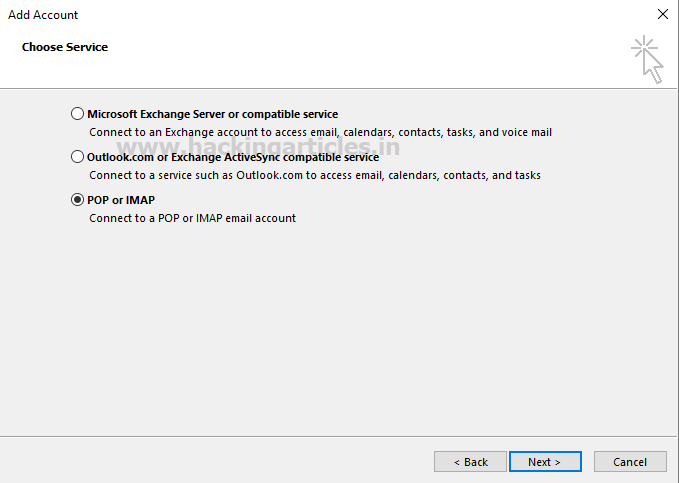
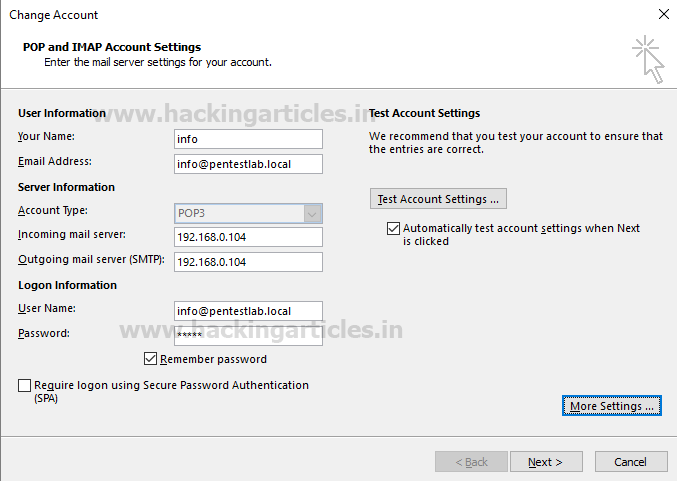
Connect client to FTP Server through WinSCP
Now let’s ensure whether we can connect to FTP server as anonymous user or not.
Protocol to: FTP
Encryption To: No Encryption
Host name: IP of the FTP Server
Port: 21
Username and Password: anonymous: anonymous.
Click on login
Ohh!! Great, we have got FTP access through anonymous user.
Similarly an attacker can also get access of your FTP server therefore it is quite important for admin that he should not give any permission to anonymous user for login into server.
Disable Anonymous Login
Again in order to secure your server from anonymous user login then follow given below steps:
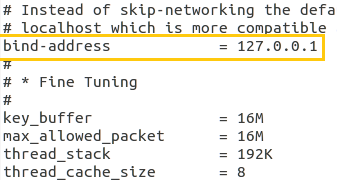
· Open vsftpd.conf
· Set anonymous enable = NO
· service vsftpd restart
Now repeat the attack to verify for anonymous login permission using metasploit as above. But this time exploit will fail to take out information of anonymous user login permission which you can confirm from given below image.
Enumerating FTP Banner
An attacker always perform enumeration for finding important information such as software version which known as Banner Grabbing and then identify it state of vulnerability against any exploit.
Open the terminal in your kali Linux and Load metasploit framework; now type following command to scan for FTP version.
use auxiliary/scanner/ftp/ftp_version
msf auxiliary(ftp_version) > set rhosts 192.168.0.106
msf auxiliary(ftp_version) > exploit
From given image you can read the highlighted text which is showing vsftpd 3.0.2 is the installed version of FTP on target’s system.
While connected with telnet again anyone can identify installed version of FTP as shown image given image.
telnet 192.168.106 21
Once attacker enumerated FTP banners then he will surly Google for its vulnerability against any exploit, therefore admin should keep the banner hidden.
As we had discussed above how a banner grabbing can expose loopholes of any software or service running on remote system therefore after installing any service always hide their software versions.
Admin should make following changes in their configuration file to prevent banner information.
· Open vsftp.conffile
· Enable the comment “ftp_banner=Welcome to blah FTP service” by removing # from front of it.
Now save the whole text file after modification as shown in given image. Now it will not disclose banner information. Now restart the service using following command.
service vsftpd restart
Nmap –p 21 -sV 192.168.0.106
Wonderful!! We are successful in hiding banner which you can confirm from given image.
Though admin has hide the banner and disabled anonymous user but still attack has potential to steal credential for unauthorized access.
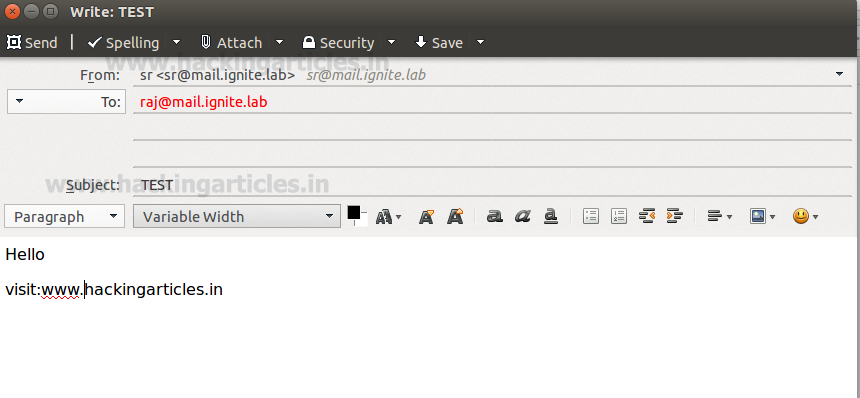
An attacker can take help of sniffing tools which can sniff the data packet travelling between server and client in a network and retrieve credential, this is known as sniffing, after then use them for unauthorized access. As we have discussed above FTP users may authenticate themselves with a clear-text sign-in protocol forusername andpassword.
Similarly we had captured TCP packet through wireshark for sniffing FTP credential, from given image you can observe User: raj and password: 123 had login successfully.
Use SSL Certificate to prevent Credential stealing
SSL stands for Secure Sockets Layer, the protocol which provides secure, encrypted communications between server and client, this encrypt data packet travelling between server-client networks.
Although attacker can sniff network data packet but will be not able to read fetched information because entire data will show in the form of cipher text.
Here administrations need to generate their own SSL certificate for secure authentication. Make the directory where the SSL certificate keys will be stored.
mkdir /etc/ssl/certificates
Type following command which generate a SSL certificate inside certificates directory using rsa: 2048 encryption valid for 365 days.
openssl req -x509 -nodes -days 365 -newkey rsa:2048 -keyout /etc/ssl/certificates/vsftpd.pem -out /etc/ssl/certificates/vsftpd.pem
For generating new private key it requires information such as Country name, state, email address and etc as shown given below image.
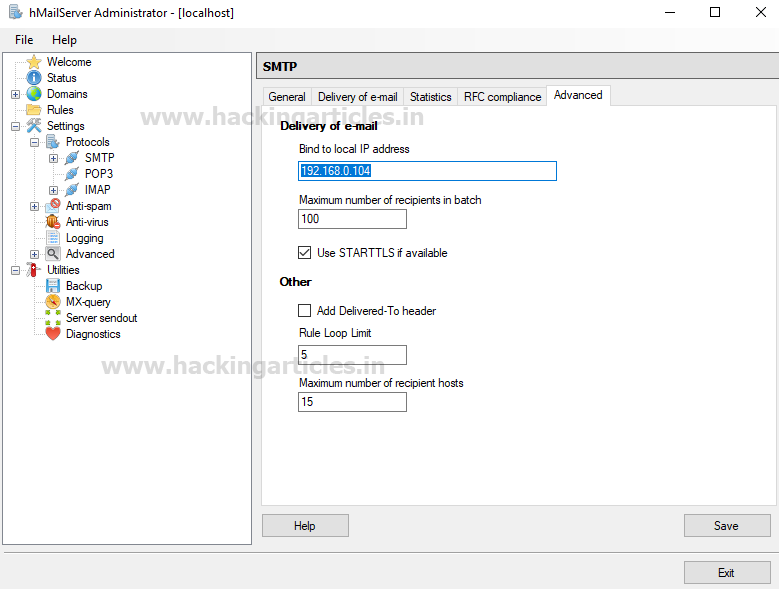
Now we need to open vsftpd.conffile for changing default setting by adding few line at the end of file.
rsa_cert_file=/etc/ssl/certificates/vsftpd.pem
rsa_private_key_file=/etc/ssl/certificates/vsftpd.pem
ssl_enable=YES
allow_anon_ssl=NO
force_local_data_ssl=YES
force_local_logins_ssl=YES
ssl_tlsv1=YES
ssl_sslv2=NO
ssl_sslv3=NO
require_ssl_reuse=NO
ssl_ciphers=HIGH
You can confirm it as shown in given image now save the changes and restart the service.
service vsftpd restart
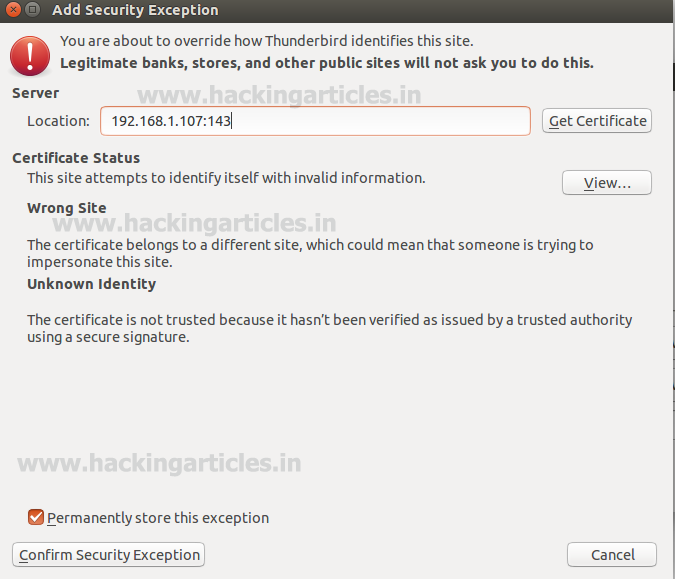
Establish TSL/SSL connection with FTP through WinSCP
Now let’s ensure whether we can connect to FTP server as anonymous user or not.
Protocol to: FTP
Encryption To: TSL/SSL Explicit encryption
Host name: IP of the FTP Server
Port: 21
Username and Password: raj: 123
Click on login
Now server will send certificate to authorized user click on yes to store certificate and continue the encrypted connecting.
If attacker will sniff network packets he will get cipher text as shown in given image. In this way we can prevent sniffing from stealing credential in any network.
FTP Brute force Attack
Another way to steal credential is Brute force attack on FTP Server using Metasploit.
Open the terminal in your kali Linux and Load metasploit framework now type following command to Brute force FTP login.
use auxiliary/scanner/ftp/ftp_login
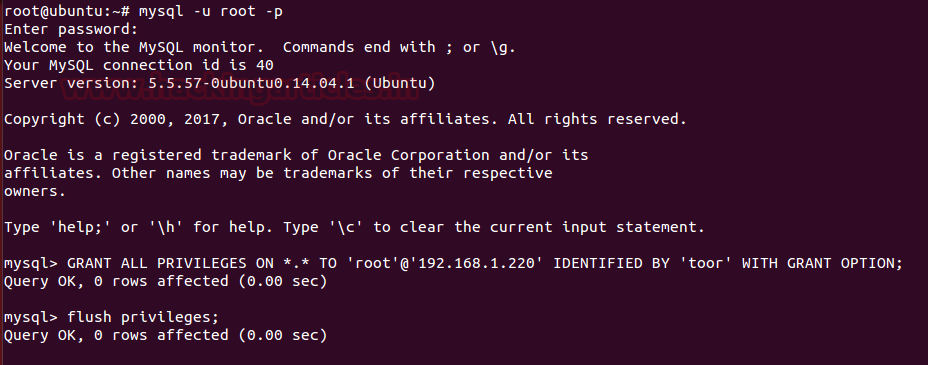
msf auxiliary(ftp_login) > set rhosts 192.168.1.128
msf auxiliary(ftp_login) > set user_file /root/Desktop/user.txt
msf auxiliary(ftp_login) > set pass_file /root/Desktop/pass.txt
msf auxiliary(ftp_login) > set stop_on_success true
msf auxiliary(ftp_login) > exploit
From given image you can observe that our FTP server is not secure against brute force attack because it is showing matching combination of username: raj and password: 123 for login.
Once attack steals your username and password, he try to login into server as authorized user and then can perform mischievous action such as steal your important data or replace with malicious file.
Bravo!! You can observe that using raj: 123 we had login successfully
Hence our server is not secure against such kind of attack so let’s protect our FTP server.
Here admin can set iptable chain rules for certain number of login attempts and if user crossed the define number then account will get locked for some time period as specified by admin.
Type the given below command to set iptable chain rule for account lockout policy:
iptables -I INPUT -p tcp --dport 21 -i eth0 -m state --state NEW -m recent --set
iptables -I INPUT -p tcp --dport 21 -i eth0 -m state --state NEW -m recent --update --seconds 120 --hitcount 3 -j DROP
Now this above rule will allow only 3 chances for login into FTP server otherwise locked the account for 120 seconds (2 minutes).
service vsftpd restart
Let’s ensure iptable chain rule working by making brute force attack as above.
Great!! It has prevented by stopping brute force after 3 attempts but will get activated after 2 minute therefore admin should locked the account for long period of time.
Admin can take help vsftpd.logto view client IP who try to connect with vsftpd server.
cd /etc/vsftpd.log
tail vsftpd.og
Now open hosts.allow file from inside /etc to allow valid user to connect with server securely through specific IP.
At the end of text file enter specific IP to whom you want to give permission for establishing connection as shown in given image.
Vsftpd: 192.168.0.104
It quite important that admin should restrict all IPs other than allowed IP (192.168.0.106) to protect network from establishing connect from unknown IP.
Open /etc/hosts.deny and specify list of hosts whom you want don’t to allow accessing into the system.
Vsftpd: All
Now open configure file of vsftpd and add following lines:
# TCP Wrappers
Tcp_wreappers= Yes
Restart the service vsftpd “service vsftpd restart”
When valid user try to connect with another IP then server will not allow established connection as shown in given image.
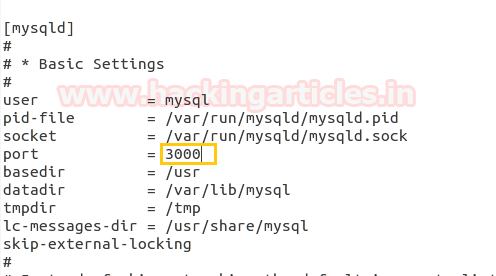
FTP Port forwarding
As we know port 21 is use as default port for FTP service therefore we can also secure port from 21 to another port.
Open vsftpd.conffile and follow given bellow steps:
· Disable connect from port 20=N0
· Add listen_port=5000
· service vsftpd restart
Great!!! We are successfully connected with FTP server via port 5000 in this way internal penetration testing helps us in system and network security.
Note: Always restart the vsftpd service after making any changes in its configuration file.