In this post, we will demonstrate how to set-up our own WordPress CMS for penetration testing on Ubuntu 20.04, Docker and Windows using XAMPP server.
WordPress is a free and open-source content management system (CMS) based on PHP and MYSQL. It is installed on a web server that is either part of an Internet hosting service or a network host in its own right. WordPress is reportedly the most popular website management or blogging system in use on the Web.
For more detail visit https://en.wikipedia.org/wiki/WordPress
Webserver Setup For Ubuntu 20.04
![]()
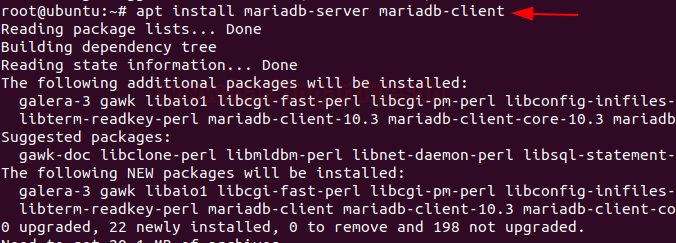
Install MySQL
Next, we are going to install MariaDB server for the maintenance of our web server. MariaDB is a free and open source fork of the MySQL RDBMS.
apt install mariadb-server mariadb-client
![]()
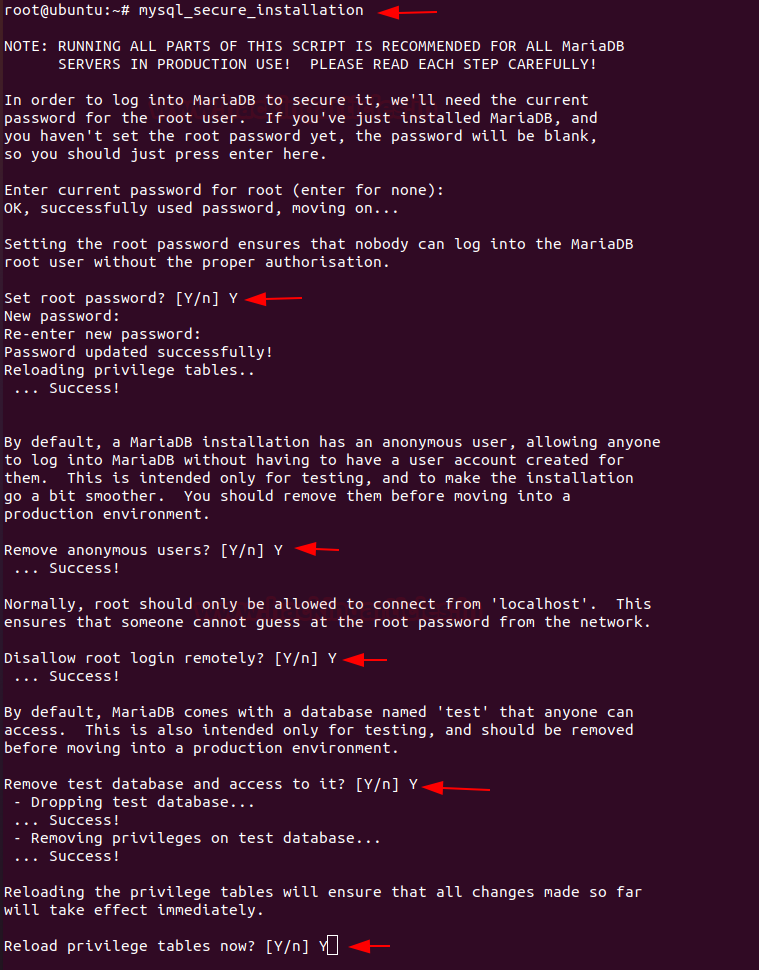
Now change the security by disallowing root login by entering the following command
mysql_secure_installation
First step will show an option to set the password for the root, by entering the password we enabled a root user for our database.
Second step will show an option to remove anonymous, by entering ‘y’ we have disabled all the by-default anonymous users in the server.
Third step will show the option to disallow root login remotely, by entering ‘y’ no-one can enter in the server by network.
Fourth step will show the option of removing database test, because by default MariaDB has a database by the name of test, which anyone can login into.
![]()
Install php
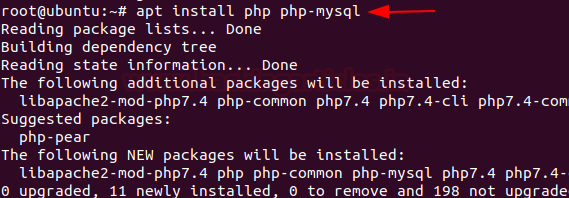
Now install the php php-mysql , which is the last component for the installation of the webserver. Use to access the database from the network.
Enter the following command to install the php
apt install php php-mysql
![]()
![]()
![]()
![]()
![]()
![]()
![]()
![]()
![]()
![]()
![]()
![]()
![]()
![]()
![]()
![]()
![]()
![]()
![]()
![]()
![]()
![]()
![]()
![]()
![]()
![]()
WordPress is a free and open-source content management system (CMS) based on PHP and MYSQL. It is installed on a web server that is either part of an Internet hosting service or a network host in its own right. WordPress is reportedly the most popular website management or blogging system in use on the Web.
For more detail visit https://en.wikipedia.org/wiki/WordPress
Table of Content
RequirementWeb Server configuration
For Ubuntu 20.04- Apache
- PHP
- MySQL
- php
· Docker
· Docker-composer
For XAMP server in Windows· XAMPP server (32/64 bit)
Webserver Setup For Ubuntu 20.04
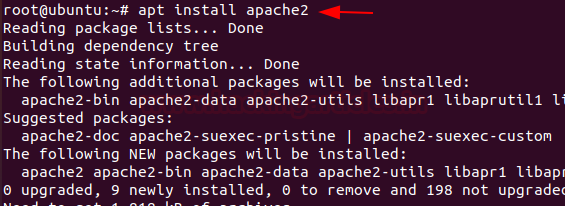
Install Apache
Apache is the most common web server and is easy to install on Linux. Let’s install apache by using following command
apt install apache2

Install MySQL
Next, we are going to install MariaDB server for the maintenance of our web server. MariaDB is a free and open source fork of the MySQL RDBMS.
apt install mariadb-server mariadb-client

Now change the security by disallowing root login by entering the following command
mysql_secure_installation
First step will show an option to set the password for the root, by entering the password we enabled a root user for our database.
Second step will show an option to remove anonymous, by entering ‘y’ we have disabled all the by-default anonymous users in the server.
Third step will show the option to disallow root login remotely, by entering ‘y’ no-one can enter in the server by network.
Fourth step will show the option of removing database test, because by default MariaDB has a database by the name of test, which anyone can login into.

Install php
Now install the php php-mysql , which is the last component for the installation of the webserver. Use to access the database from the network.
Enter the following command to install the php
apt install php php-mysql

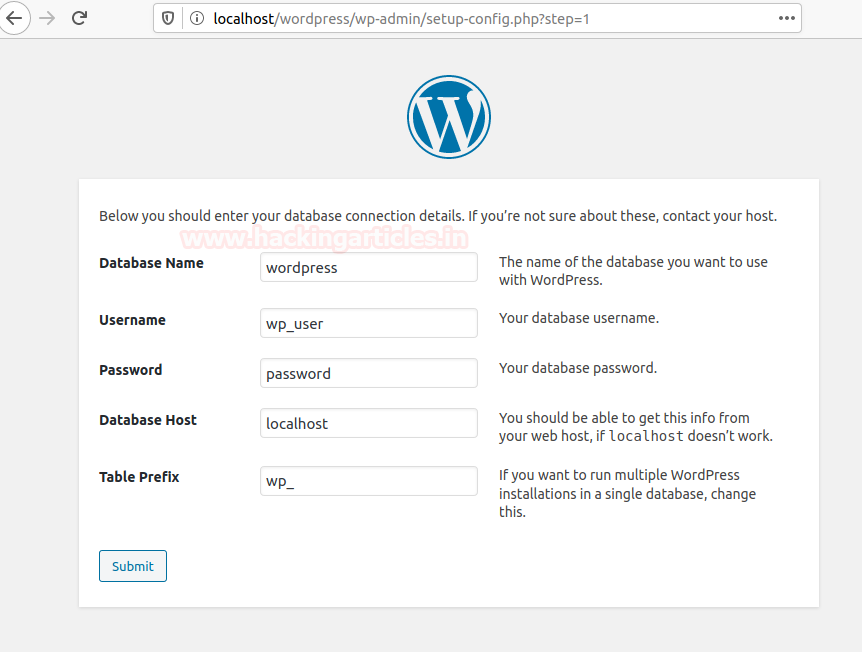
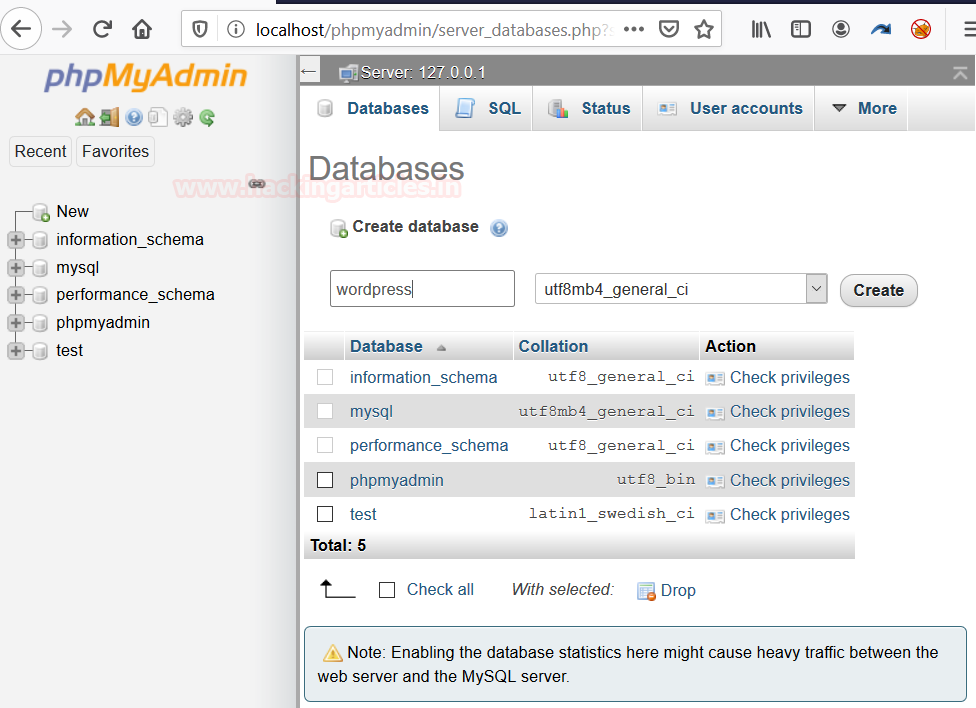
Create MySQL Database
Now, login as root user in MariaDB to create a database. After creating the database, we will create a user by which we will log in into the wordpress wp-admin.
To access the mysql, enter the following command

Install Worpdpress CMS
Now install the wordpress cms in the var/www/html to access the wordpress on localhost in any browser.
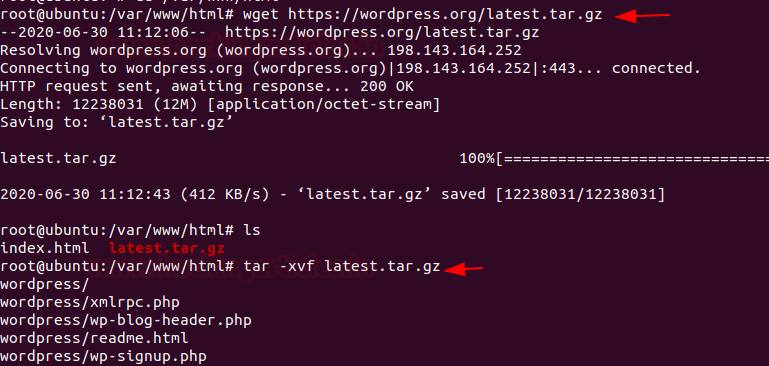
wget http://www.wordpress.org/latest.tar.gz
Now list all the files in the folder, and start extracting the .tar.gz file of wordpress.
ls
tar –xvf latest.tar.gz

After completing the extraction of the worpress, let’s change the ownership and permissions to it.
chown -R www-data:www-data wordpress/
chmod -R 755 wordpress/
After giving the permissions to wordpress create a directory within the wp-content directory in wordpress directory which contains all the uploads for the web server.
chown wordpress/wp-content/uploads
chmod -R www-data:www-data wordpress/wp-content/uploads

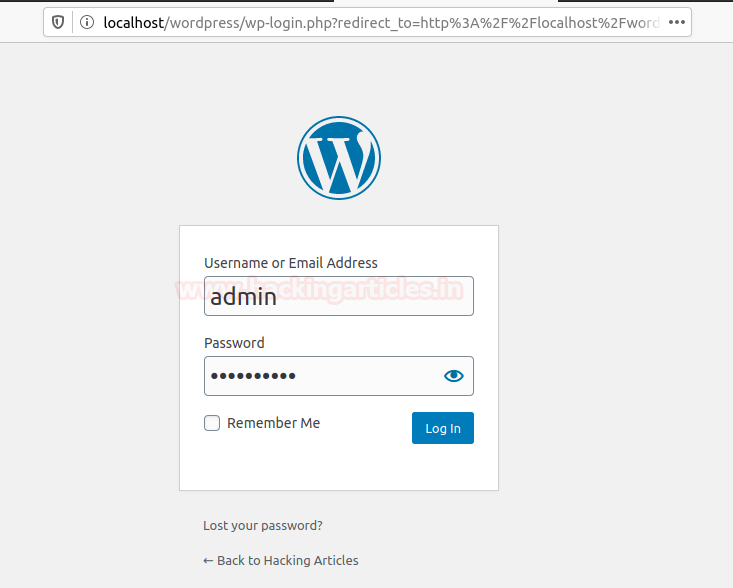
Now access the wordpress in your browser and start configuring it.
http://localhost/wordpress/

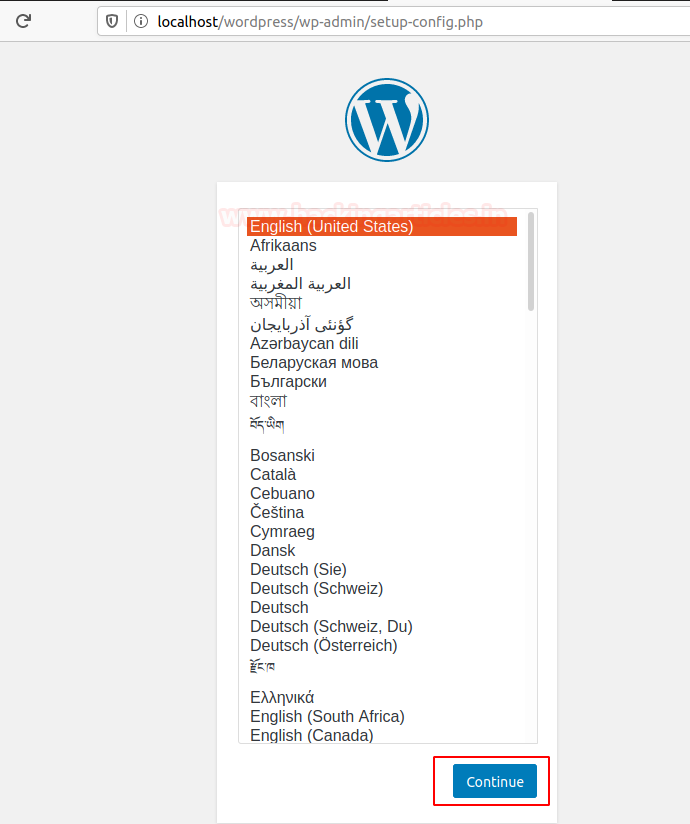
After selecting the preferred language, you’ll get a setup wizard like this

After clicking the Let’s go button, you have to fill the form to access the wp-admin.

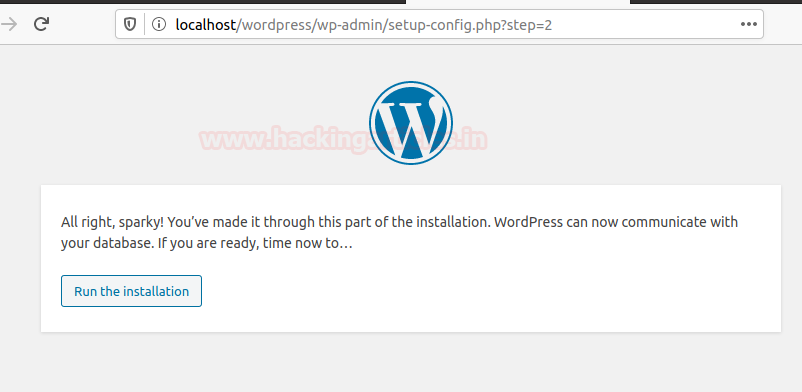
After submitting the form, you’ll get the prompt, and press the button to run the installation to

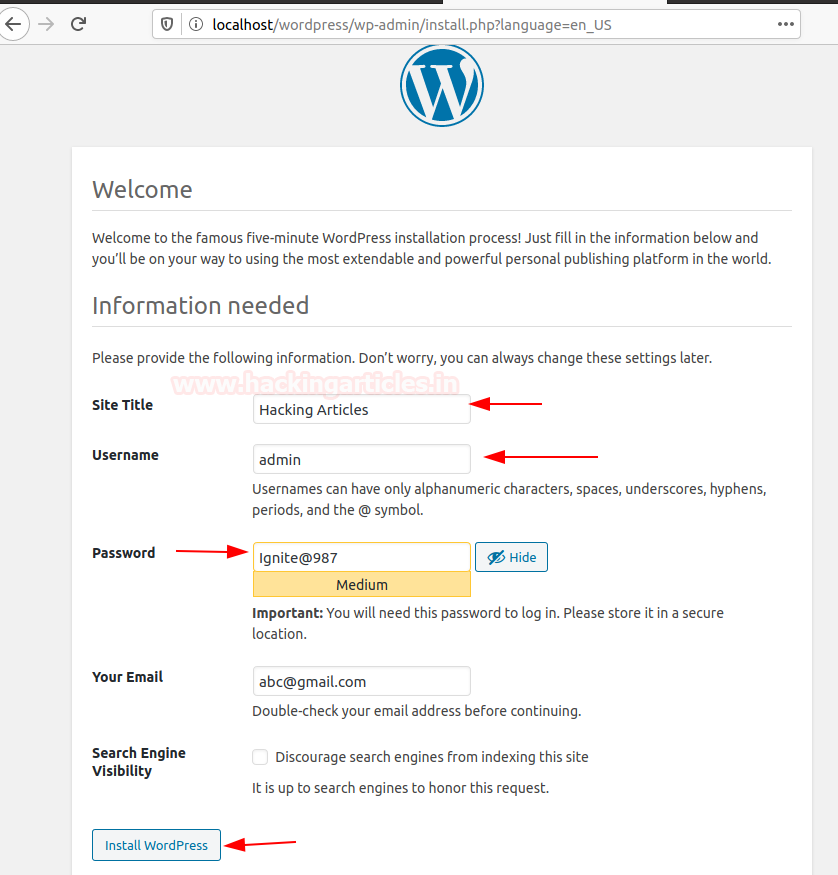
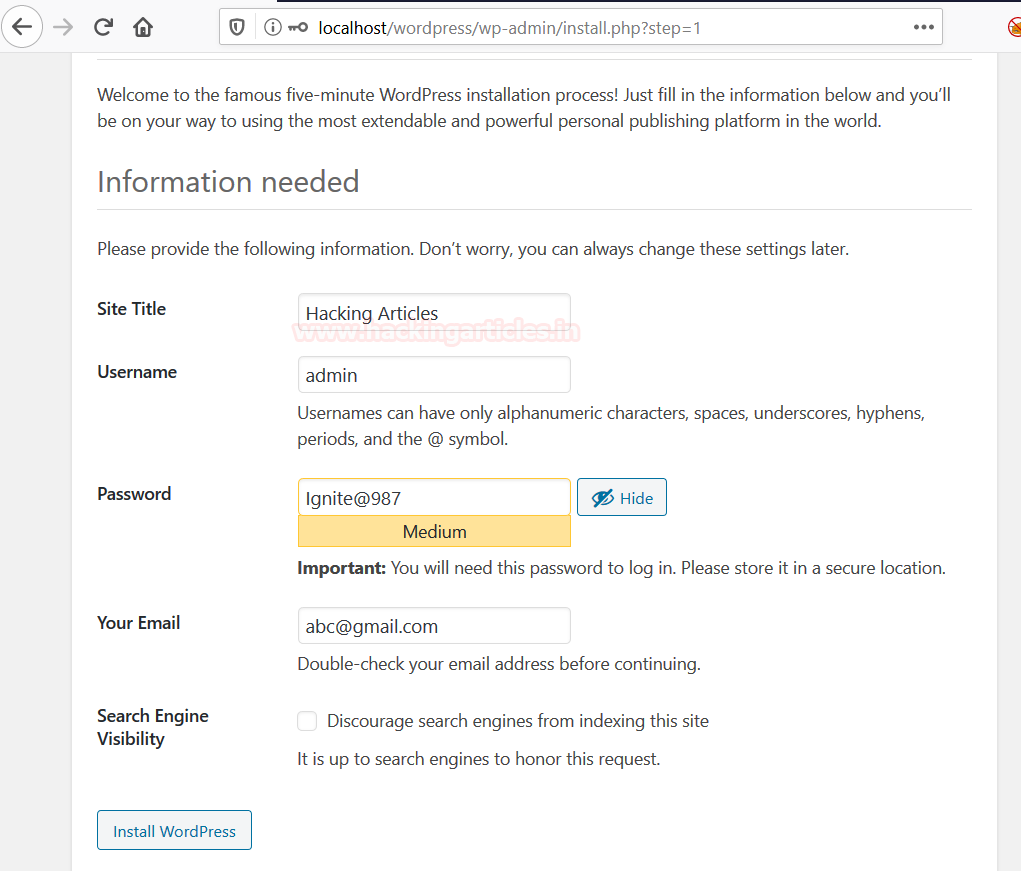
After the installation, you have to fill another form in which the name and all the details of the site will have to be filled.

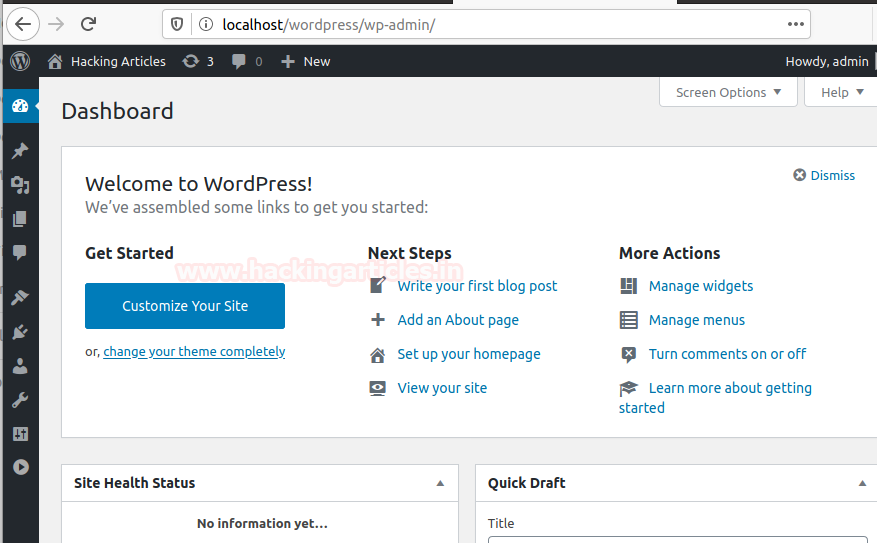
Now you have successfully completed the installation and have to login as admin so that you can access the wp-admin page of the WordPress.

This is how your wp-admin page look like

Open the wp-config.php file in wordpress directory and paste the following lines in it.

This is how your final page will look like

Wordpress Installation using Docker
Docker is an open source project to make user and system admins easier to create and deploy multiple application inside a docker container.
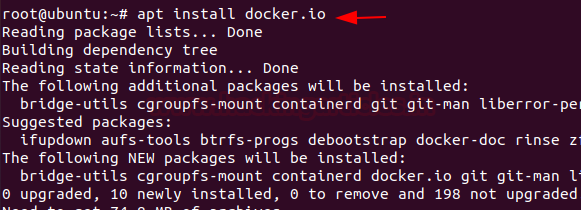
Install Docker
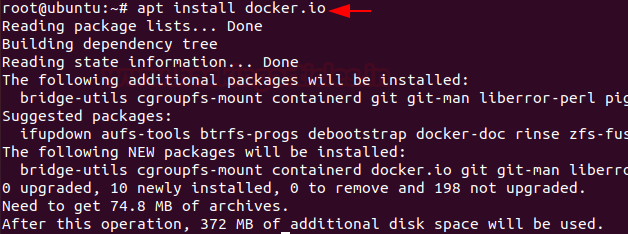
We will update the Ubuntu repository and then install the latest version of docker.io. Let’s start the installation of docker packages with the apt command as below:
apt install docker.io
Let’s start the Docker service by entering following command:
systemctl start docker
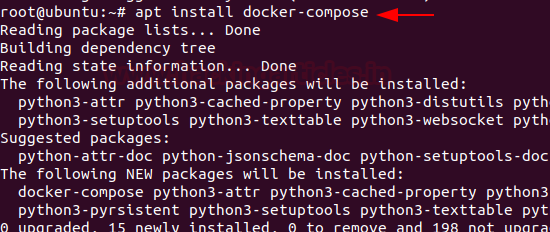
Install docker-compose
Docker Compose is used to run multiple containers as a single service.
Let’s begin the installation of docker-compose with the help of apt by entering following command.
apt install docker-compose

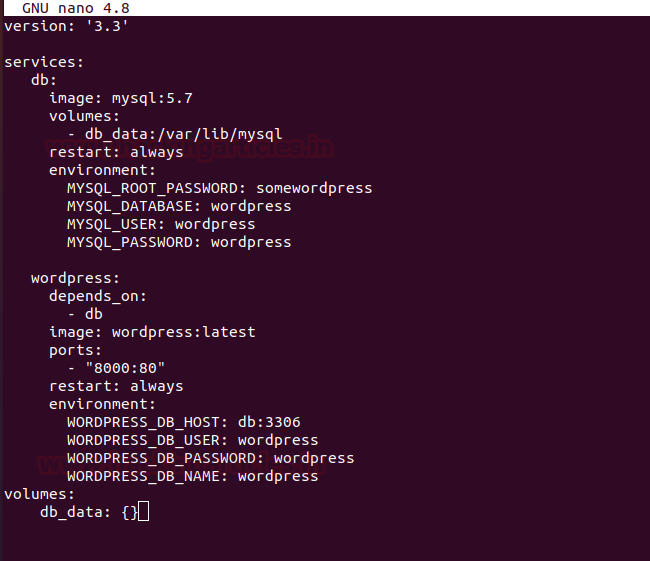
After installing the composer for the Docker, we must create a directory by the name of wordpress.
After creating the directory, we will create a .yml file in the directory so that it will become a docker image.
mkdir wordpress
cd wordpress/
nano docker-compose.yml

And now the copy pastes the following in the file
 |
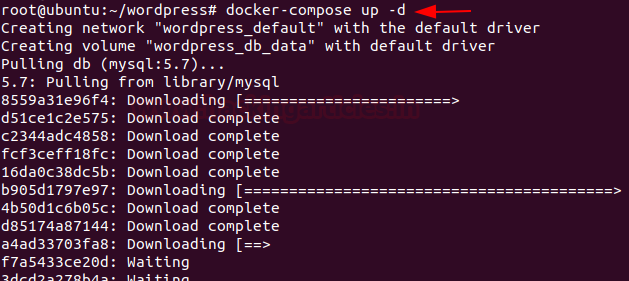
After saving the file, now let’s up the docker services and create the volume for the wordpress.
docker–compose up -d

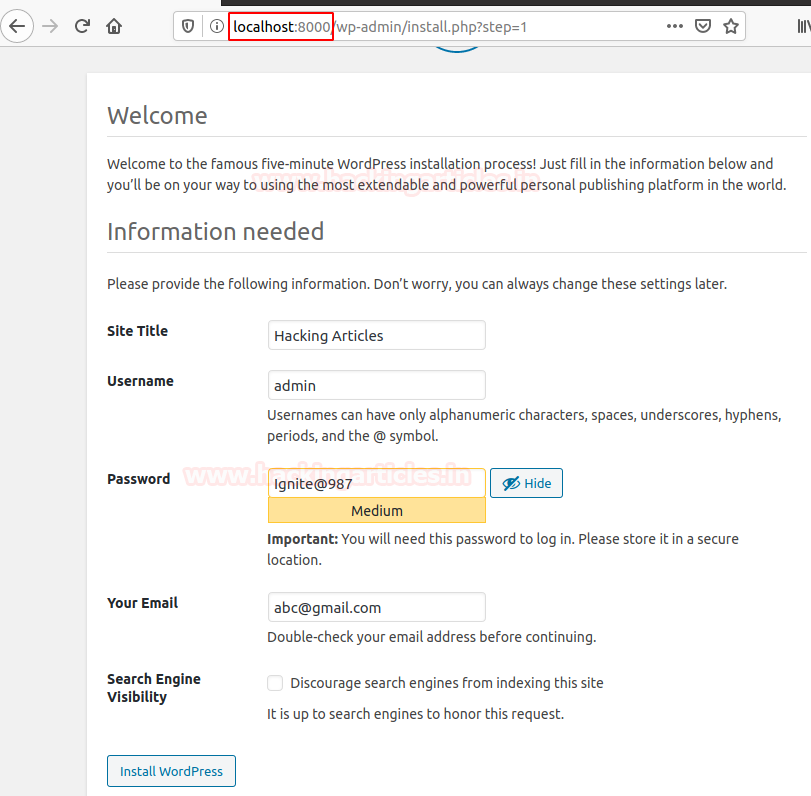
After the doing all the configuration step-by-step, now open the browser and surf the local admin

Now open the setting bar and enter your localhost ip address with port number so that the wordpress after installation will work properly.
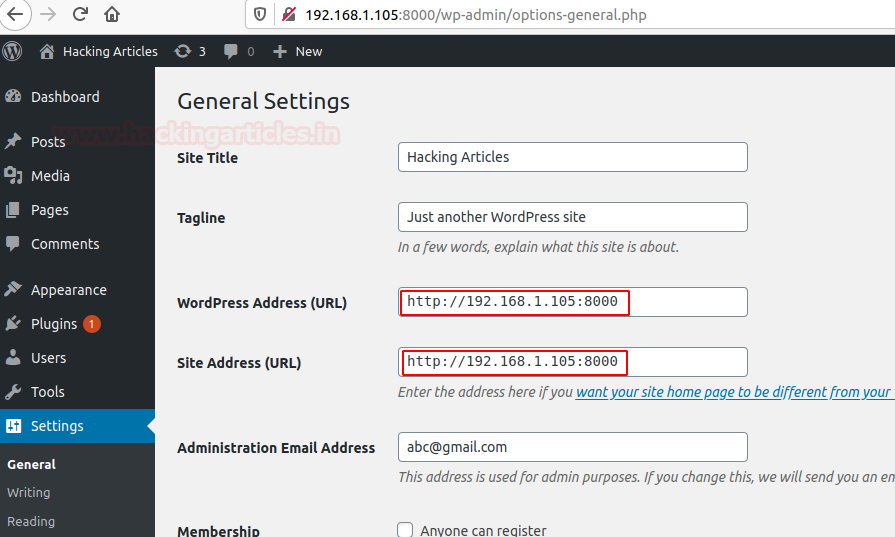
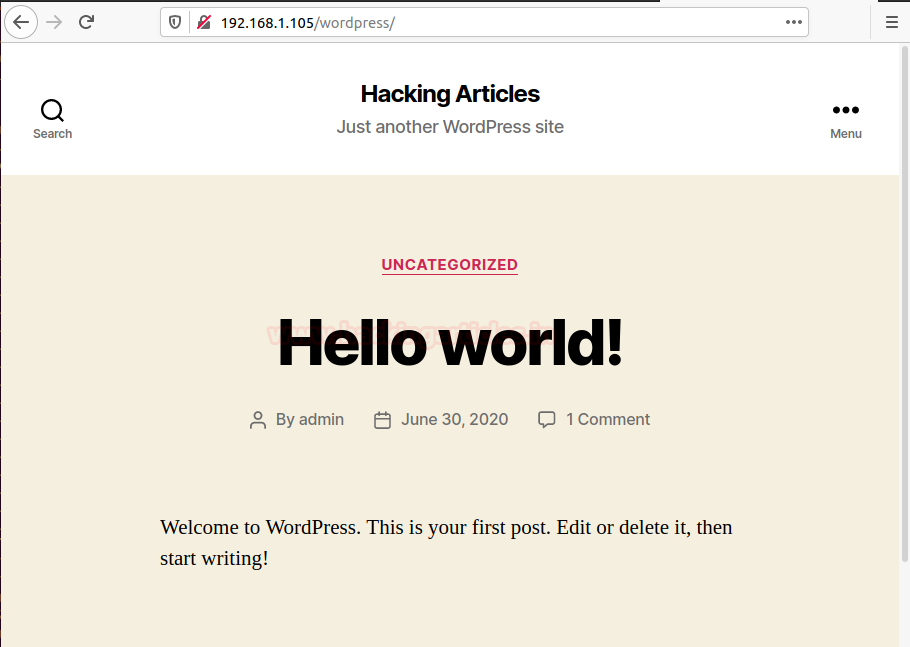
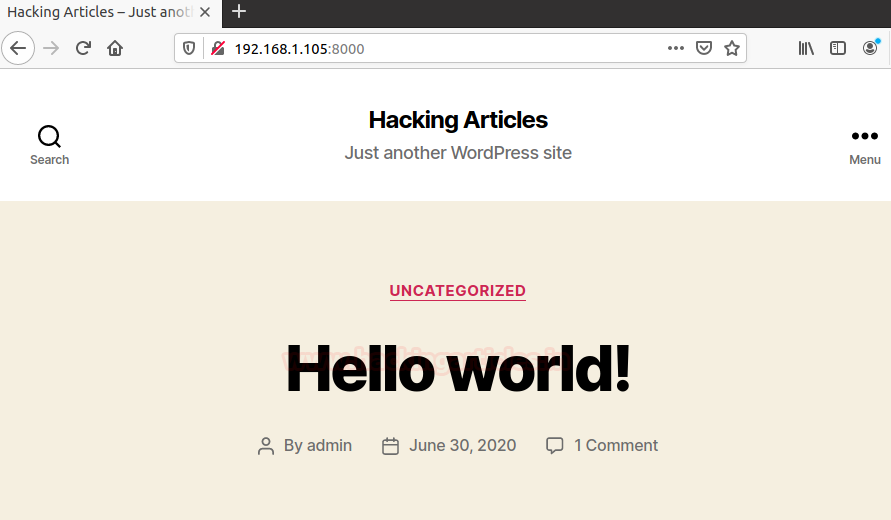
After doing all the changes, now our wordpress is ready to launch, and its home page will look like this.

For XAMP in Windows
XAMPP is a free and open-source cross-platform web server solution stack package developed by Apache Friends, consisting mainly of the Apache HTTP Server, MariaDB database, and interpreters for scripts written in the PHP and Perl programming languages. Since most actual web server deployments use the same components as XAMPP, it makes transitioning from a local test server to a live server possible.
Let’s start the installation of XAMPP server
Download and install XAMPP on your computer
The first step to install WordPress locally is to download and install the XAMPP server. we can download the Windows installer file from Apache Friends.
Once the download finishes, run the file we downloaded to install the XAMPP, during the installation we can choose which components needs to install. To install XAMPP we have to select only Apache, MySQL and php, to run the wordpress.
After the installation process is completed, we have to run the Apache and MYSQL servers in the XAMPP.

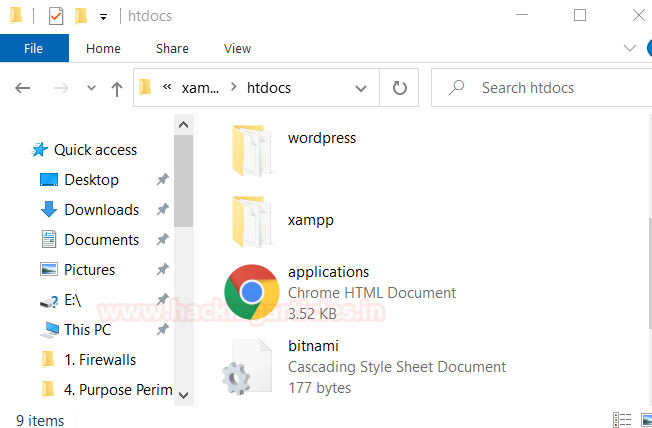
Paste extracted file of /WordPress in the /htdocs folder in /xampp folder in C-Drive.

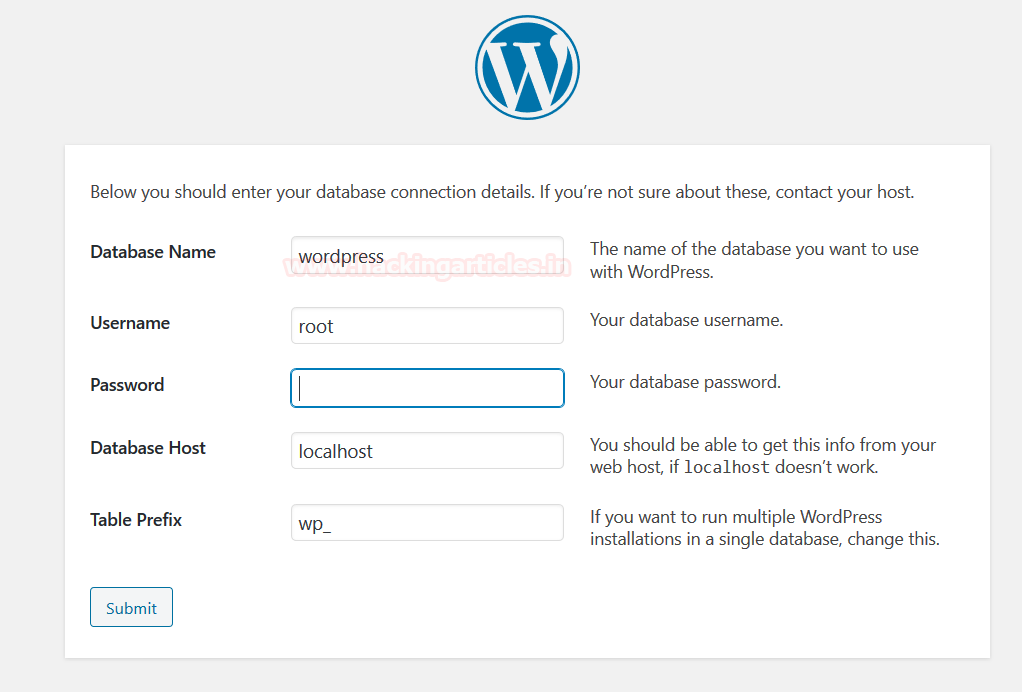
Once you have pasted the file in the htdocs folder, now open the browser and surf for the localhost/WordPress. And create a database by the name of WordPress, in which all the user data will be stored.
After creating the database, create a username and assign a password to it to access the wp-admin page.

After following all the steps mentioned above, we have to login as the user we created and afterwards we have to setup the website credentials as shown below.

After doing all the configuration setup, our WordPress is set to launch and this is how it looks.